September 2017
Blogs on Dream Forge You Might Have Missed
Dreamforge H.E.L Cannon Paint Scheme
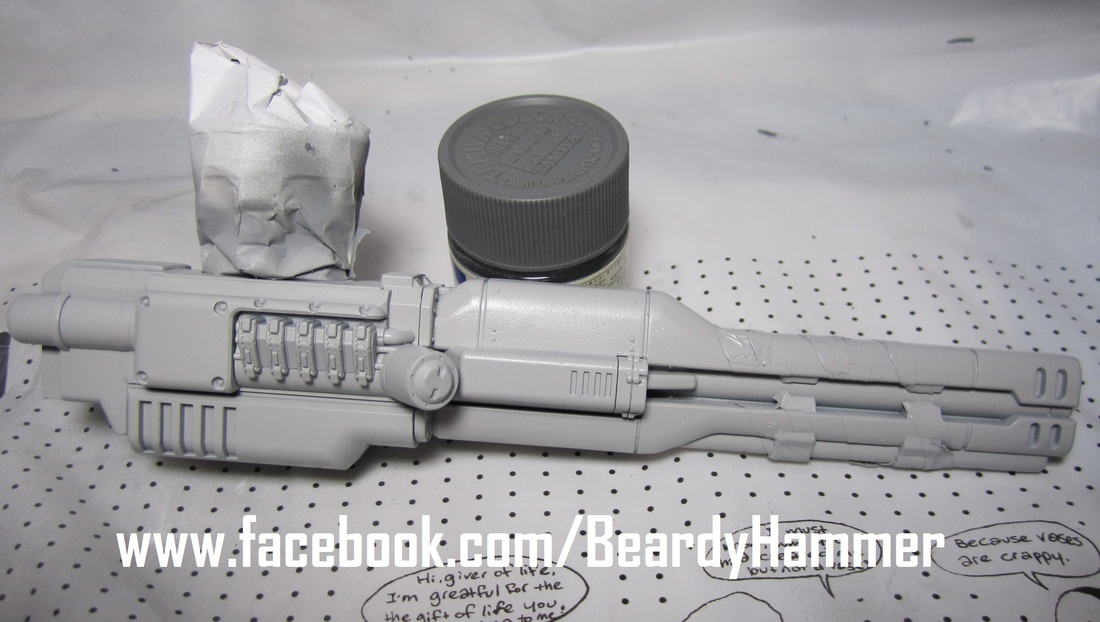
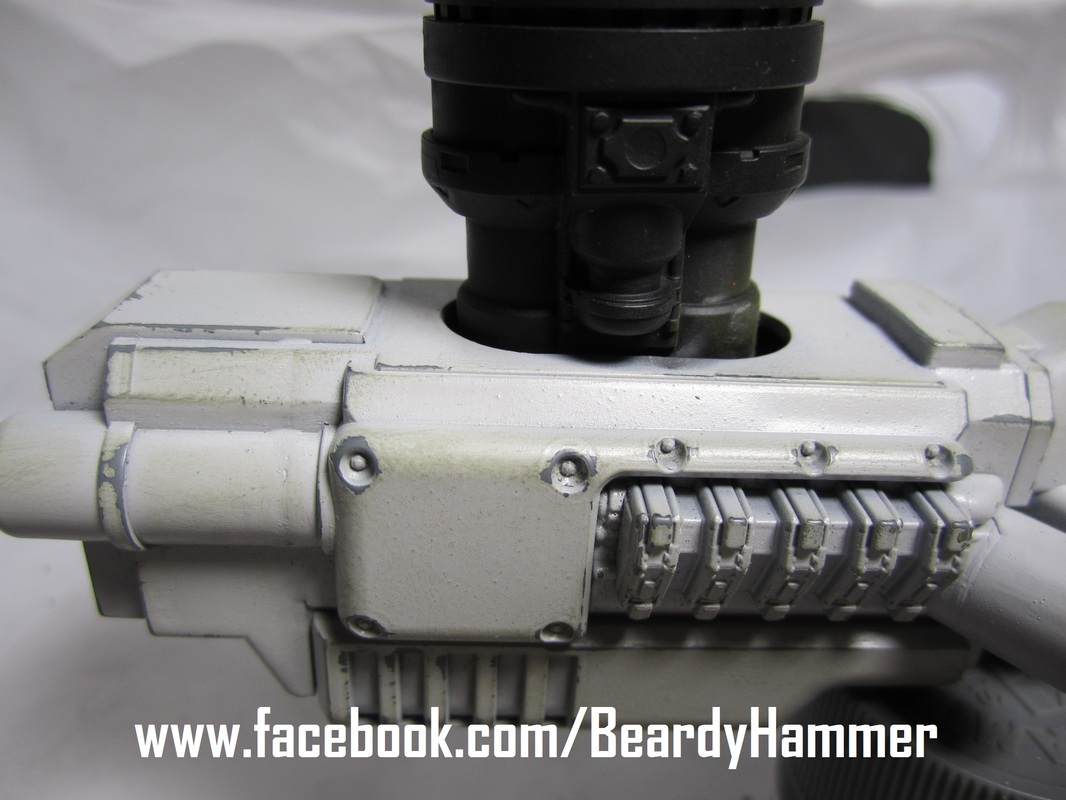
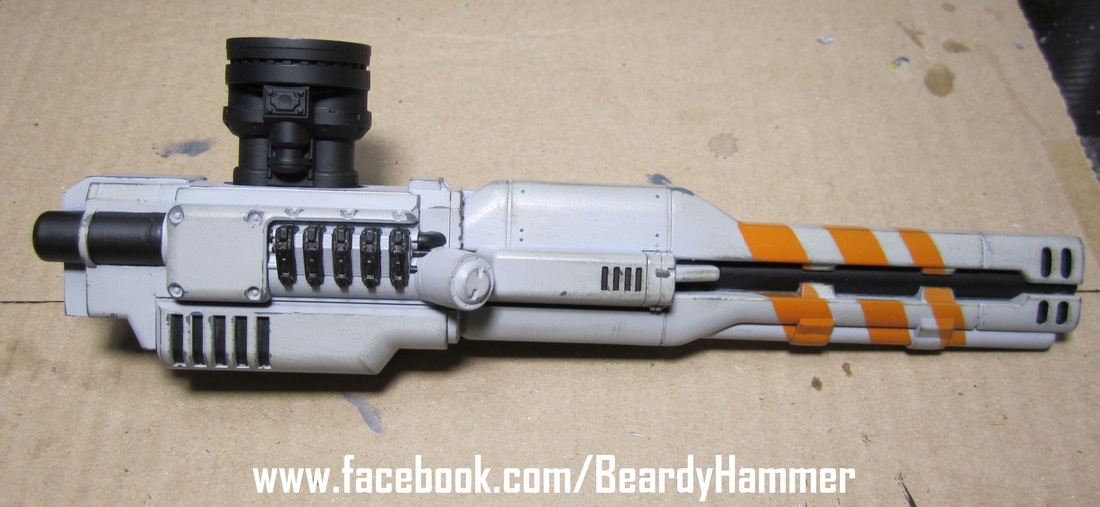
After first washing and drying the completed H.E.L Cannon to get rid of any manufacturing lubricant, it was time to airbrush on a layer (make that 4 or 5 layers) of Tamiya X-6 Orange. Tamiya's orange is great, and the one I used on my 2013 Gunpla entry, but it's thin as hell!
|
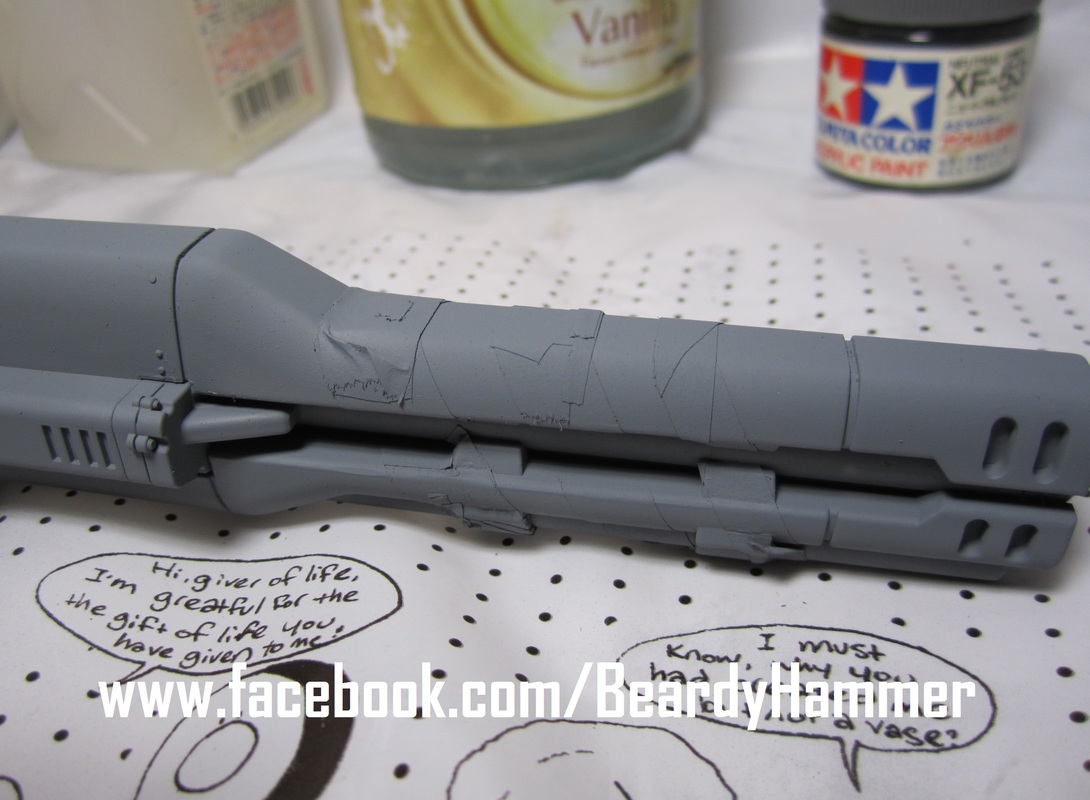
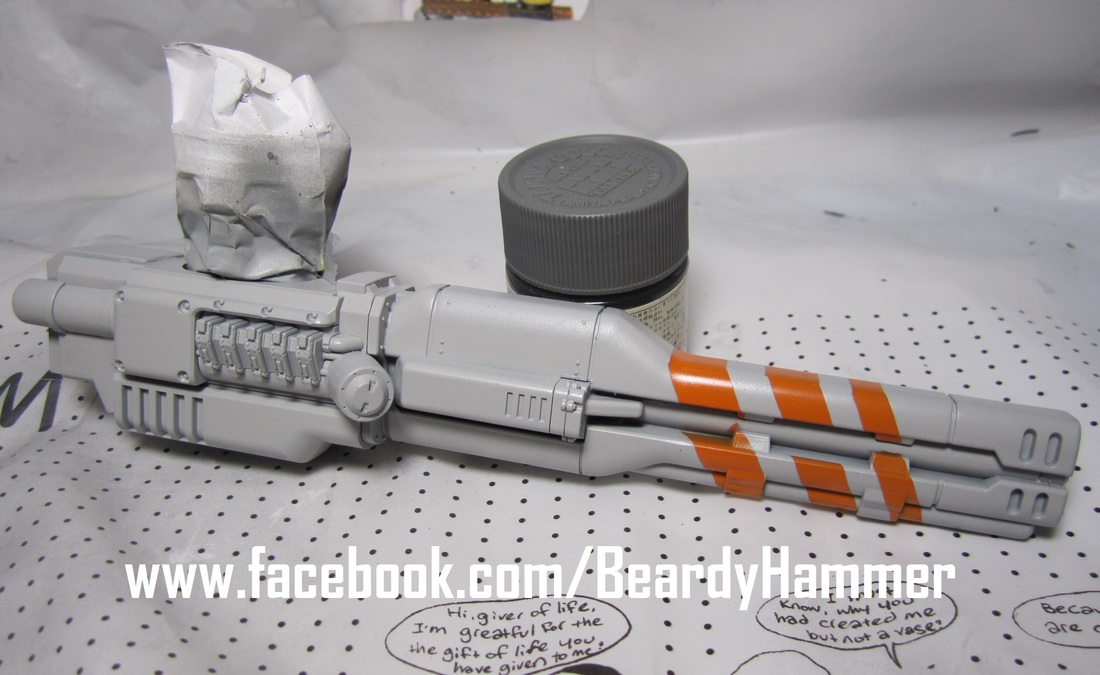
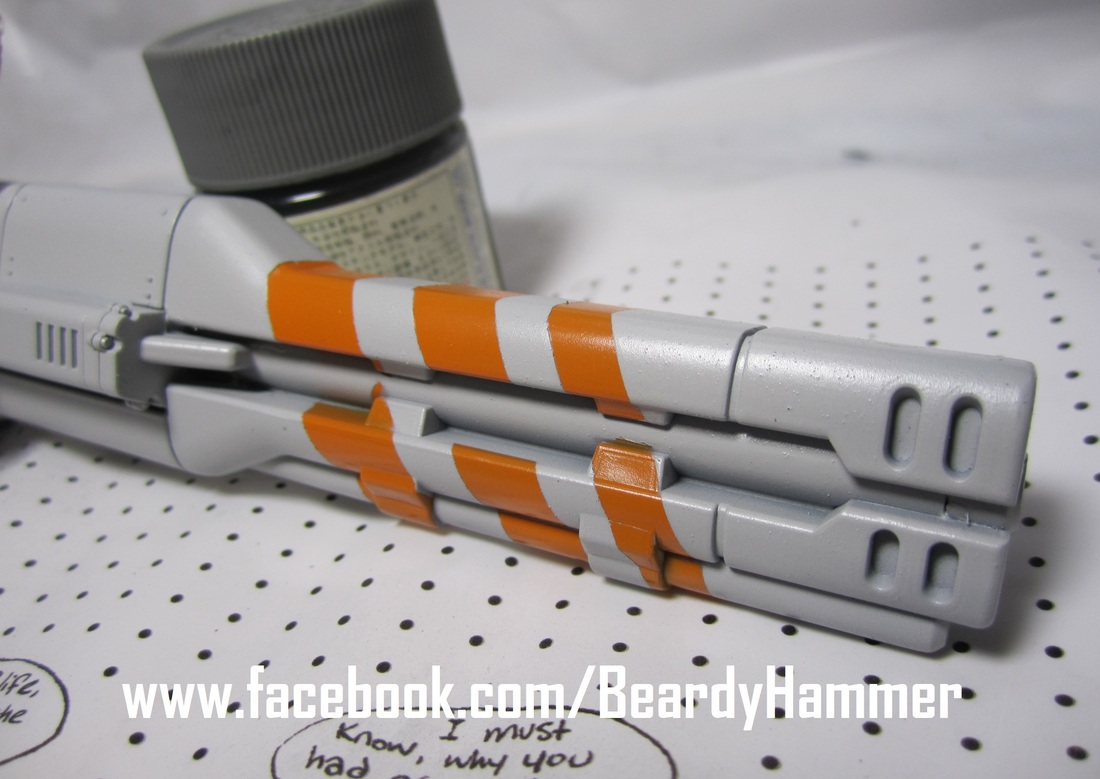
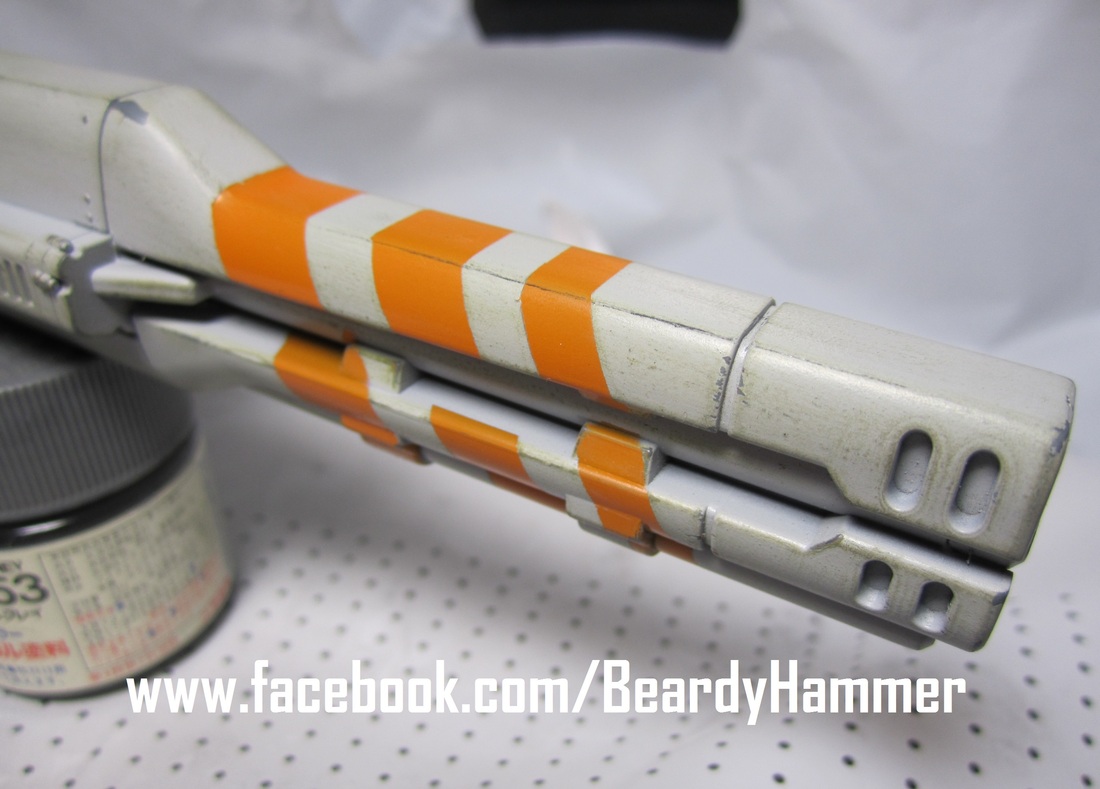
Once the orange is dry (I give it a day or two), I masked the barrel lines with Tamiya Masking Tape - a necessity for any modeller! Then the cannon was sprayed with Tamiya Neutral Grey XF-53. Tamiya Flat paints spray so well!
|
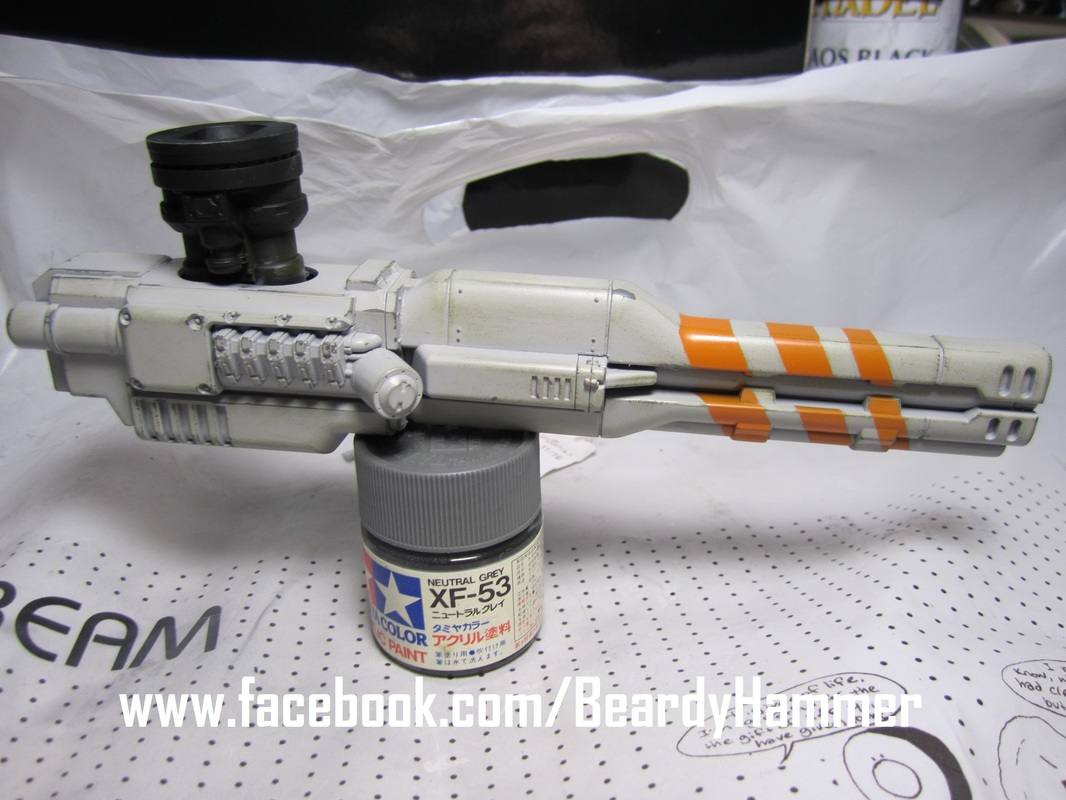
The Neutral Grey finished and dry, it was time to airbrush on the AK-732 Hellgrau. As I said earlier in this Project Log, the AK Interactive paints are premixed for airbrushing - which is polite of them really. It is also semi gloss which applies in an interesting way, but dries pretty quickly.
|
When the Tamiya Masking Tape was removed, the stripes were pretty much okay.
There will be some patching to do - but now while it's still slightly tacky, it's time to weather it by wearing away the edges and dirtying it up.
There will be some patching to do - but now while it's still slightly tacky, it's time to weather it by wearing away the edges and dirtying it up.
Using the same technique I did with the body, I wiped over the paint vigorously with a painting cloth - with varying degrees of success! Some places are too heavy and will need to be patched, but once the metal chips go one it should look okay.
February 2014
Update
Now with all the colours blocked out - it's time to use Testors Dullcote to dull the semi gloss and gloss paints down.
The metallics will be done after the Dullcote.
The metallics will be done after the Dullcote.
March 2014
DREAMFORGE 28MM LEVIATHAN CRUSADER - IT'S ALIVE!!!
Last night saw some significant progress in my ongoing Dreamforge Leviathan Crusader - the waist was finished and the legs are on!
Houston, we have an operable mech!!
I have to say that this is a crackingly good model. Getting the spine to join the torso was fiddly - lining up the hydraulics was more difficult because once they are painted the pieces didn't move as freely. But once in place they moved very nicely.
Then - typical me, I broke one of the hip joints off! This is now glued and drying, but so SO disappointing after all this effort.
Once the hydraulics were fitted and moving the waist section is a piece of art!
Combine that with the legs and knees - this is amazing. I have action figures that aren't this flexible!
The Leviathan is imposing and once the weapons are completed and attached (I'm waiting for the glue to dry on the hip ball socket!) it will be very impressive!
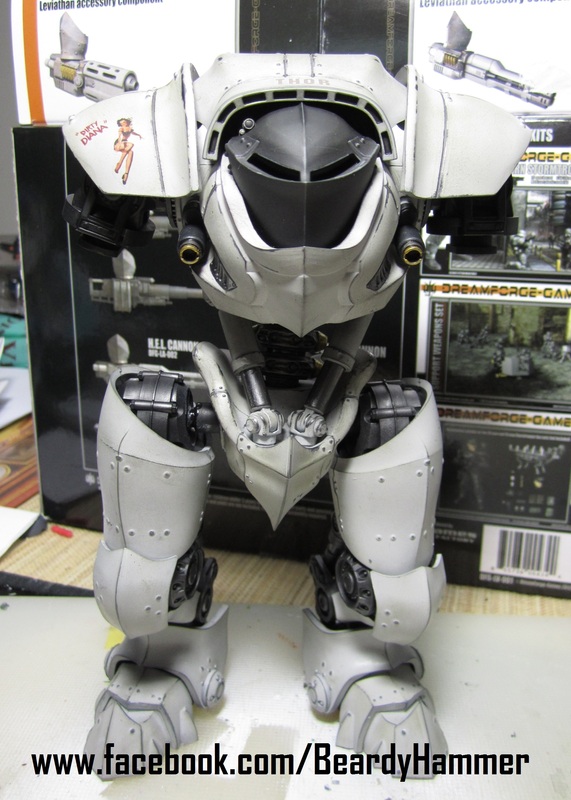
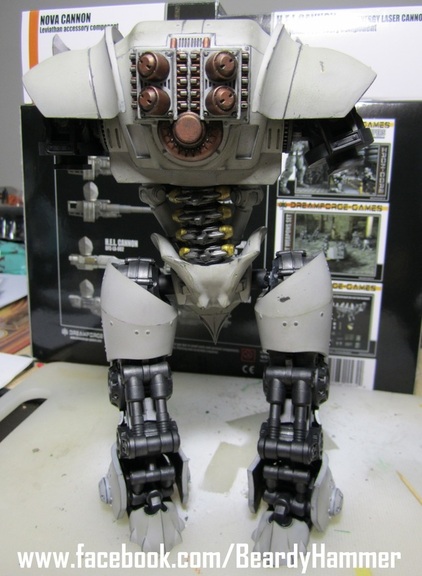
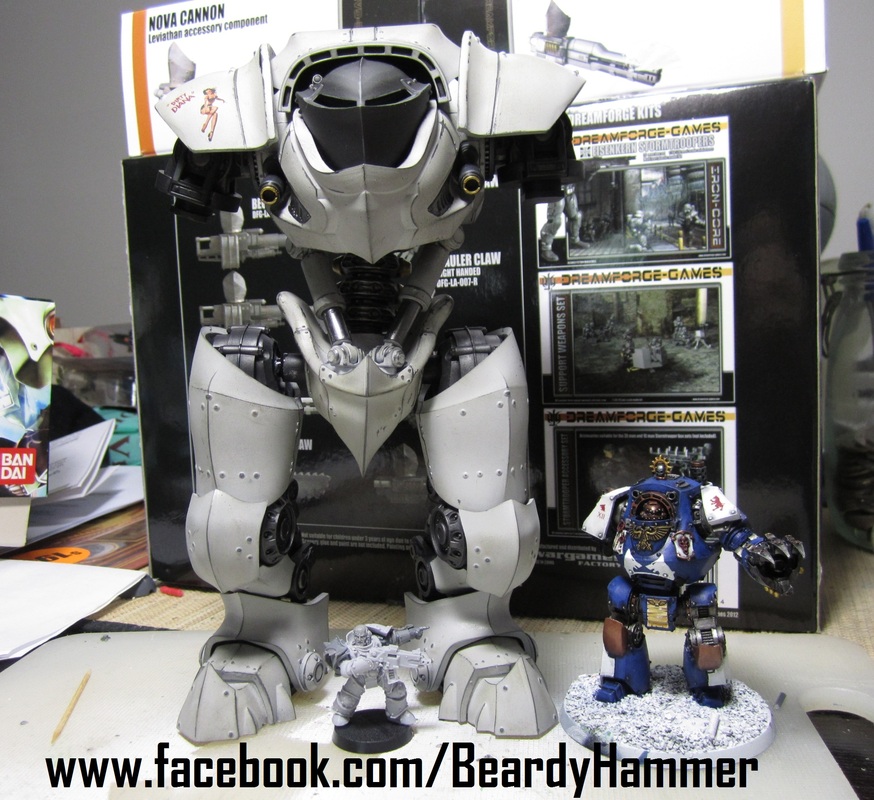
Here he is - proud and tall! You can get a better idea of the weathering in proportion now.
I tried to keep it to scale - hopefully I've mostly achieved that!
I iwll probably repaint those gold parts on the spine top match the engine. I initially planned on having tattered fabric over the back anyway, so we will see.
I tried to keep it to scale - hopefully I've mostly achieved that!
I iwll probably repaint those gold parts on the spine top match the engine. I initially planned on having tattered fabric over the back anyway, so we will see.
|
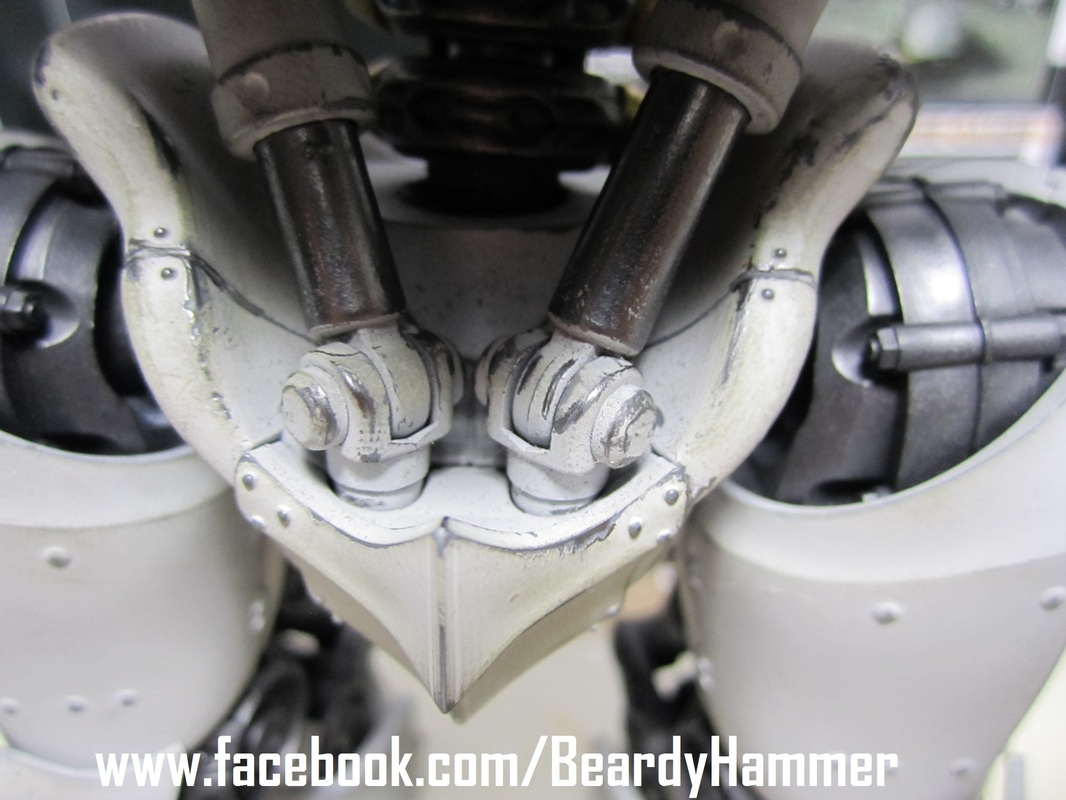
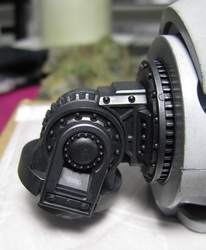
Here are the heavily weathered hydraulics. I figured these would be moving around a lot, so they would have significant paint loss. Still needs a touch up - maybe some oil and grime. I'm not familiar with dirtying up so that will be interesting!
|
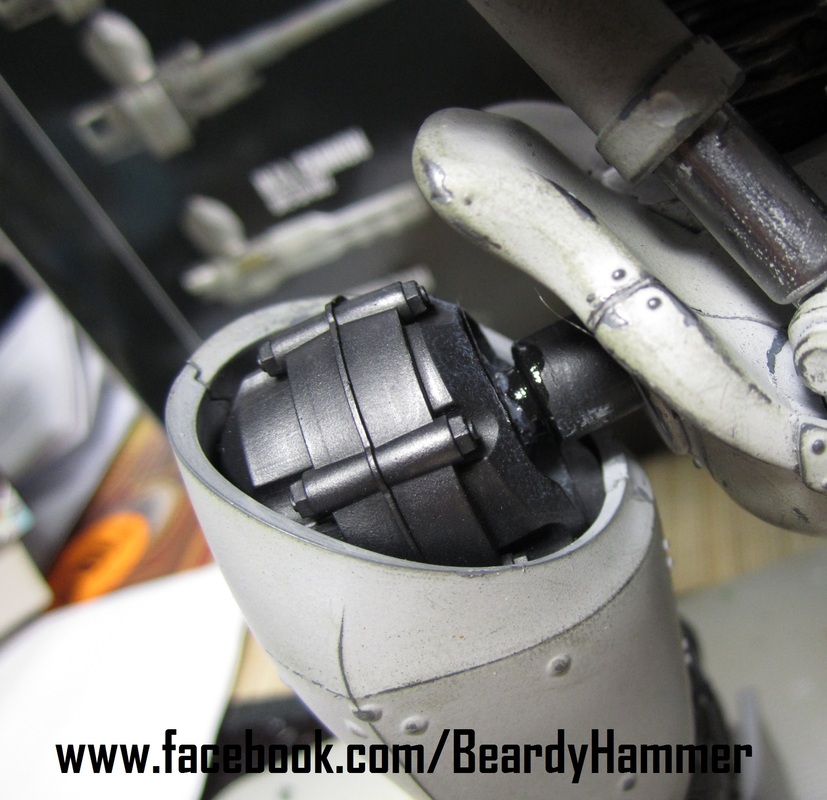
And here we have one of those heartbreak moments! Here is where I broke the hip ball joint off. The left leg went on perfectly, but the right one was very tough - so I stuffed it!
|
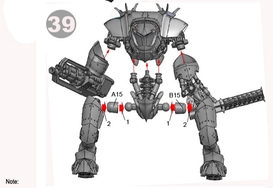
These are the instructions from Dreamforge showing the very simple leg/ hip assembly. Unfortunately I put the cups into the legs THEN clicked the hips in. That would seem right by these instructions, but not the revised ones online. Hopefully I can resurrect it to some sort of working order.
|
And for Ben who asked for a scale comparison...
February 2014
DREAMFORGE 28MM LEVIATHAN CRUSADER - Weathering Time! Paint Chips
|
It's been some time since the Dreamforge Leviathan Crusader and I have met - and opening the box it's just as brutal and beautiful as ever.
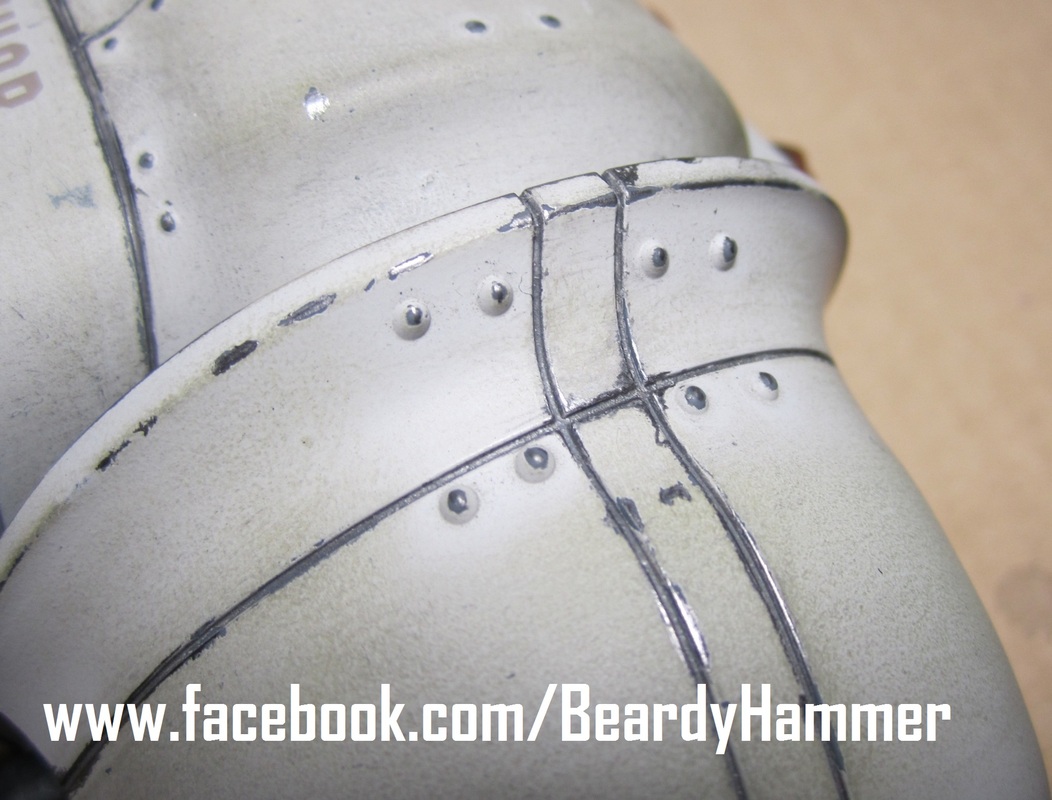
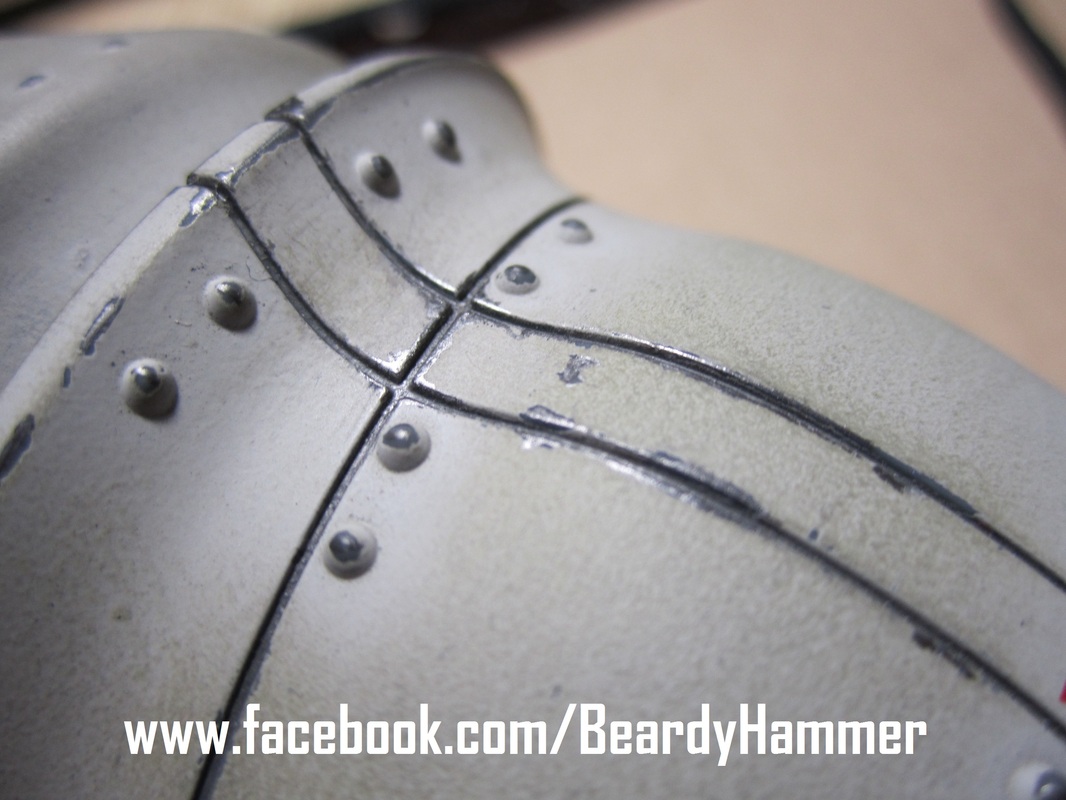
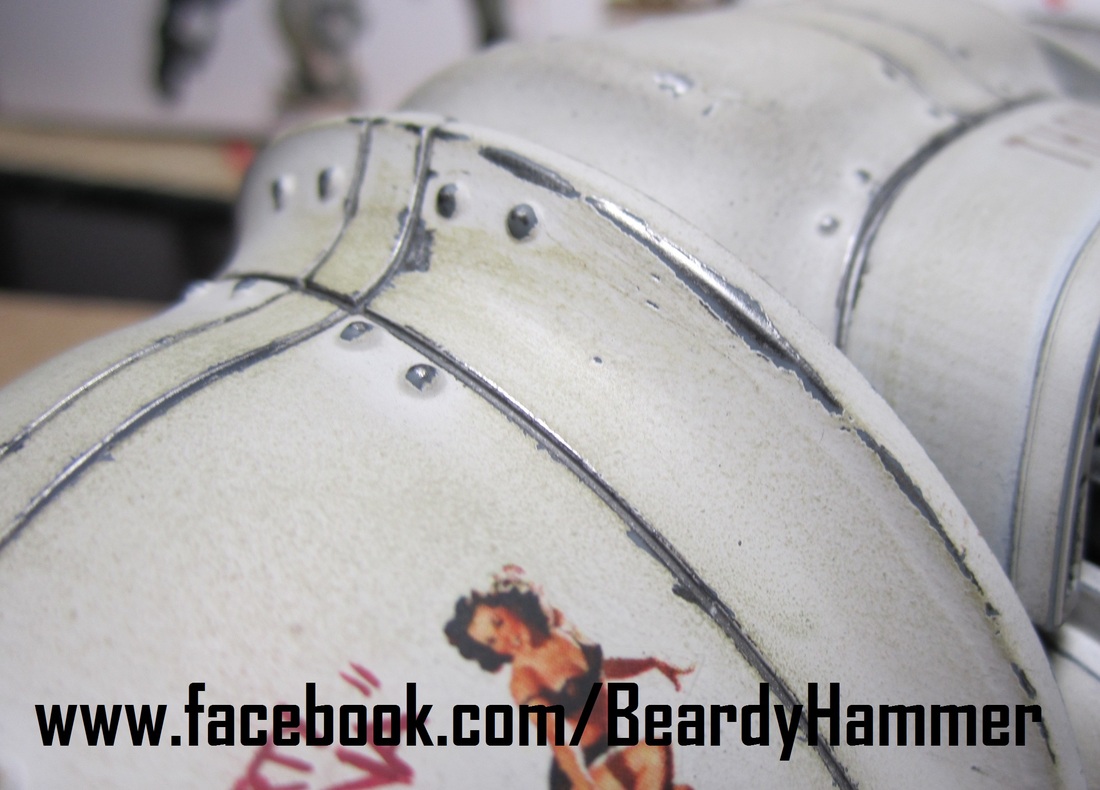
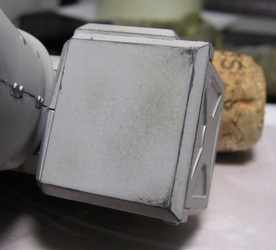
I had initially rubbed back the edges of some of the armour to expose the base colour, but to scale it looked a bit odd - just not quite right, so it was time to add some metal chips. I haven't done this a lot, so I grabbed the 6B and took to the edges, gently at first, but enough to show up. I have put this under the light so you can see the weathering show up - it's not actually this silver looking - more a dull gray. The 3D effect where it looks like it's coming through the paint actually works in most places, but could do with some evening up. I didn't want for it to be too obvious, but at the same time to scale with the wear and tear something of this size. It's a large kit and easy to get carried away with, but mainly sticking to the edges as if walking crew, passengers, rain or wind would have made it. I am considering adding stowage to the model, so this may fit in with the theme. Again, working on this has been a delight - I just hope it won't be so long between working on it again. With Gunpla coming up though, I'm not too sure, and with changes in my mind about the themes of the model, complications arise.
|
February 2014
Dreamforge 28mm Leviathan Crusader - New Dullcote and some glue!
It's been many years since I've bought a new spray can of Testors Dullcote (as was pointed out by the new packaging and the stunned look on the face of the HobbyCo guy who couldn't understand that things change - aaaah to be 22 and know everything!) so when I got to use this new one I was mightily impress.
It's matte - and I mean really matte.
It's matte - and I mean really matte.
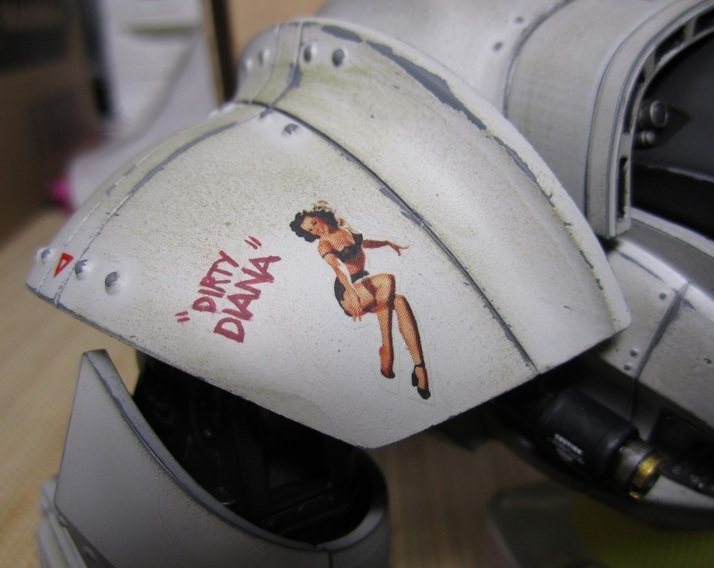
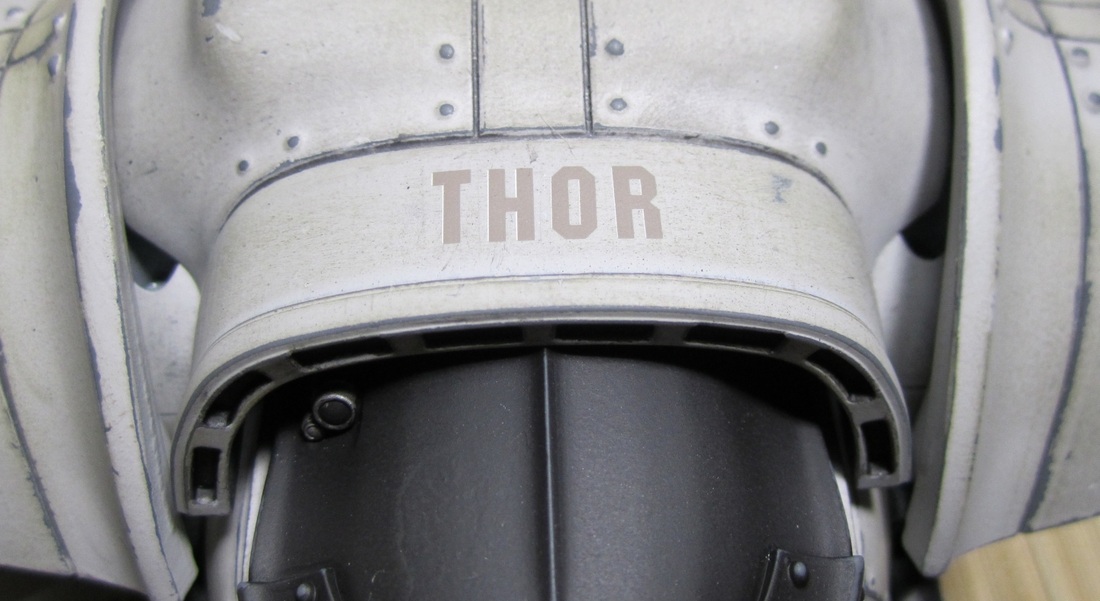
Now with all the happiness of the Dullcote working so well, there was disappointment; this would be the test to see if the decals integrated perfectly... and it was 50% successful.
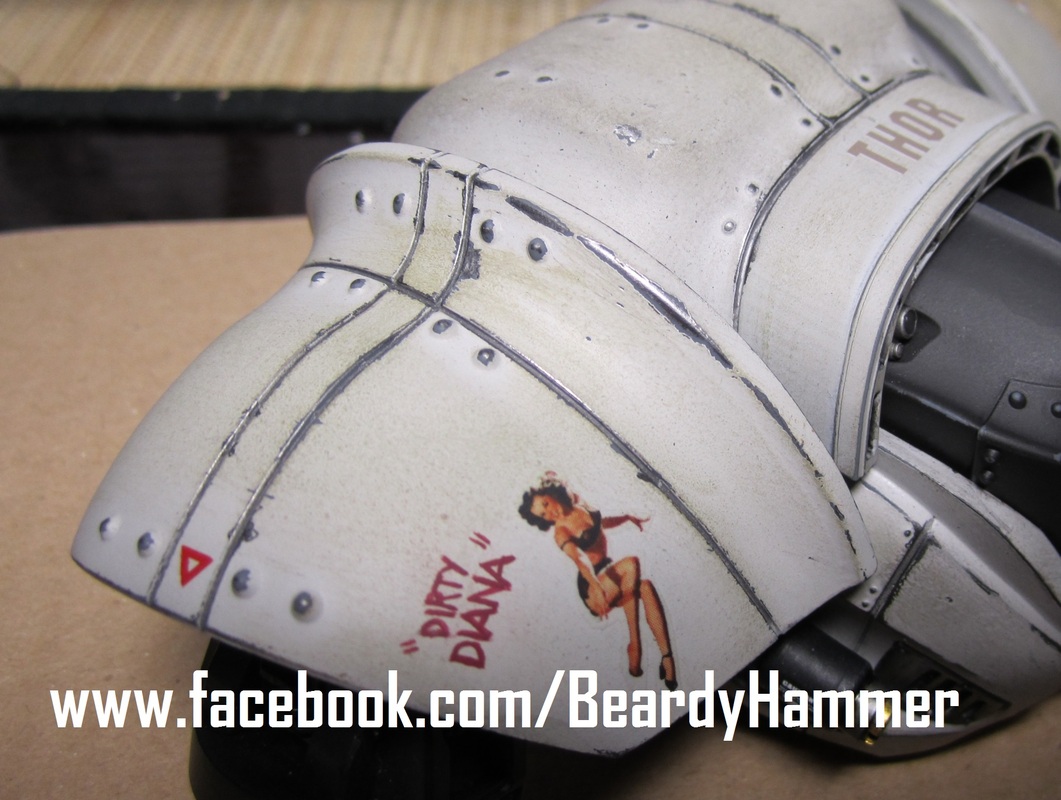
The main piece - "Dirty Diana" didn't work too well. The backing which is quite think is still evident. I'll have to take to it with a very sharp blade.
The secondary piece - "Thor" worked really well and I'm pretty pleased actually.
The main piece - "Dirty Diana" didn't work too well. The backing which is quite think is still evident. I'll have to take to it with a very sharp blade.
The secondary piece - "Thor" worked really well and I'm pretty pleased actually.
|
Luckily the light background of the paint disguises most of the white underneath the lettering. Bit disappointing, but a pretty small thing really. Being aircraft decals, these easily adhered to the surface with the help of Tamiya Mark Fit (Strong).
|
Coming Up Next: Detailing and construction and painting of the mid section.
July 2013
DreamForge 28mm Leviathan Crusader - Time for some nose art!
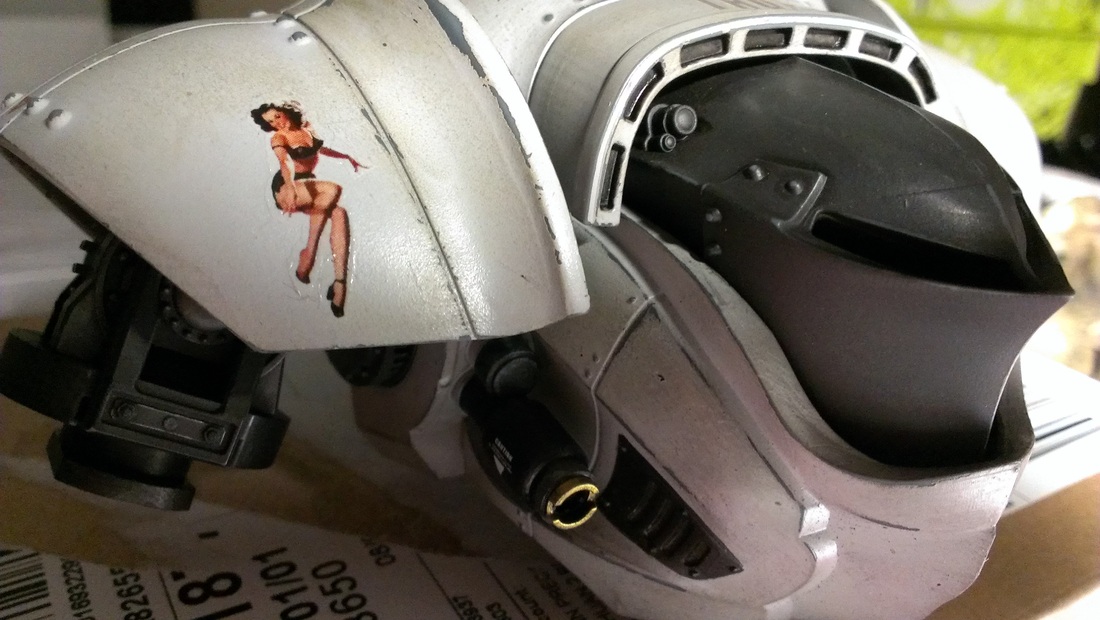
What happens when you add some after-market nose art to your mech? Well after careful consideration, this...
|
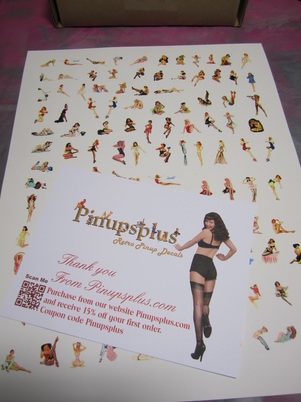
The decals are 1/48 scale and sourced from this seller on eBay:
They arrived pretty speedily from the US and were packed nicely. Unfortunately the decals themselves arrive as one big sheet, so you have to cut the one you want out of the sheet and then neatly around the shape. My knife wasn't sharp enough, so the edges are slightly ragged. Tip: Use a sharp sharp knife!!
The colours are really nice and there's not stray white backing showing through.
I'm hoping the decal isn't too big, it's almost 1:1 with the figure! Thinking of adding some writing so she has a name... Ideas? |
So I decided that like all great aces, my guy would have nose art on his vehicle - sure it's not a plane, but it's still a good idea!
Having cut out the right lady, it was time to gently place her and add the Super Sol to soften the edges of the decal. This will of course get a Testors Dullcote to flatten it out and match in with the paint. |
July 2013
Dreamforge 28mm Leviathan Crusader - Update - look there's other colours on it!
Well look-ee here; there's more than two colours on the model...
Having worked out the theme and the basic colour scheme things have moved along quite well.
I find that the only real difficulty I have with the model is time to dedicate to it. If I had more time, this would have been done ages ago!
Here - look at some pictures I can de-construct for you.
Having worked out the theme and the basic colour scheme things have moved along quite well.
I find that the only real difficulty I have with the model is time to dedicate to it. If I had more time, this would have been done ages ago!
Here - look at some pictures I can de-construct for you.
*Keep in mind that these are early pics without the metal chips, rather just the space for them*
|
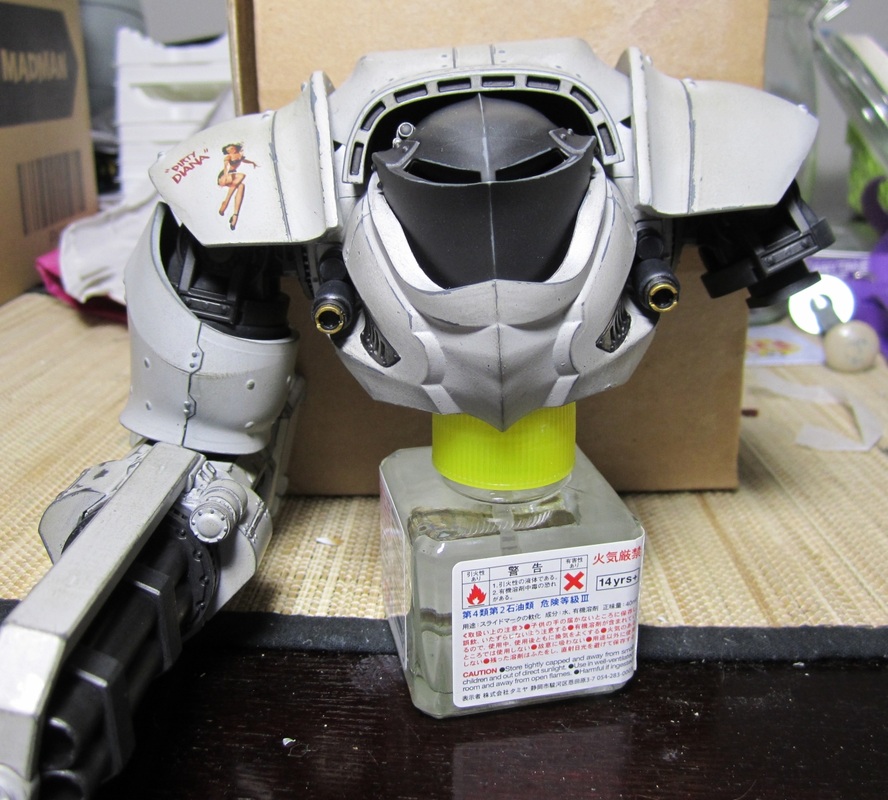
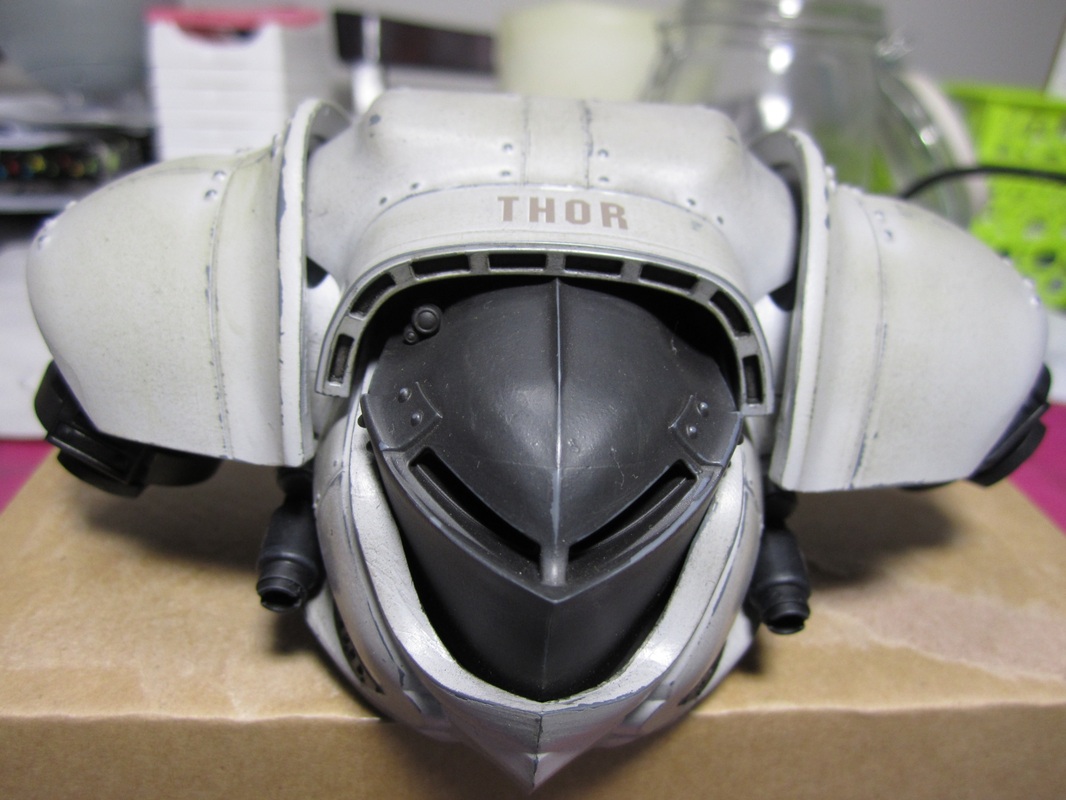
So here we see the first head on shot - black head and all. I have also applied some lettering I got online and seems to be dead centre - miracles!
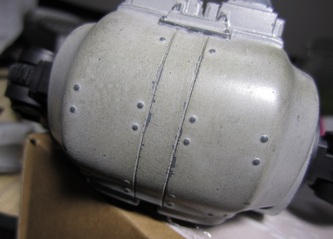
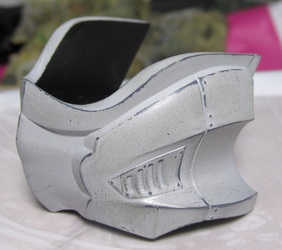
You'll notice the weathering on the head where I have worn the black paint down tho the grey paint underneath in places. You can also see the weathering on the shoulders. There is also an armoured piece for the front not shown - this may have livery on it. |
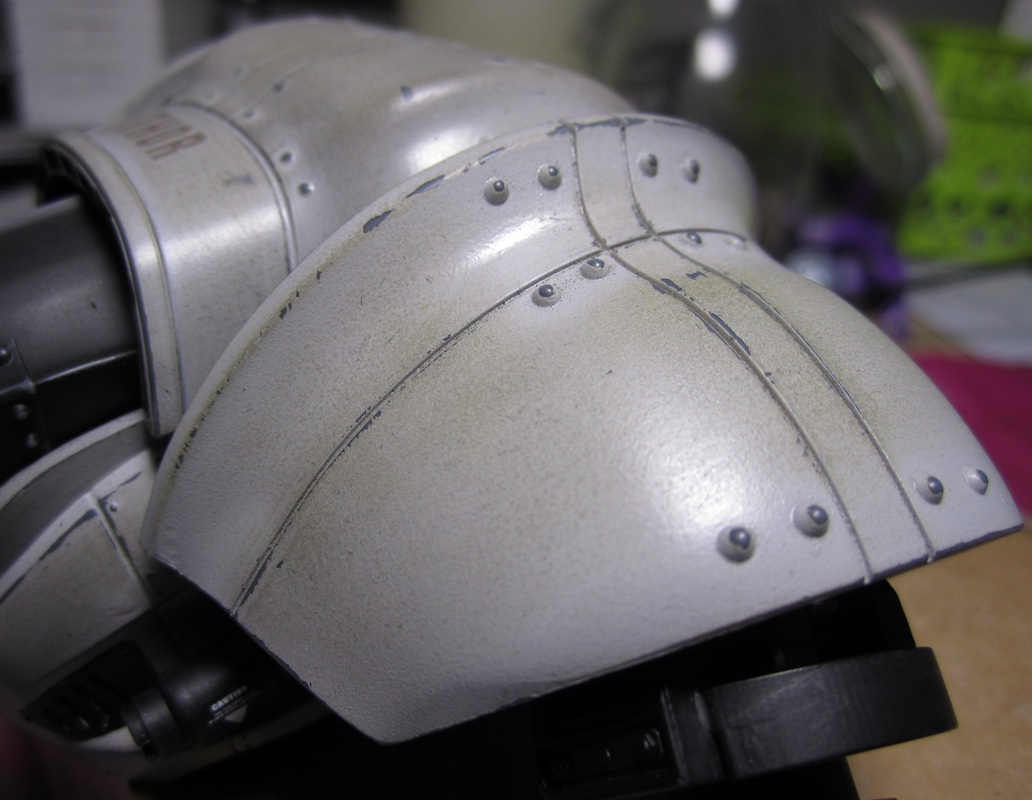
Speaking of shoulders - here's two if therm!
I tried to match the weathering to the hull, even though the likely foot traffic would be less. |
And here we have colour - metallic as it is!
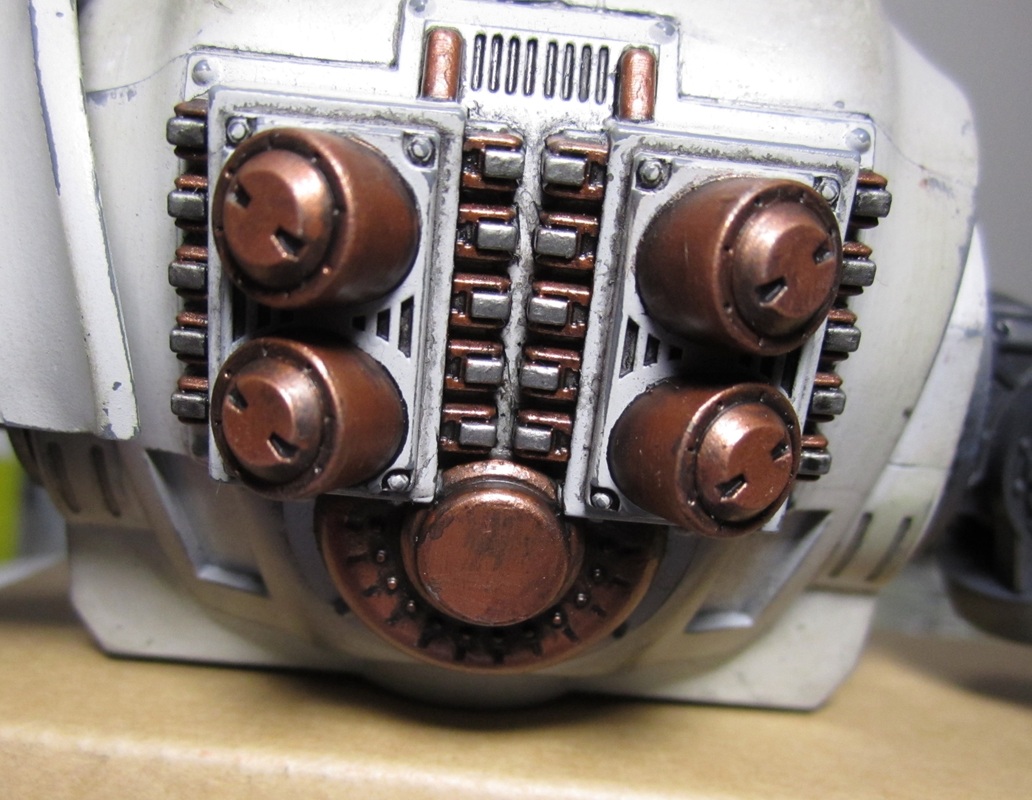
This is the engine. I went for a steampunk-style look with the bronze and the dark metal. There;s a lot of wear even around the elements - this was a way to show dirt as well as the metal moving as got hot then cooled down. This would cause quite a lot of wear. I always wanted this to be the dirtiest part of the mech. Still work to do... |
Here's on of the side guns - metal details still to be applied.
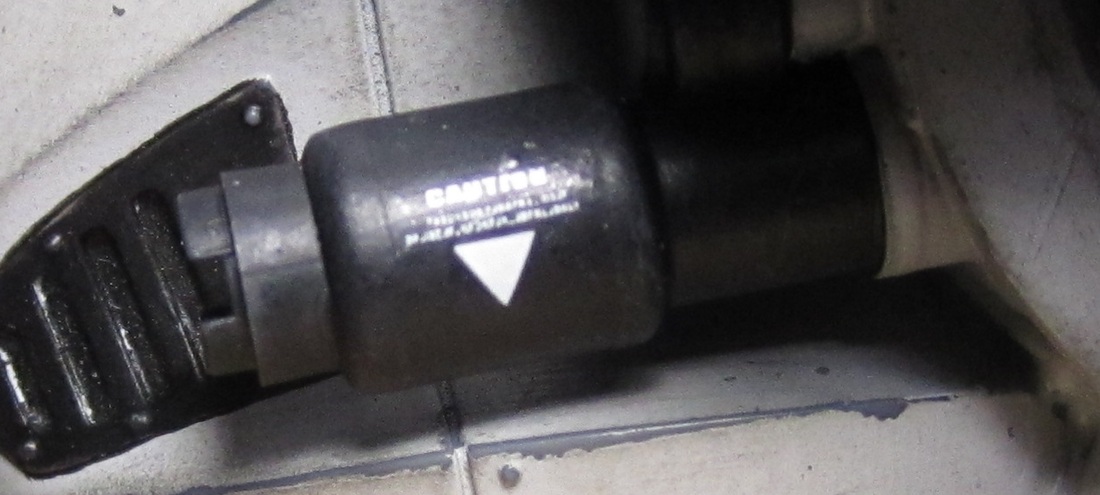
I put this picture in to show the Gundam decals I had used for it. Initially the mech was going to have more, but I kind of like the sparse nature of the colour scheme so far. I may look at more on completion. |
Now as far as paint goes, it looks like the AK Interactive German Warships Acrylics may just stretch! My airbrush hasn't been the best I might add, so there has been some spoilage. The rest of the paint apps have been Citadel Colour with varying degrees of success.
Coming Up Next: More colour and hopefully the project finished...
Coming Up Next: More colour and hopefully the project finished...
July 2013
Dreamforge 28mm Leviathan Crusader - Update - Things have moved quickly!
So things have moved quickly in the world of the build - it's still in bits, but the backstory is coming along and the overall look is forming.
When I initially started this, I really just had the idea of a piloted mech with a somewhat worn paint job - since then it has evolved and the paint job has become more and more tattered, this truly must be the mech of a veteran mech ace!
When I initially started this, I really just had the idea of a piloted mech with a somewhat worn paint job - since then it has evolved and the paint job has become more and more tattered, this truly must be the mech of a veteran mech ace!
So before I get to the pics, an explanation of the technique I used. As I said previously:
At first I used my finger across the raised edges of the feet. The mix of residual dried paint on my fingers from a filthy painting cloth I use to clean my airbush nibs with rubbed off really well and also took the top layer of paint off, leaving the AK-733 Dunkelgrau showing through. This was pretty touch and go as I haven't tried this technique - if it is a technique at all. It worked!
I then continued this over all the panels of the lower limbs, getting lighter as i went up the body. I figured the feet would be most worn and scuffed.
I have adapted this slightly and I'm now using the cloth on the semi dried paint. The paint sits for about 1/2 and hour or more - touch-tested of course - then i slowly rub the cloth over the surface I want to look as if the paint has been worn away. This also occasionally picks up paint along edges, which I later pick out with a scalpel to their full worn and chipped look.
This technique has been touch and go, and as the paint is slightly tacky still, if it goes badly, I dampen the surface and wash off the weathering I just did. This also means sometimes fixing up the odd finger print.
Once it is fully dry (about an hour or so) I apply the Testors Dullcote which I am partially happy with. It's not as dull/ matte as I want.
The next day it's time for the pencil. I use a 6B and a 4B to tab gently along the edges of the panels to pick out where the top coat and the base coat have worn through and you have bear metal. This must be done sparingly and there are no solid lines of metal. You'll notice in the pictures below, that corners get more pencil than flat areas Overall that has worked quite well, but it wears off if you touch it too much!
|
Be aware: All pics are WIP - not final
|
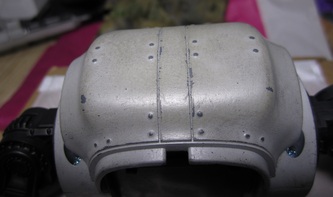
This first row shows the heavy weathering on top of the carapace. Initially this was going to be quite light, being that it was unlikely there would be foot wear, for example. However, repairs to the shoulders, engine and access to the cockpit and side guns would necessitate the pilot or crew walking all over it. Also the brushing of trees and rain would likely make the base coat appear in a short period of time. I may revisit this idea as it may be too heavy.
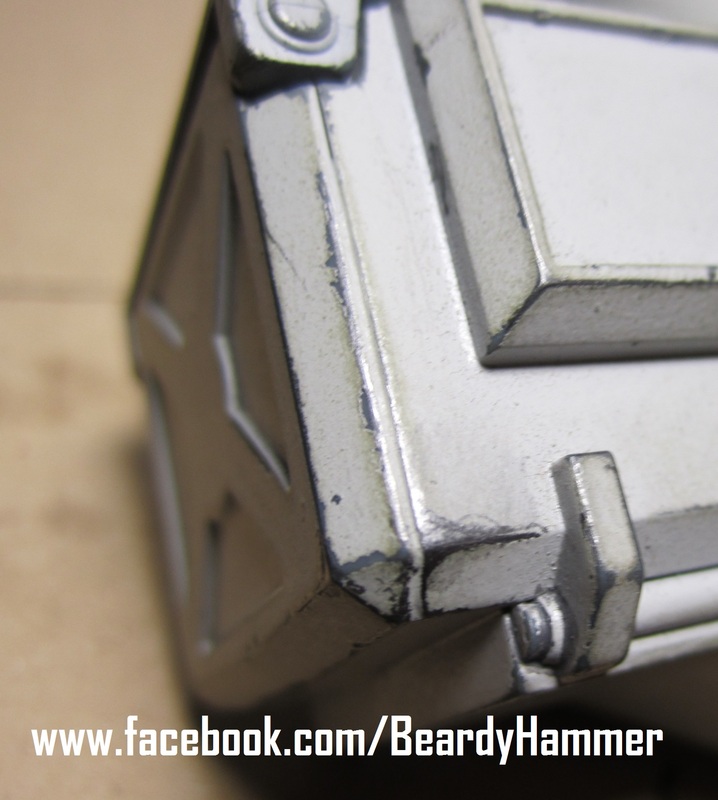
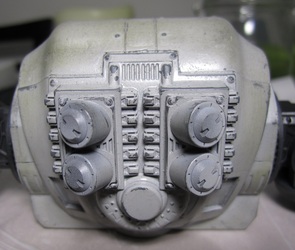
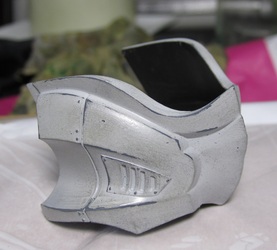
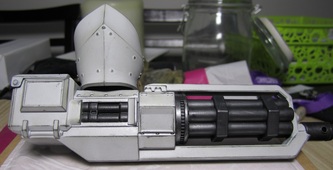
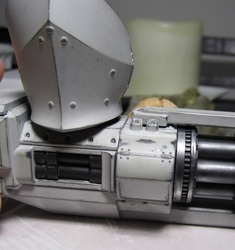
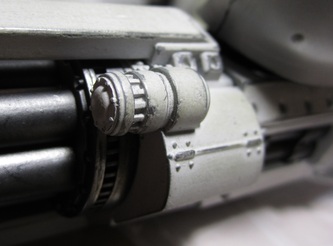
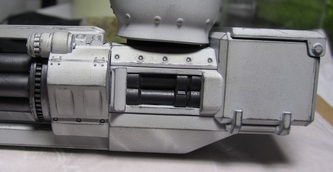
The second row is the engine (still to be painted and only showing some paint wear. The thought now is to paint most of this, especially the "knobs" which will be a burnished gold or maybe bronze. The cockpit has some wear, but mainly only on areas where hands or feet would have brushed over it. I didn't put too much dirt on here. The third row is the massive gatling gun - this was actually a pain to build and I'm rethinking buying the left arm for the left arm. As you can see, there are points of heavy wear where crew would have walked on it. to repair or fix a blockage. Overall I'm happy with this, but may go back as it's a bit heavy in spots. The fourth row is just detailing to show the paint chips and scuffs on the ammo box. I really like the way the ammo box turned out actually. The black pistons on the side of the gatling gun will be detailed later. |
Next is the head and torso assembly. It's quite tricky as the head needs to attach to the carapace before the torso is glued on. It's fiddly and I'm not too confident about it! Still, has to be done.
I will finish the engine first and as the detailing on that looks quite important. I have the feeling it's going to end up being mainly black...
I will finish the engine first and as the detailing on that looks quite important. I have the feeling it's going to end up being mainly black...
Note: The AK Acrylics set is nearly finished. I'm hoping it will stretch as buying the individual AK-733 Dunkelgrau involves $30 postage to Australia. No one seems to stock that colour individually apart from the supplier overseas. Here's hoping it lasts!
July 2013
Dreamforge 28mm Leviathan Crusader - the build begins
You may have read on here before, how I have recently been painting the Dreamforge miniatures.
You can read below where I rave about the brilliant 28mm Stormtroopers, which are probably the best sci-fi 28mm soldiers on the market - rivalling the big boys like Games Workshop, that's for sure!
Well at the same time I bought the Stormtroopers, I also bought the Leviathan Crudsader, and a Leviathan it is! The kits is LARGE...
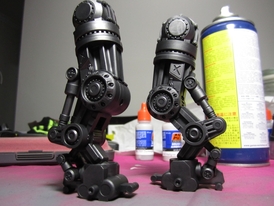
But I have finally begun with the legs.
The construction is very solid, and retains articulation without the need for much glue at all - most of the construction either locks into place or has small screws.
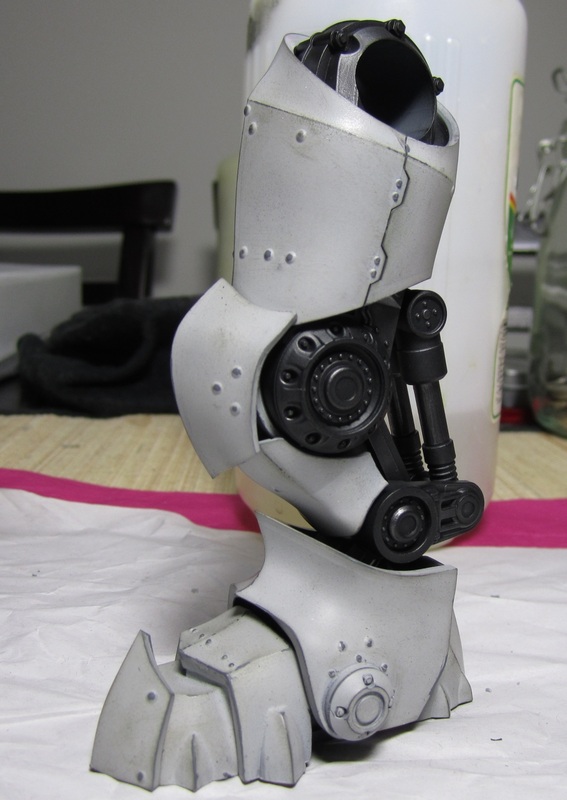
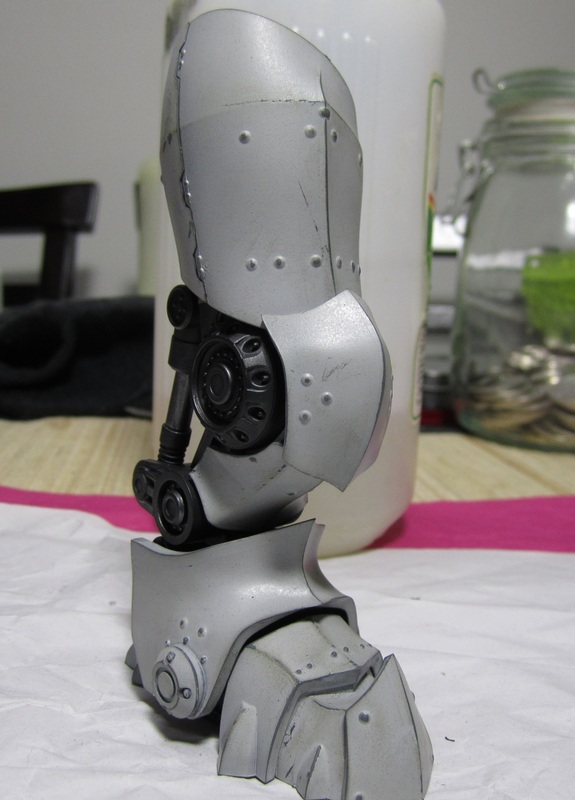
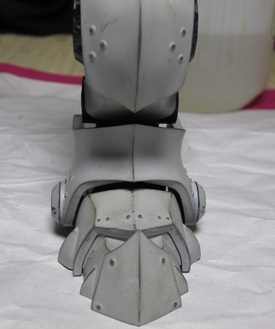
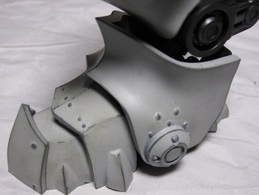
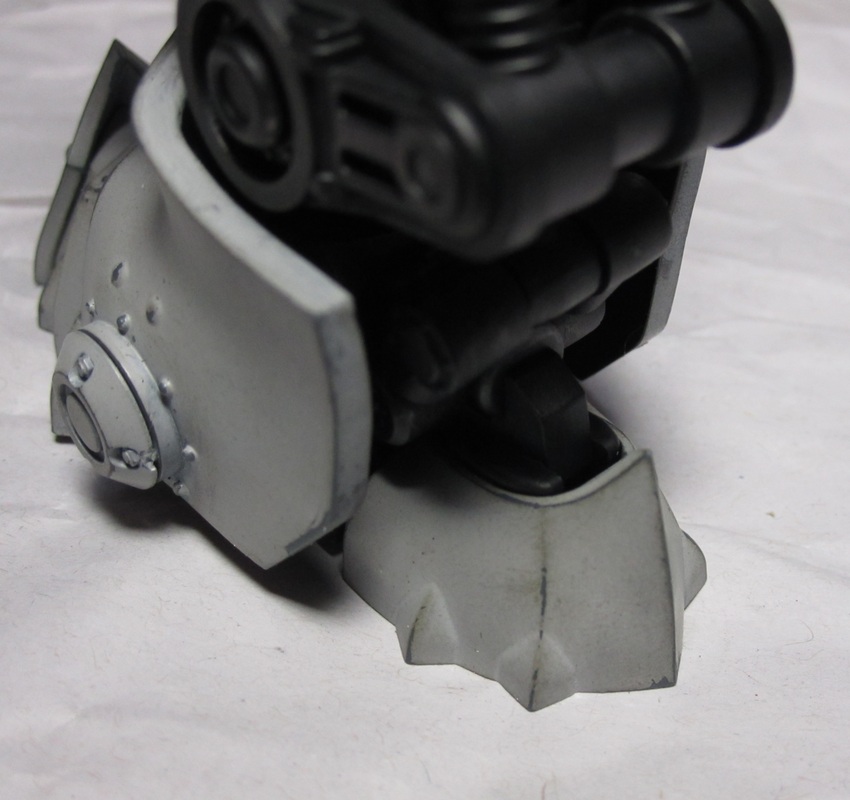
As you can see on the left, I have gone for a very dark metal colour over a GW Chaos Black spray undercoat. To achieve this look, I have very simply ground 6B pencil on sandpaper and then painstakingly applied it to the legs with cotton buds. I found I went through 4 or 5 buds per leg. For the hydraulics, I used HB pencil to go for a more chromed look - with varying degrees of success. I may swap this out.
So to the painting...
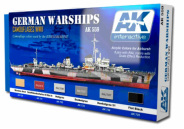
I started with the AK Interactive German Warships Acrylics as the look I'm after is a light grey mech in a semi-urban war zone where the camouflage is wearing off from not being serviced regularly or being hastily applied over another colour. As far as weathering goes, I do want to avoid rust weathering and heavy dust/ sand, but paint wear is a must.
I started with the AK-733 Dunkelgrau all over the armour plates - both sides. Unfortunately I discovered two things; 1) it's the same colour as the plastic 2) it's not matte.
After spraying the surfaces with this colour, I waited half a day and then sprayed on AK-732 Hellgrau - also not matte. After waiting a few hours, I noticed the paint was almost dry and started the weather it.
At first I used my finger across the raised edges of the feet. The mix of residual dried paint on my fingers from a filthy painting cloth I use to clean my airbush nibs with rubbed off really well and also took the top layer of paint off, leaving the AK-733 Dunkelgrau showing through. This was pretty touch and go as I haven't tried this technique - if it is a technique at all. It worked!
I then continued this over all the panels of the lower limbs, getting lighter as i went up the body. I figured the feet would be most worn and scuffed.
In retrospect I might go back and touch up some of the weathering on the upper legs as it's a bit harsh.
After the weathering (which took about 2 hours, I sprayed the armour with Testors Dullcote - then after that dried, attached the armour to the mech.
Now the question is; 'do I apply paint chips?' - don't know, will see how it all goes!
Overall I'm very pleased.with this start and hope the other leg matches when I do that.
I am wondering now though, how will the fuselage will get weathered as it's unlikely to be scuffed much at all - but that's a worry for another day.
June 2013
Dreamforge Eisenkern Stormtroopers
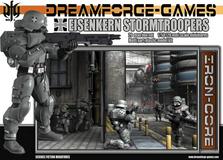
That's not Games Workshop I hear you cry! Well you're right...
Although Games Workshop is far and away the leading miniature producer in the world at the moment, there are other companies doing work that equals or betters their's - Victoria Miniatures I've already mentioned to you, and of course Infinity, Hasslefree, Puppets War and many others.
Dreamforge would have to be, after now sampling their product, right up there.
It all started with the Project Eisenkern Kickstarter, a truly epic idea that caught the imagination of many fans. I only wish I got in on the ground floor, because what a ride it must have been!
But now it's here, the produced kits and they're multi-part injection moulded plastic kits... oh the joy!
For some time now, miniature companies have been moving away from metal and going toward resin - a tempestuous mistress if ever there was one, just look at Games Workshop's very mediocre Finecast line!
Dreamforge have gone one better, and gone straight for what the fans want - multi-part posable plastic kits - and they're really good!
After a very detailed assembly of some beautifully moulded parts, I was away.
I have to say, the fine detail on the moulding is amazing and the poseability is just great!
(I did manage to glue the shoulder pads on the wrong way though...! Luckily I like them like that.)
So what do you get [link]?
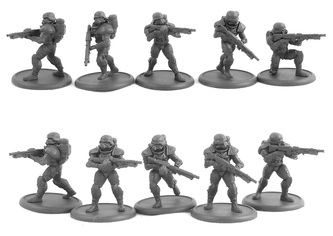
Plenty of weapon options, well posed arms and legs, and beautifully detailed armour.
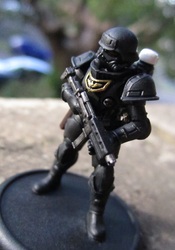
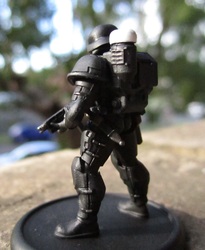
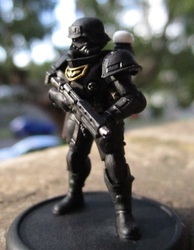
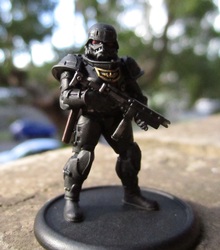
So today I built my first one, an Eisenkern Stormtrooper.
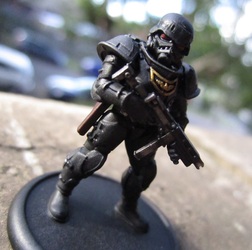
I chose a pretty simple black scheme, inspired by the Japanese anime Jin Roh and a bit of Hugo Boss Axis action!
Just a light very dark grey drybrush over the black basecoat, some blacklining followed up by the detailing and it was done!
I chose to leave him matte, with the shining gold eagle on his chest standing out.
I then covered the white dome on his backpack in high gloss. It really looks great - a bit like a radar or GPS dome!
So how do they compare to the other miniatures you may be painting now?
Here's a look at the whole range [link].
You can see the comparison with the GW Imperial Guard is very favourable, looking more realistic than the Heroic Scale GW models.
Here's a look at the whole range [link].
You can see the comparison with the GW Imperial Guard is very favourable, looking more realistic than the Heroic Scale GW models.
Now if you like that - you'll really like this...
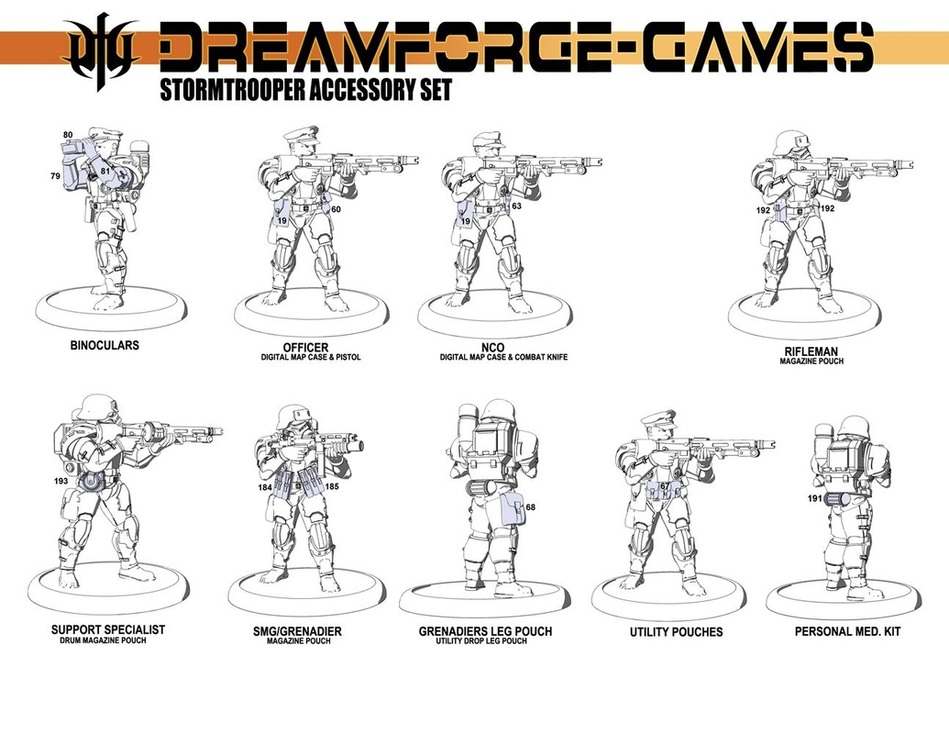
Dreamforge Eisenkern Stormtroopers Accessory Set
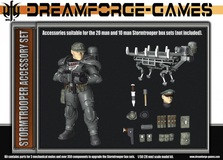
The Accessory pack is also bursting with bits.
Being used to other manufacturers bits boxes I wasn't expecting much - I was wrong!
There are tonnes of pouches, extra guns, hands and heads - in fact check this out [link]
I didn't use any of the accessories on my first guy, but the second one, a Military Police figure, I have used some of the pouches.
The inclusion of the mechanical mules is interesting. Not sure i'll use them, but will be good for the bits box.
You can see here how they advise you use the accessories, but they are very flexible, so entirely up to you!
So do you like your heavily armed infantry?
Want something new and quality?
Then I highly recommend this new Dreamforge range.
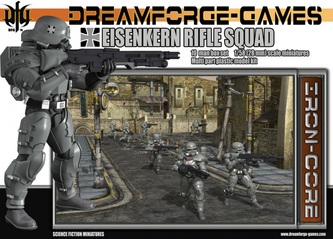
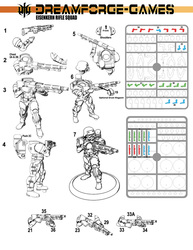
If you just want to dip your toe in the water, go for the cheaper Eisenkern Stormtrooper Rifle Squad - I doubt you will be disappointed.
Want something new and quality?
Then I highly recommend this new Dreamforge range.
If you just want to dip your toe in the water, go for the cheaper Eisenkern Stormtrooper Rifle Squad - I doubt you will be disappointed.

