I'm really not entirely sure what possessed me, but at this rather early stage I'm thinking of taking the leap and doing Armies On Parade!
It's not about thinking my stuff is awesome, it's more about using Armies On Parade as a way to inspire me to work on one thing at a time. I mean we all get distracted by the new shiny thing, or have a burst of enthusiasm for a particular look - I jump from my War Hounds to something that seems interesting, to Dark Eldar, not to mention the Fantasy miniatures and really just end up with a whole lot of single miniatures which is cool, but people's armies look so cool!! I want that....
Instead of trying something easy, like continuing my War Hounds, Dark Eldar or Dark Elves, maybe it was the opportunity to try a race that I've tried many times but can't quite keep a colour scheme I'm happy with - the Tau. The Hammerhead on the left is a WIP, but you get the idea.
Tau are awesome. I love their mindset and their vehicles are also amazing, so having settled on a fairly easy and interesting colour scheme, I figure why not give these guys a go.
If they turn out to be naff, then so be it and no one will ever see them, but if they are okay I get a small force that I could actually play a game with AND potentially compete.
The journey begins. Let's see how it goes, shall we? From now until October. Anything can happen!
Final Armies On Parade 2016 Update
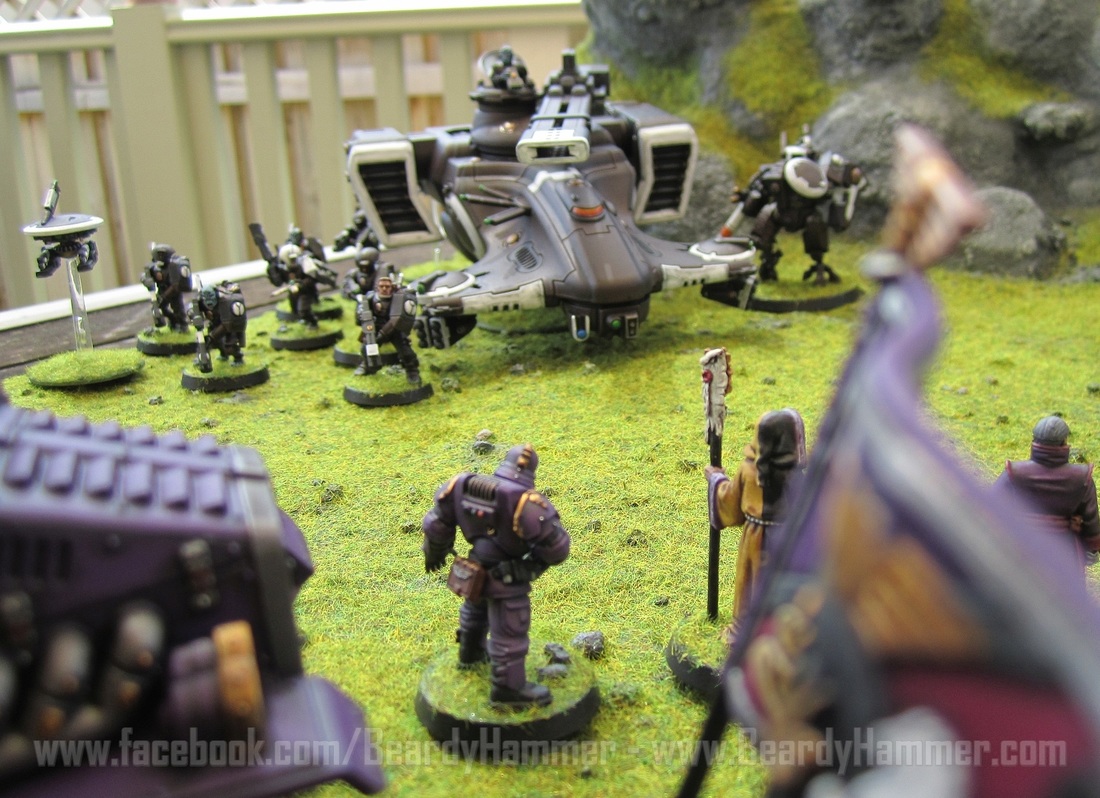
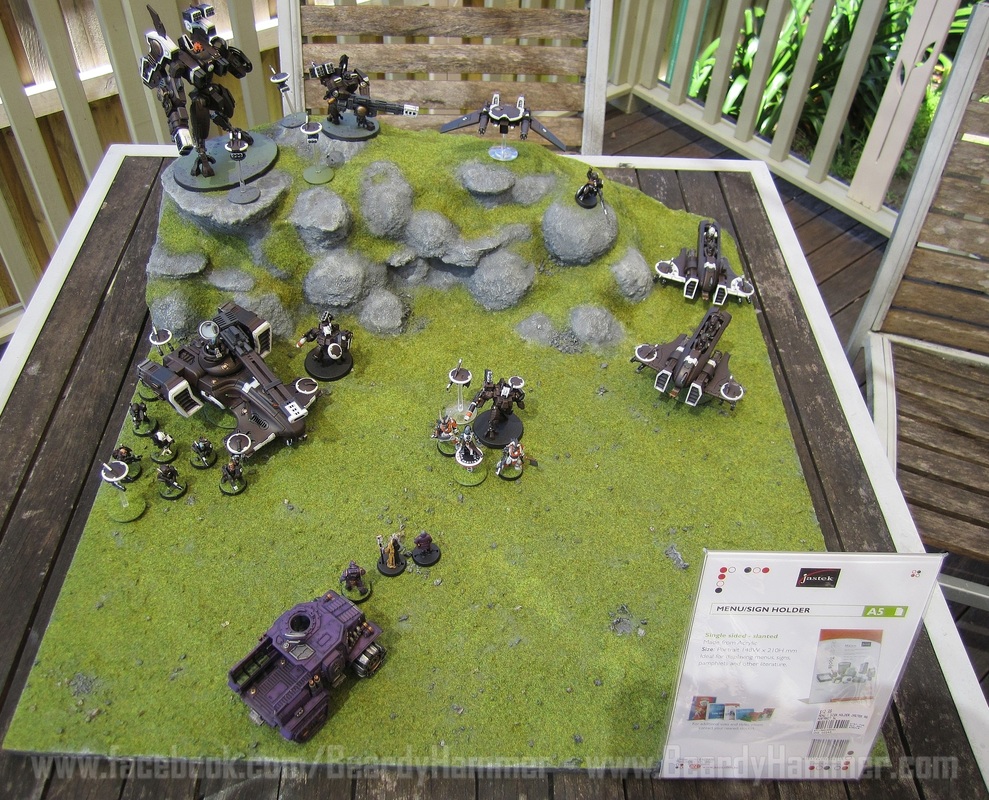
Well it's all done! Armies On Parade 2016 is packed and ready to go.
What follows is an image dump of the completed models in their p[ace hopefully giving you an idea of the narrative and what is going on.
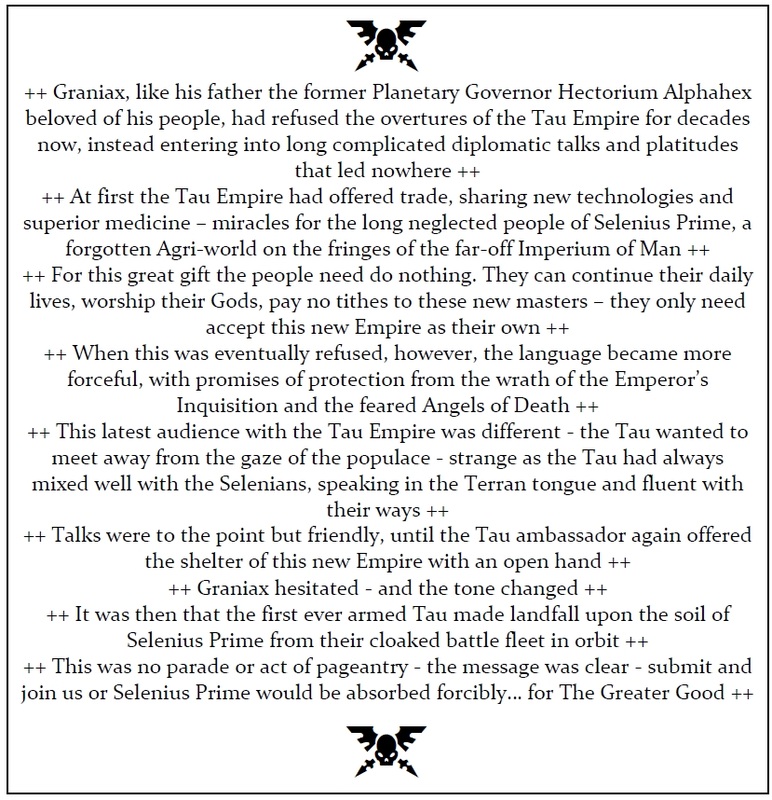
There is a story to go along with the scene, so have included it here. I'm not a writer - so sorry - but it's to set the scene.
If you're in Sydney Australia and you'd like to see it in the real, maybe throw a vote it's way, then it will be at the Chatswood store on Saturday 15th of October. Come and have a chat too, I'll be there! :)
What follows is an image dump of the completed models in their p[ace hopefully giving you an idea of the narrative and what is going on.
There is a story to go along with the scene, so have included it here. I'm not a writer - so sorry - but it's to set the scene.
If you're in Sydney Australia and you'd like to see it in the real, maybe throw a vote it's way, then it will be at the Chatswood store on Saturday 15th of October. Come and have a chat too, I'll be there! :)
|
|


I should add here that I do apologise for the water mark, but some of my images were being used by another blog (unattributed BTW), so it's a practical step, but boring and a bit of a shame because it gets in the way!
A New Base & some close-Ups On Dry-Fitting Day!
|
|


Today was the day to see if I had too much stuff to fit on - and if I don't want it totally crowded then yes - BUT I do see a space for some more imperials, so will be unpacking the bitz box tonight and making a few more.
As you can see from the pics, here are still some bases to do, but getting pretty close.
I did however get the rocks redone and the mould seems to have been burnt off by the very well timed Australian sun!
As you can see from the pics, here are still some bases to do, but getting pretty close.
I did however get the rocks redone and the mould seems to have been burnt off by the very well timed Australian sun!
A Day Of Abject Failure But Also A Pot Of Gold AT The End Of The Rainbow
Armies On Parade is just a few days away, so it was time to fit the minis onto the base today, so went to where I had stored my base to check it out. It's been a few weeks since I saw it, so expected it to be pretty stable - how wrong I was.... and it wasn't good!
The Bad News
So it seems that over the last week or so while I have been painting, the base has been - well either rotting or going mouldy or something horrible. It could be the texture under the paint or maybe it didn't dry when I sprayed the watered down PVA glue on to hold the grass - either way it looks pretty bad! There are wet white spots in the grass and all over the rocks The surface of the rocks is also very brittle.
So today, I set about repainting it! painting all the grey, then over all the white spots in the grass and then reflocking it so it looked even. This what not what today was meant to do about. Today was basing and placement - but instead looks like it will be a rush to the finish to even make this look okay. Then again, maybe doing it again will make it look better... Trying to be positive here :/
So today, I set about repainting it! painting all the grey, then over all the white spots in the grass and then reflocking it so it looked even. This what not what today was meant to do about. Today was basing and placement - but instead looks like it will be a rush to the finish to even make this look okay. Then again, maybe doing it again will make it look better... Trying to be positive here :/
The Good News
The good news, however is that I got to see some of the minis on the board and it looks like the colour scheme is pretty much as contrasting as I wanted it to be without being garish!
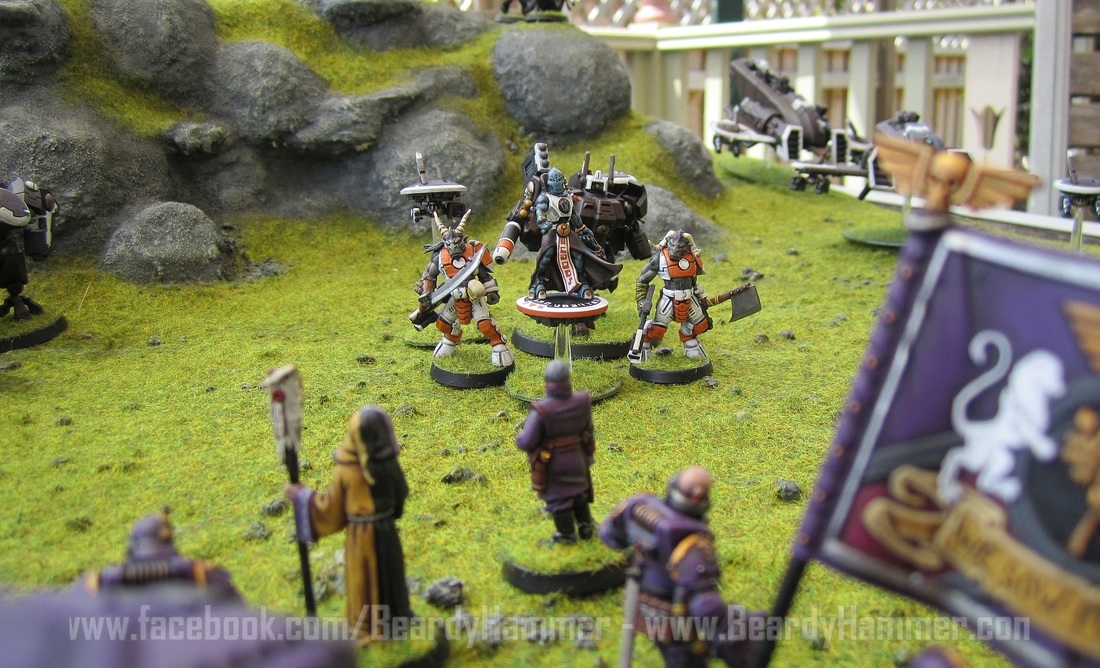
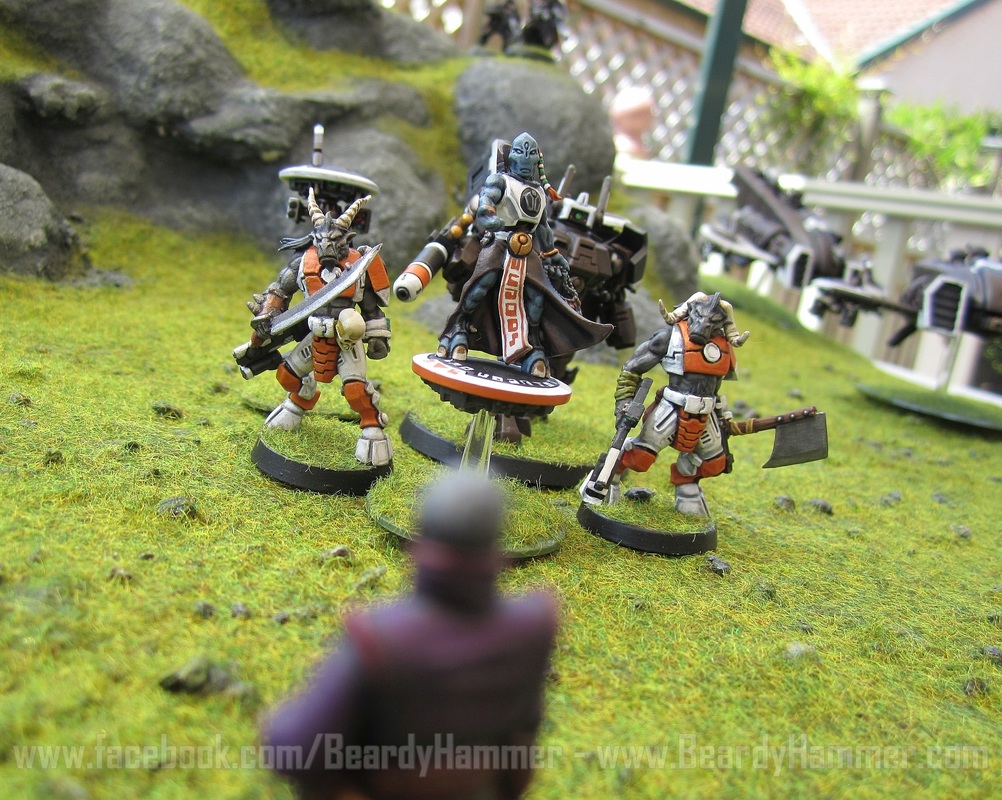
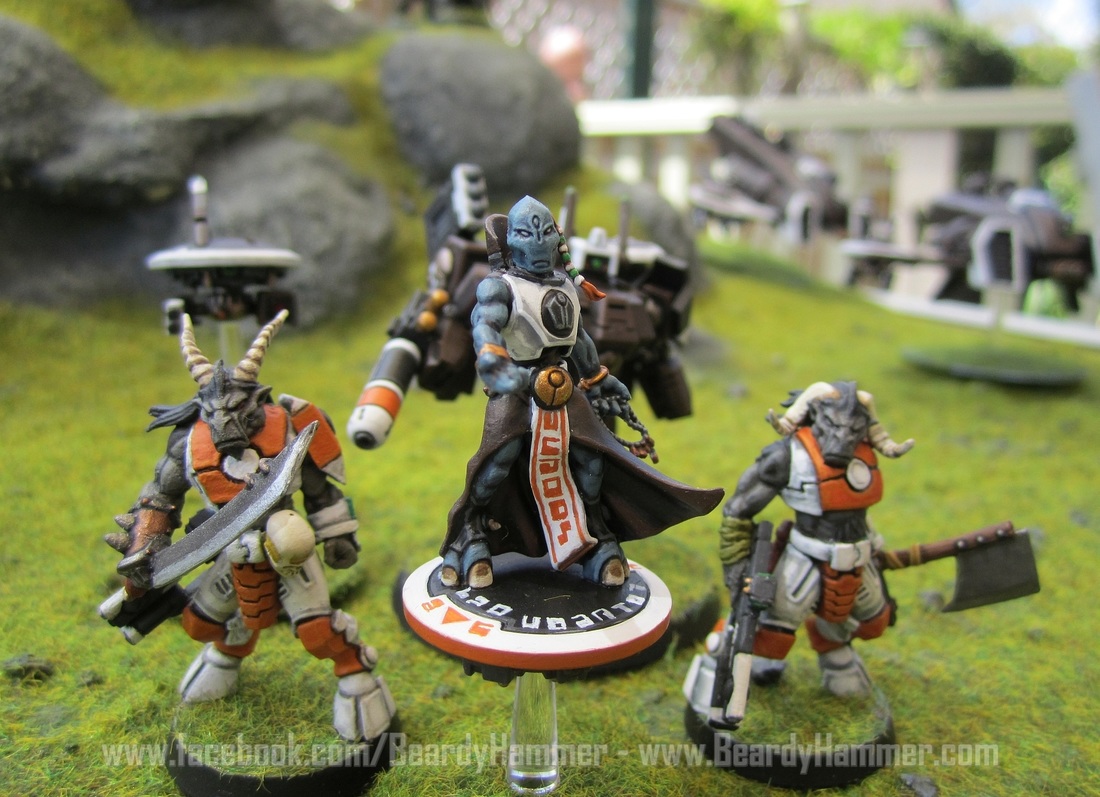
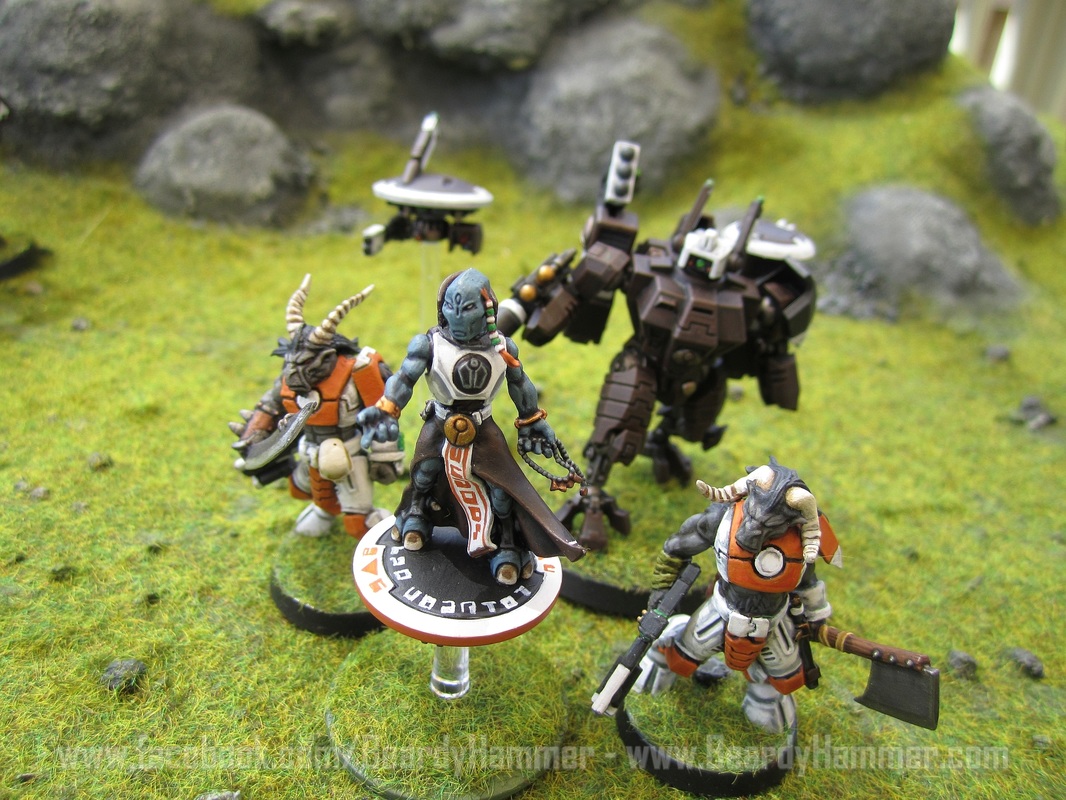
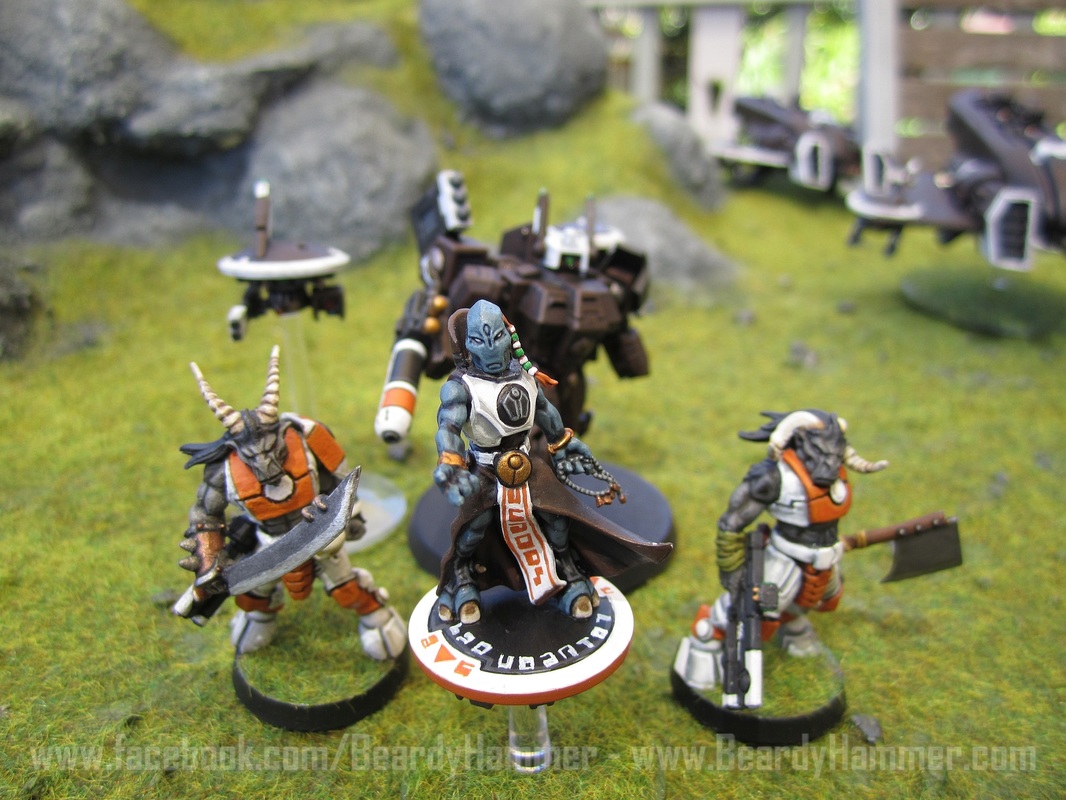
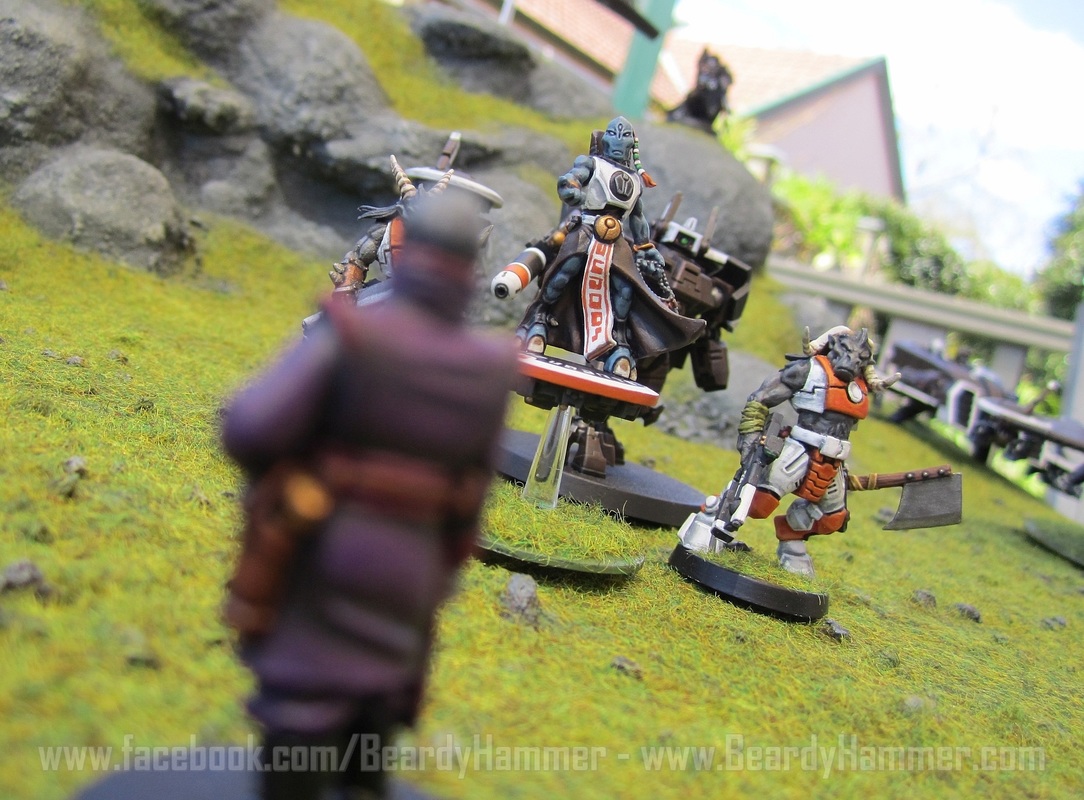
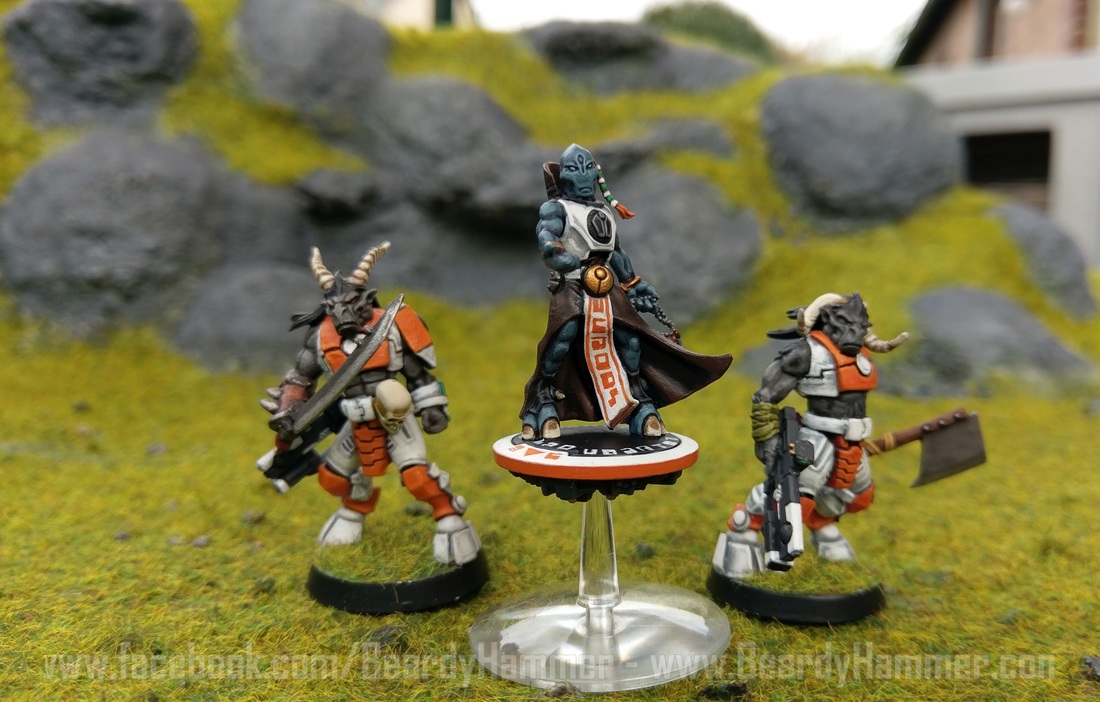
This is the Tau ambassador with his bodyguard. As you can see, the basing is still in progress, but it's happening. If you're curious about the bodyguard, those are Beastmen torsos, heads and arms with Green Stuff sculpted to look like a Tau breastplate, belts and wrist thingies. As you'd expect they retain their close combat weapons... as any good Beastman would do!. Really pleased with them actually.
This is the Tau ambassador with his bodyguard. As you can see, the basing is still in progress, but it's happening. If you're curious about the bodyguard, those are Beastmen torsos, heads and arms with Green Stuff sculpted to look like a Tau breastplate, belts and wrist thingies. As you'd expect they retain their close combat weapons... as any good Beastman would do!. Really pleased with them actually.
Aren't You A LIttle Tall For A Crisis Suit?
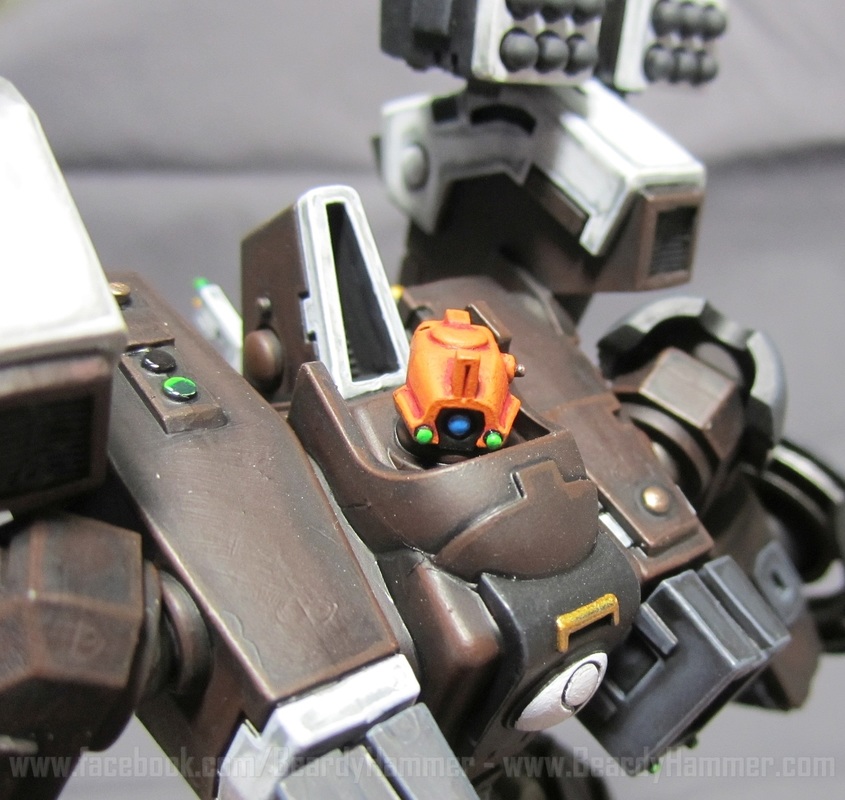
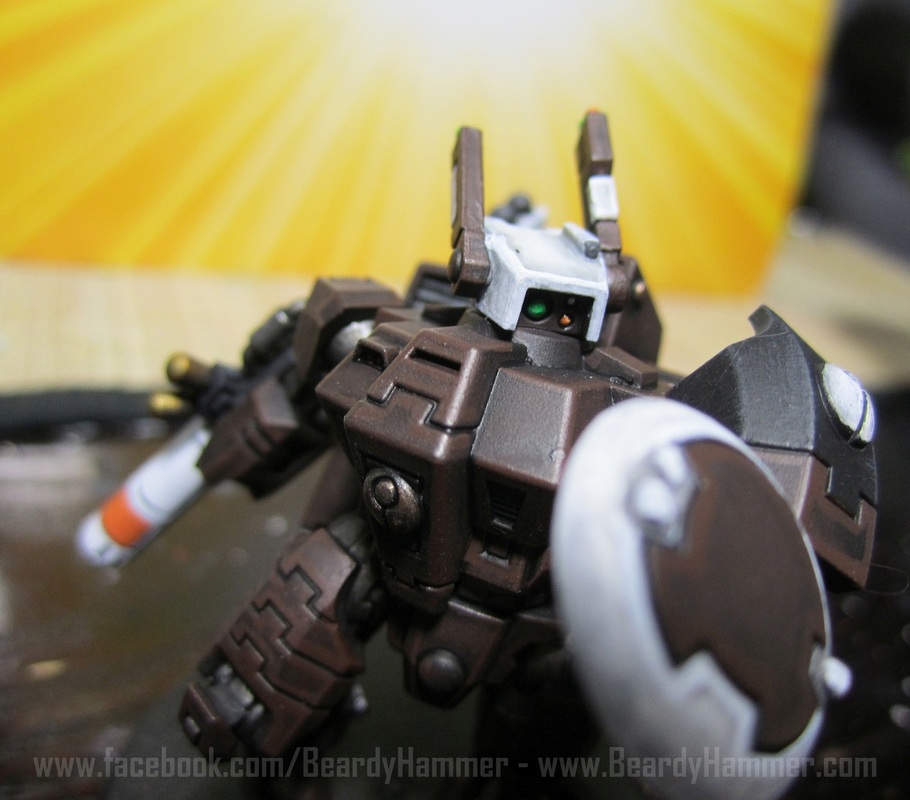
The Tau Riptide Battle Suit - what a beast!
This is the largest Tau miniature and pretty much the largest Games Workshop miniature I've ever done, and I have to say that I'm pretty happy with it.
It's definitely large, it's imposing and despite the moderate outlay it does dominate the battlefield AND was a blast to paint!.
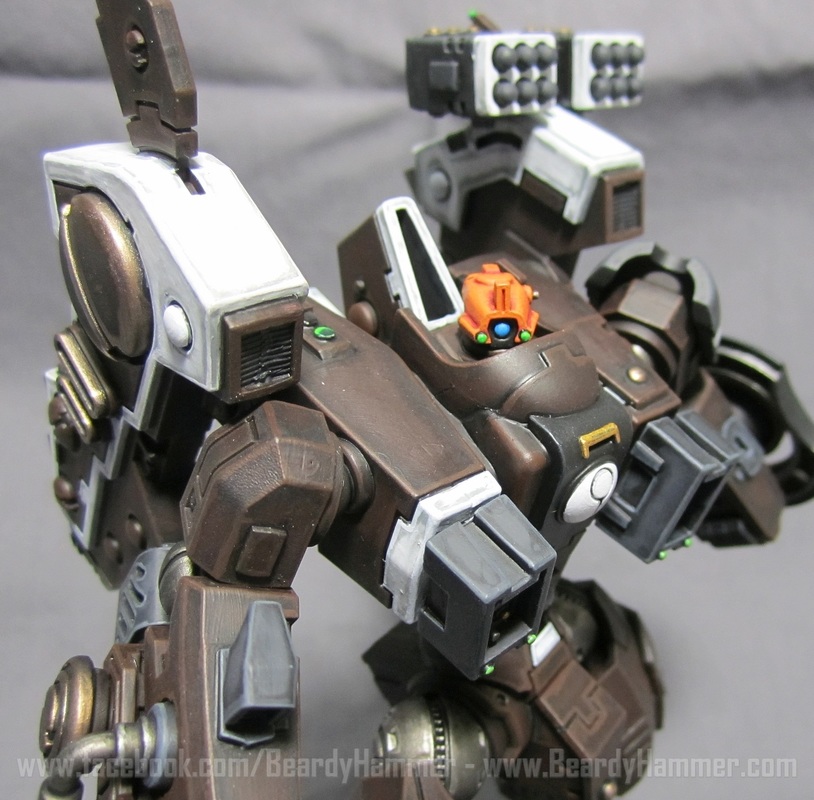
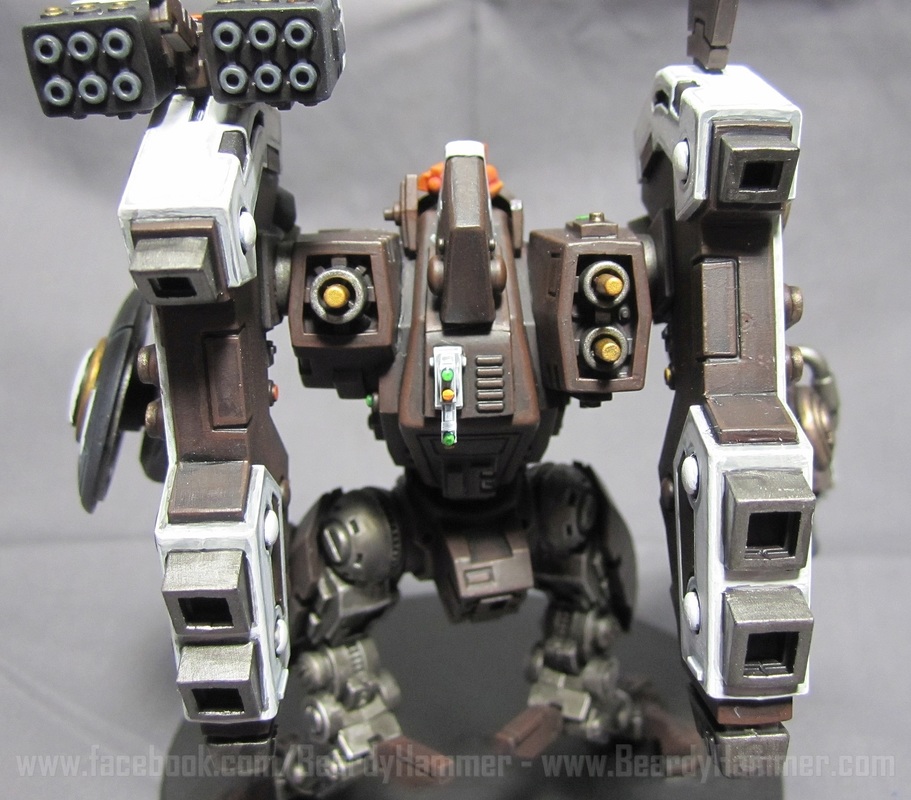
I built this in sub-sections - legs and body, arms, jet packs, head, antennae on the back and finally the missile pod - effectively I was working on six miniatures.
Despite, in maybe because of, it's large size, it's quite fiddly.
As with the rest of the army I airbrushed it with Rhinox Brown, then washed it with thinned Abaddon Black paint. Then it was highlighted with a mix of Rhinox Brown, Doombull Brown and an old Foundation Paint that looks similar to Balor Brown.
It's not a dramatic highlight, but it gives the brown some warmth that makes it almost look like chocolate. Any more dramatic highlights I just found too stark.
As with the other minis, I have done my standard dirty white I do on everything = you may have seen this on the War Hounds Vindicator.
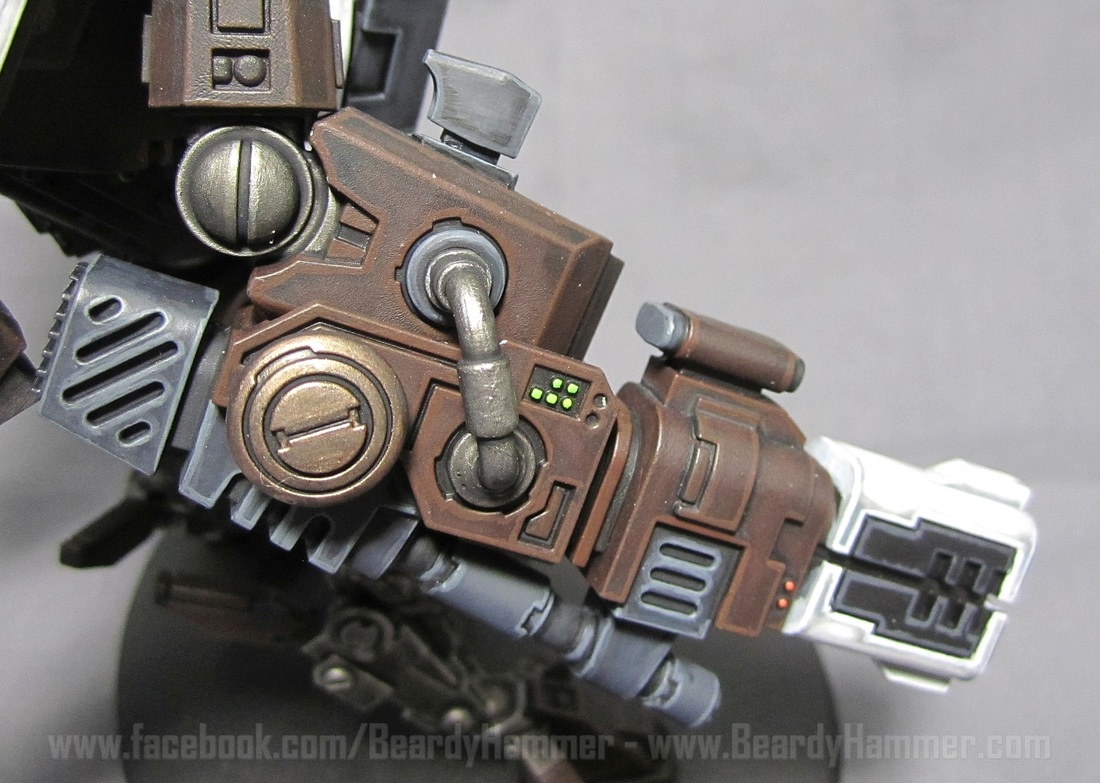
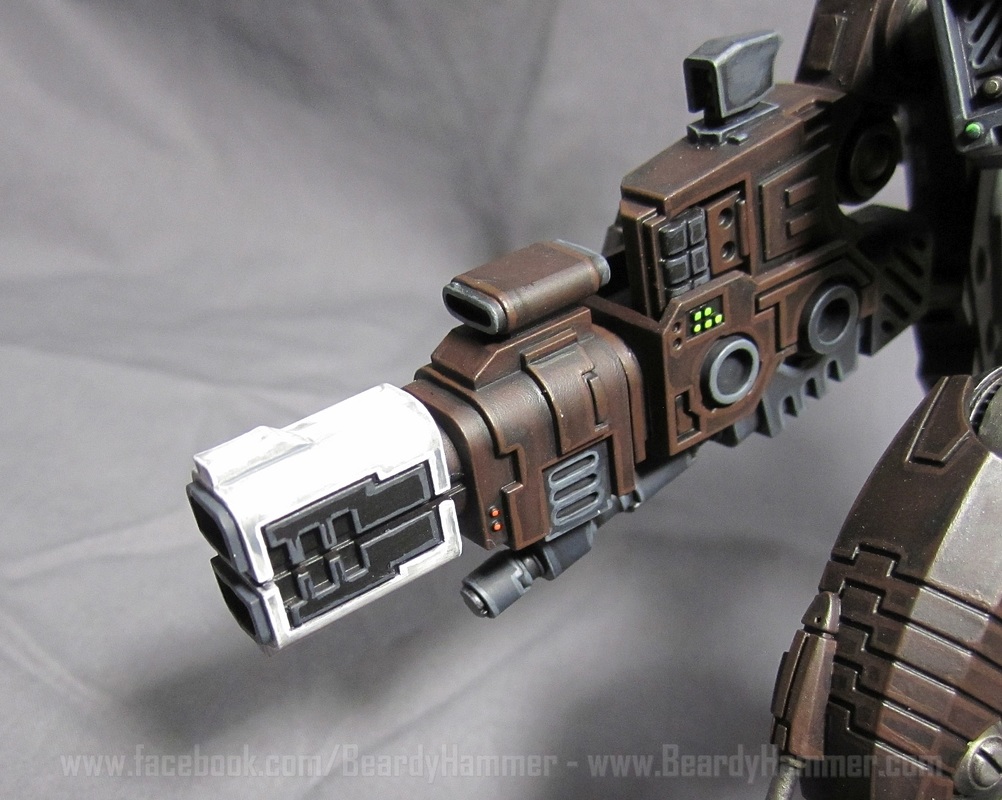
In terms of how long it took - the Ion Cannon probably took the longest at about 20 hours from start to finish. Deceivingly simple, right?
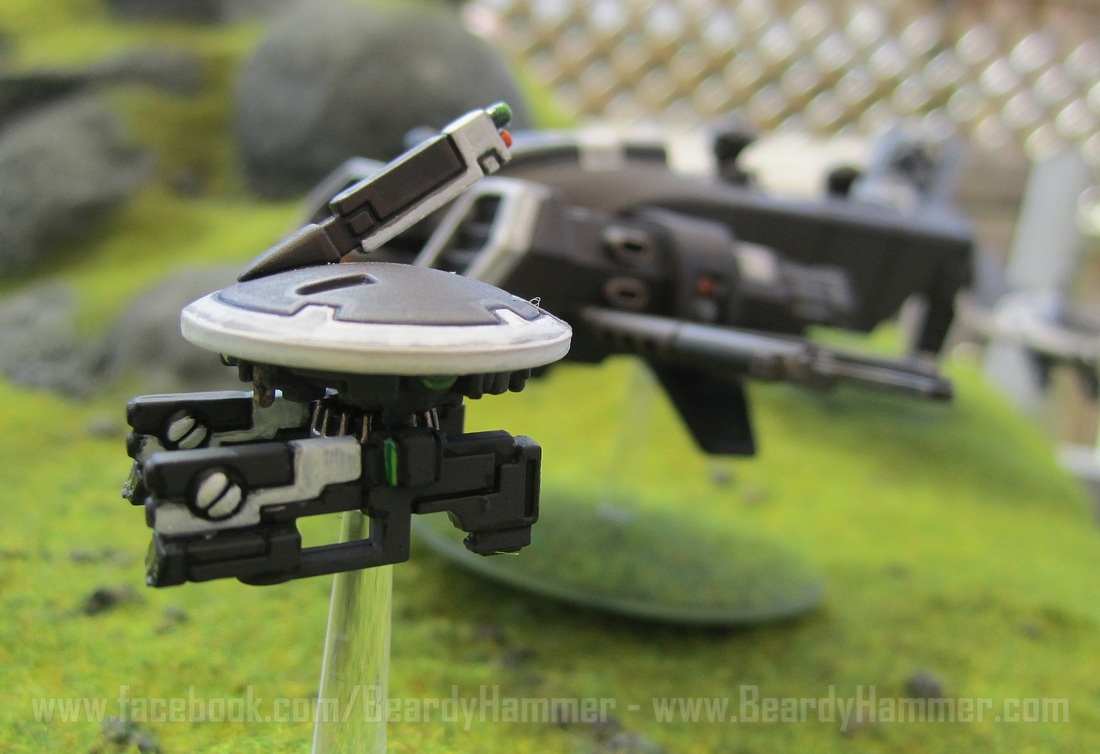
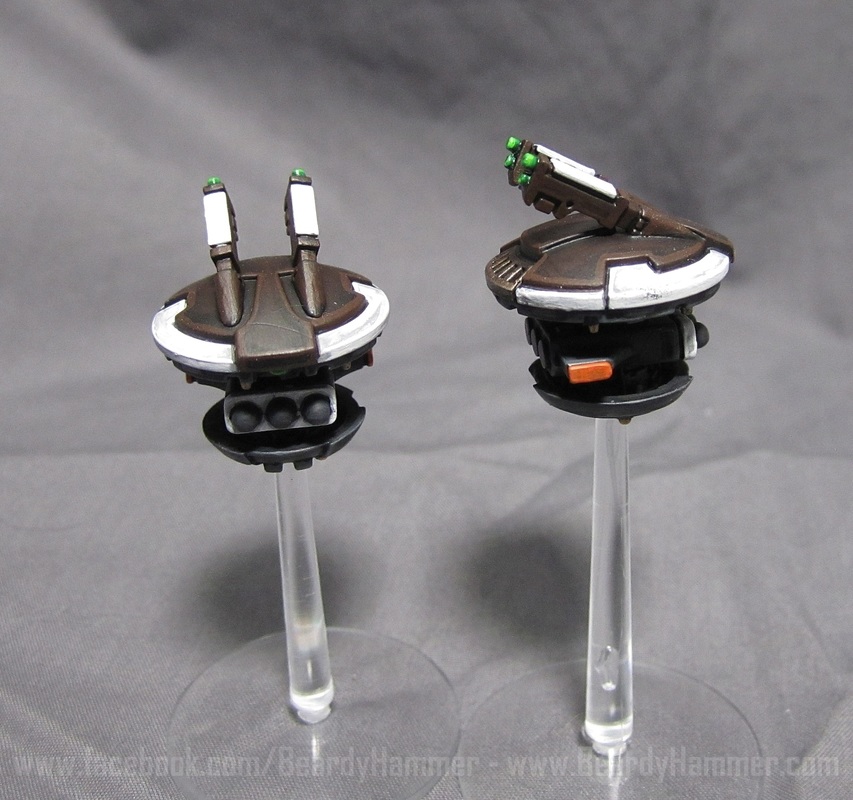
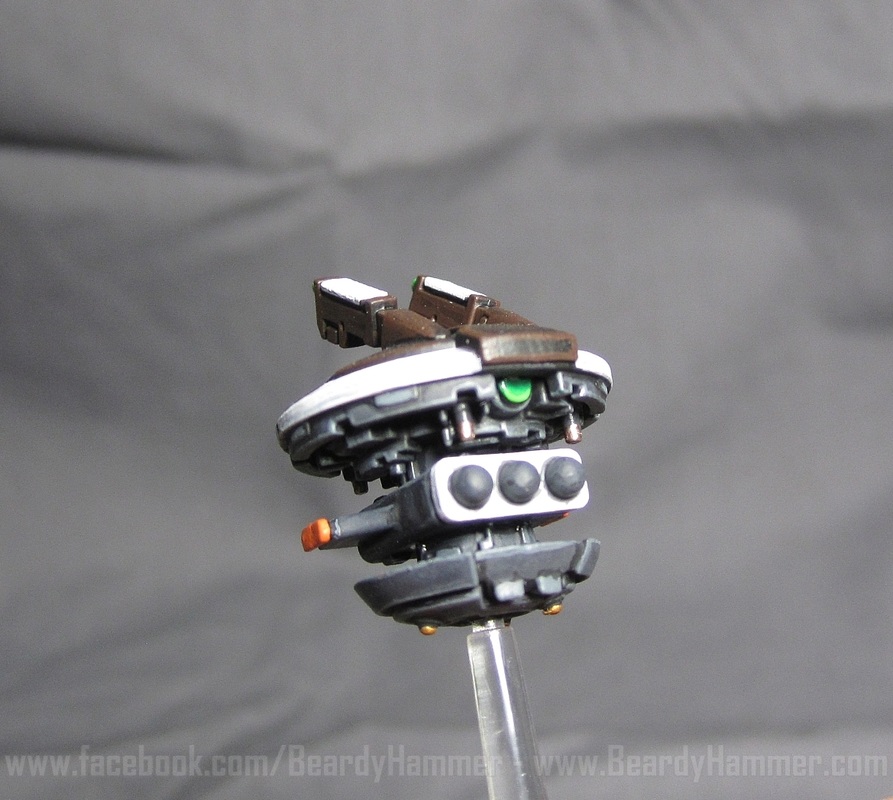
The drones were a bit different as they are a different size and have different details to the normal drones, so these were interesting - I added a bit of orange to them to really make them stand out too. I'm getting pretty fast at shading lenses by now and have the drone ones down to a quick standard I am happy with.
Overall I think he looks suitably imposing and as he is standing on the highest part of the diorama, he should really stand out.
This is the largest Tau miniature and pretty much the largest Games Workshop miniature I've ever done, and I have to say that I'm pretty happy with it.
It's definitely large, it's imposing and despite the moderate outlay it does dominate the battlefield AND was a blast to paint!.
I built this in sub-sections - legs and body, arms, jet packs, head, antennae on the back and finally the missile pod - effectively I was working on six miniatures.
Despite, in maybe because of, it's large size, it's quite fiddly.
As with the rest of the army I airbrushed it with Rhinox Brown, then washed it with thinned Abaddon Black paint. Then it was highlighted with a mix of Rhinox Brown, Doombull Brown and an old Foundation Paint that looks similar to Balor Brown.
It's not a dramatic highlight, but it gives the brown some warmth that makes it almost look like chocolate. Any more dramatic highlights I just found too stark.
As with the other minis, I have done my standard dirty white I do on everything = you may have seen this on the War Hounds Vindicator.
In terms of how long it took - the Ion Cannon probably took the longest at about 20 hours from start to finish. Deceivingly simple, right?
The drones were a bit different as they are a different size and have different details to the normal drones, so these were interesting - I added a bit of orange to them to really make them stand out too. I'm getting pretty fast at shading lenses by now and have the drone ones down to a quick standard I am happy with.
Overall I think he looks suitably imposing and as he is standing on the highest part of the diorama, he should really stand out.


Imperial Faction iNCOMING
I decided a little while ago that this diorama needed a theme and an adversary.
Initially this was going to be trench warfare between the Tau and the Imperials (or Orks) but this made the miniatures very difficult to use afterwards - the driving force behind doing the project was to build an army afterall!
So it was going to be a face-off instead; Imperials being told that this was the last chance to join The Greater Good.
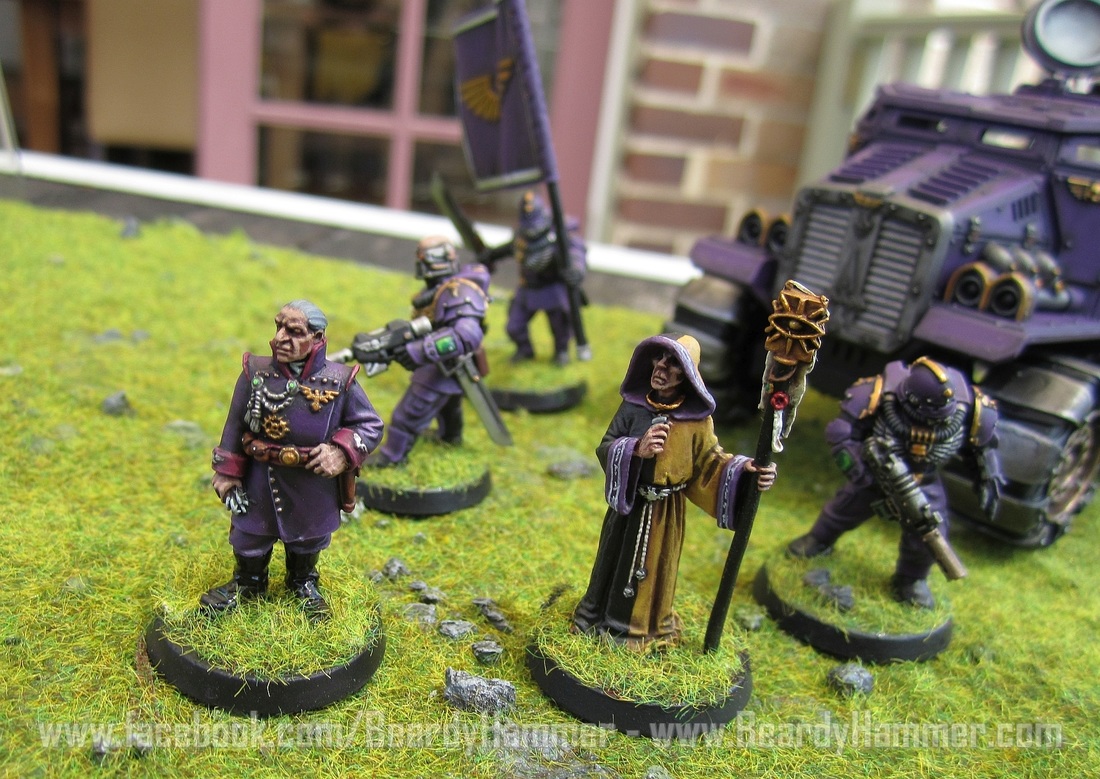
SO really the Imperials are a very side part of this whole project, none the less they have to stand out, so what contrasts with orange and green? Well a very regal purple does, and since this was going to be a Planetary Governor, this seemed appropriate!
The Planetary Governor and his advisor are from the Regimental Advisors set, and the bodyguard (one of two) is a Space Marine Scout torso, Tempestus Scion arms, Cadian legs and a Skitarii head.
Initially this was going to be trench warfare between the Tau and the Imperials (or Orks) but this made the miniatures very difficult to use afterwards - the driving force behind doing the project was to build an army afterall!
So it was going to be a face-off instead; Imperials being told that this was the last chance to join The Greater Good.
SO really the Imperials are a very side part of this whole project, none the less they have to stand out, so what contrasts with orange and green? Well a very regal purple does, and since this was going to be a Planetary Governor, this seemed appropriate!
The Planetary Governor and his advisor are from the Regimental Advisors set, and the bodyguard (one of two) is a Space Marine Scout torso, Tempestus Scion arms, Cadian legs and a Skitarii head.
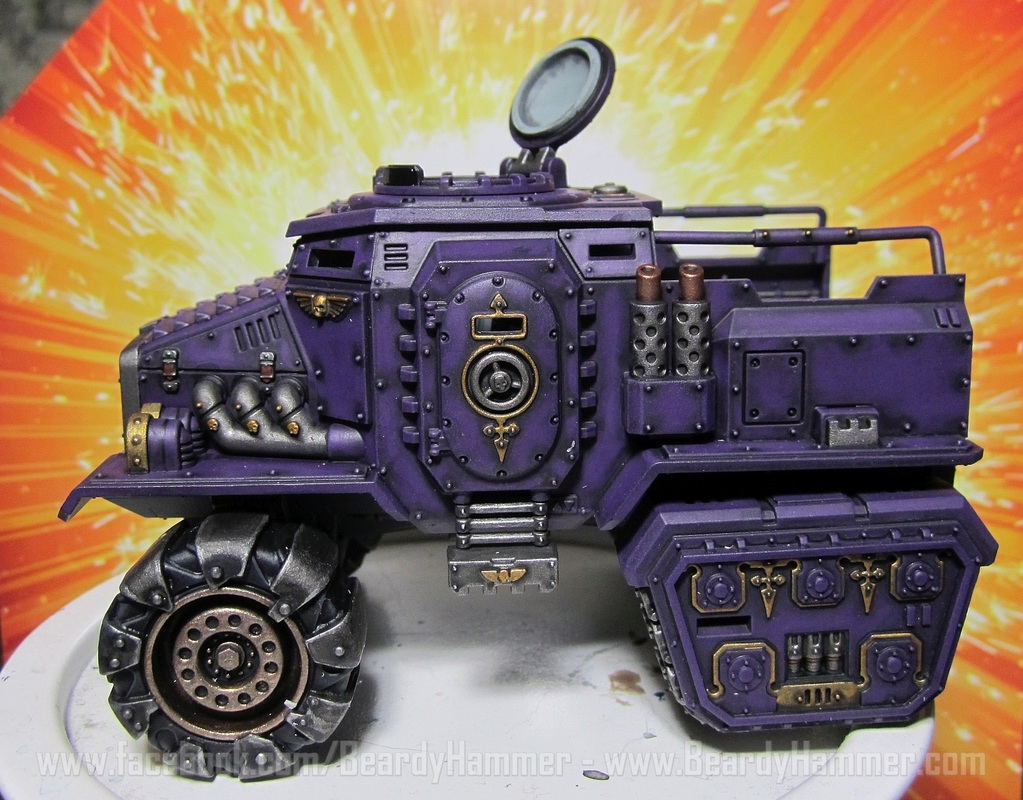
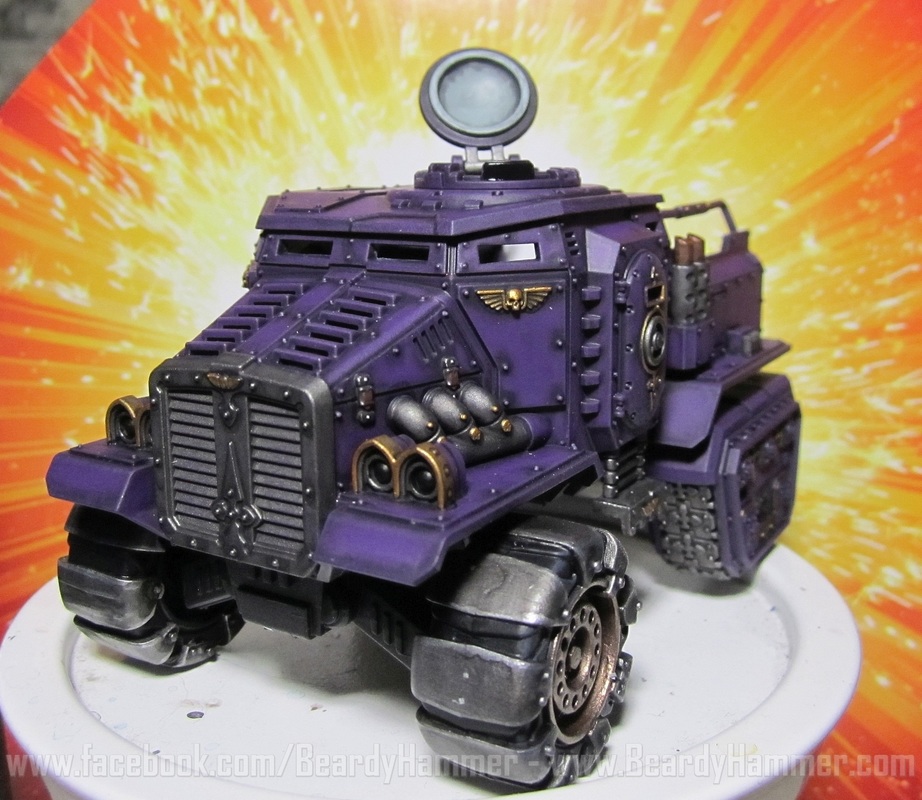
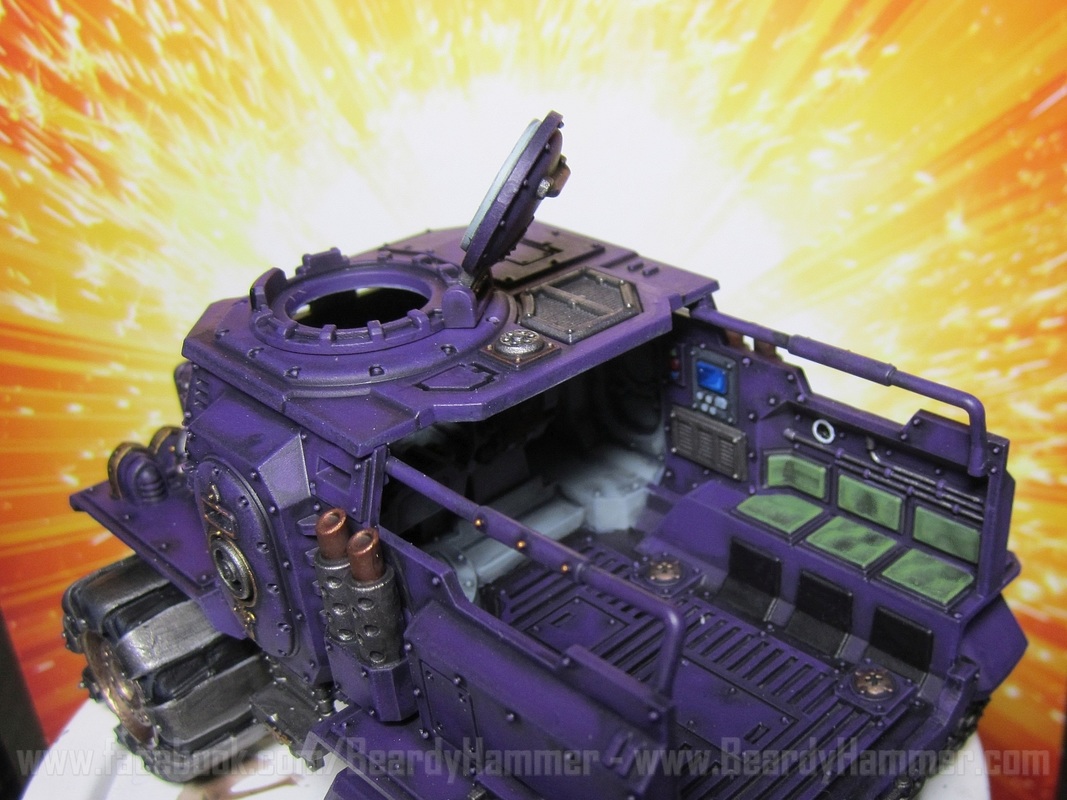


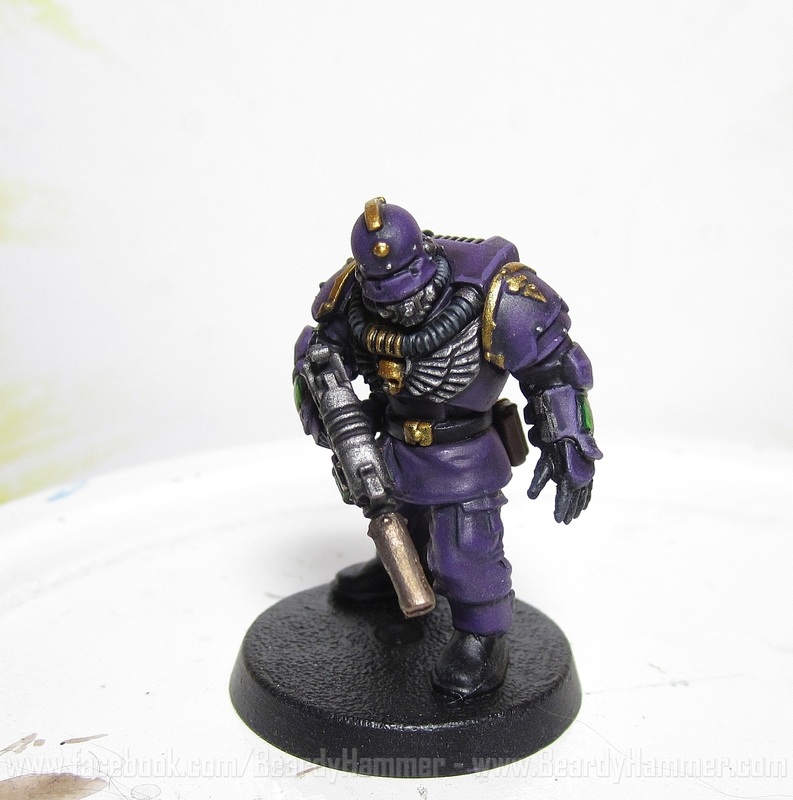

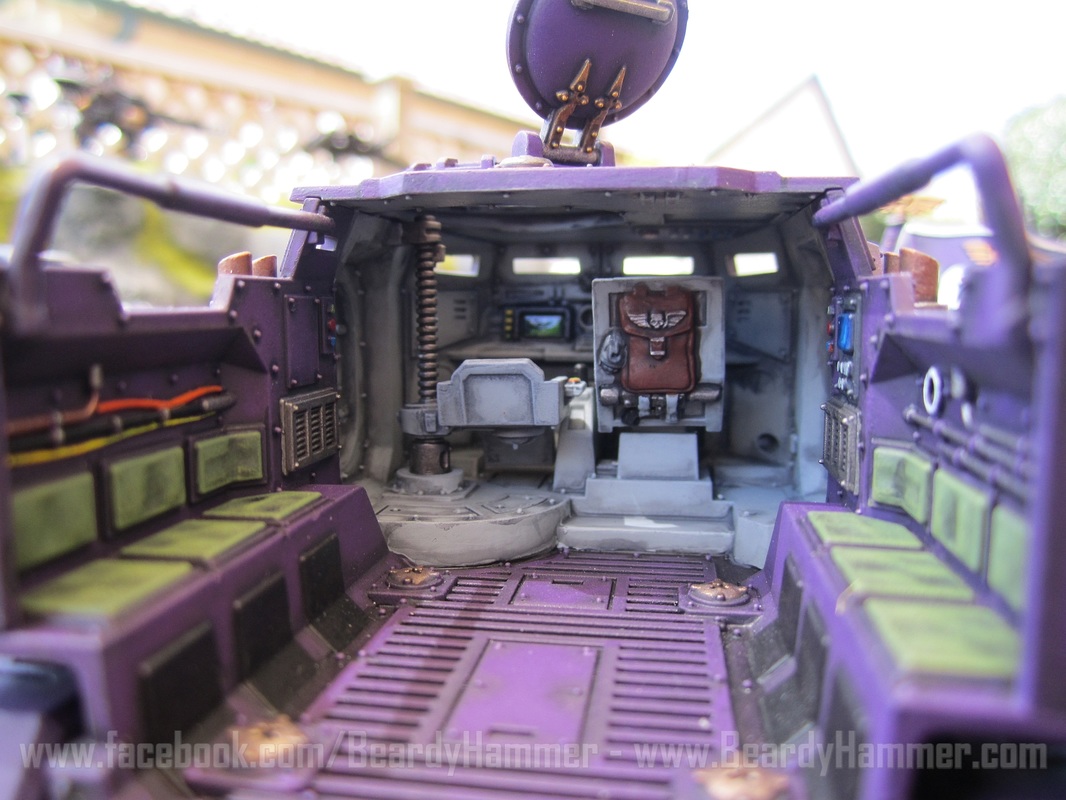
m actually really happy with the retinue so far. The purple is regal enough and the splashes of golds really make them look elite. The Taurox is just on the edge of being too bling, but it is the Planetary Governor's Taurox, so it would be like that for parades and so on. You may notice that it's open-topped. This is an option in the Taurox set, just not in the instructions. I did take the hatch off the back and leave it open backed too as the hatch didn't look right for effectively a non-military vehicle. And yes, that front wheel is from an Ork vehicle and improved the vehicle in my mind.
I love the stance on the Governor - so pompous! His Astropath advisor isn't amazing, but he'll have to do.
I really love playing with all the imperial bits and I think this recipe for the bodyguard is surprisingly effective. May throw together a quick driver to show what a normal infantry guy would be like.
Terrain Time - Or How To Make A Pile Of Styrofoam Look A Bit Like A Hill!

|
I'm going to be honest, terrain isn't my thing.
I see people do amazing stuff, especially scale modellers who do trains or historical miniature gaming, and would LOVE to do similar, but for this Armies on Parade it's going to be trial and error so why not just jump in and get it started?! The overall vision for this Armies on Parade is to have a small Imperial party being given the option to either conform for The Greater Good, or be crushed by the overwhelming force of the Tau Empire - who will be coming over the hill! Very simple really, so ideally not hard to execute - BUT it is the thing that needs to take some time or it could just look crap! A cool army on a crap board = a crap entry! So... trial and error, huh? Okay, so I started with the correct sized board and made sure not to take up the whole thing with terrain. The hills have to be there, but hopefully not too dominant. I started with a tonne of large and small styrofoam balls which were cut up to look like boulders and then jutting rocks coming out of a mountain side. Is this the way to do it? Who knows... These were all PVA glued down and together. I used a whole large PVA glue container worth of it. It took some time to dry, and some bits needed propping up, but by the next day it was solidly glued to the MDF board. |
|
|
Day 2 was all about turning these weird shapes into a hillside.
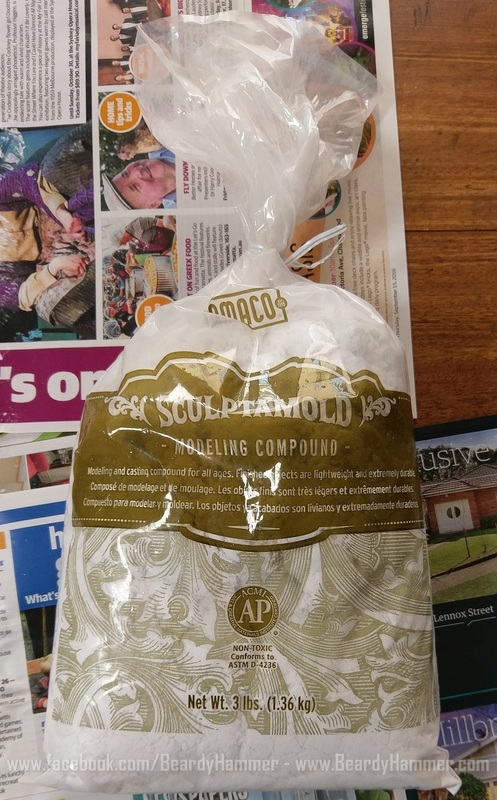
I bought this bag of Sculptamold from the local arts store. The advantage of this stuff is that you can vary the consistency depending on the amount of water you're using AND when it dries, it dries HARD!
Initially I started with the 2 parts powder to 1 parts water on the packet and it was too runny. I found that 3 parts powder to 1 part water was pretty right, but you have to work quickly because it starts to set quite quickly. All in all I used the entire bag for the hillside!
Once it started to set, I used a kidney tool to smooth it down. These are rocks, so they needed to have a smoothish surface. If it's a but firm, apply some water and, like pottery, it works a treat! This took about 2 or 3 hours of applying and smoothing.
|
|
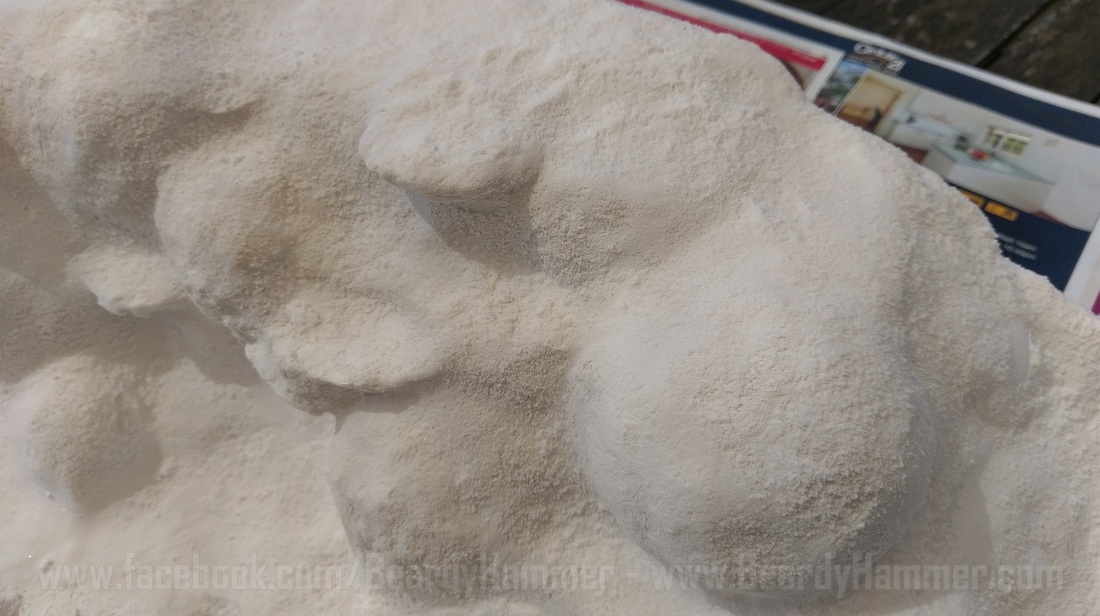
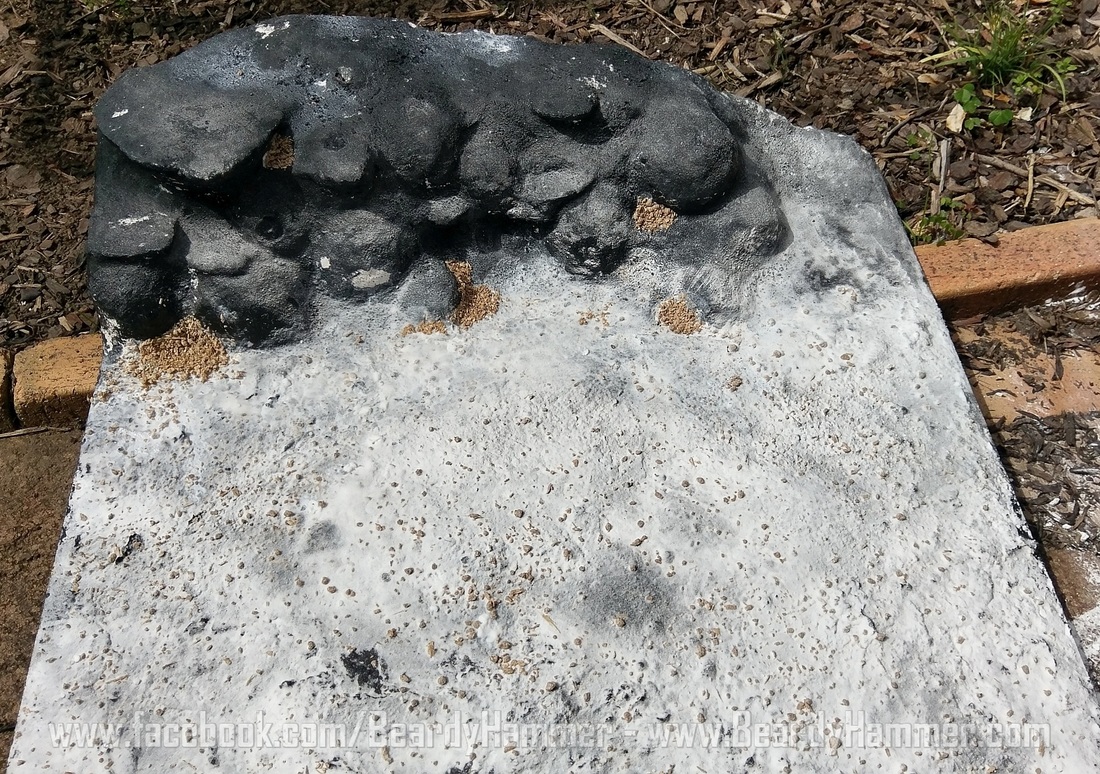
Day 3 was adding some texture to the hillside. This was mainly just texture to the rocks so when they are drybrushed they look like rock!
Initially I was going to use PVA glue watered down, but went with a spray adhesive instead - not sure this was the best thing actually.
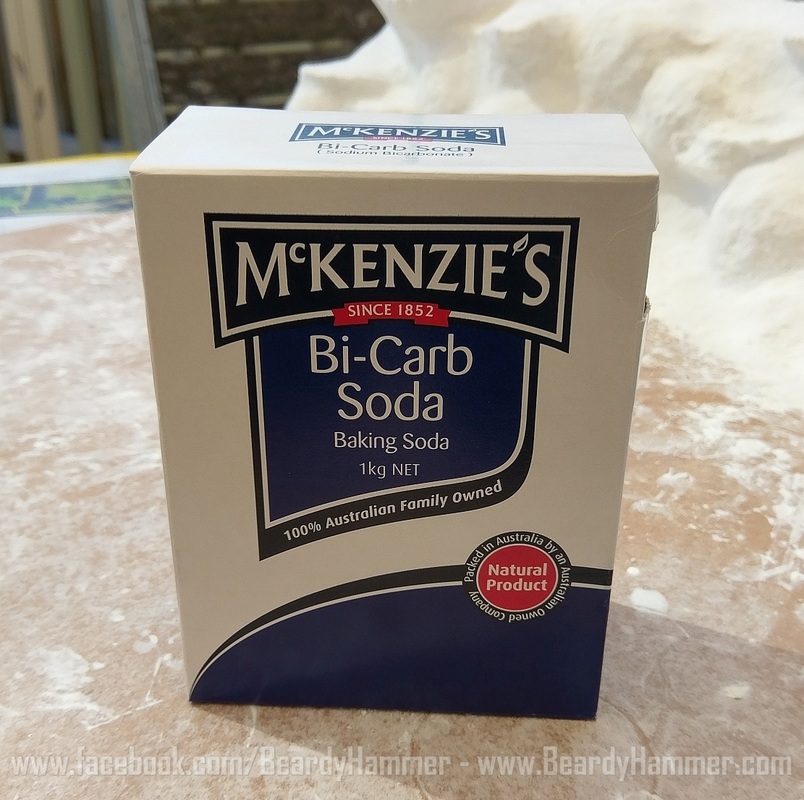
Anyway, once this was applied I sited bi-card soda to the whole area. As you can see I let it pile up. When it was dry, I just shook all the excess off. I did two layers of bi-carb, which may have been too much, but you have to learn, right?
After this, I then sprayed layers of the spray adhesive over the top to hold it in place. I did about 4 light coats, then a more saturated one.
Initially I was going to use PVA glue watered down, but went with a spray adhesive instead - not sure this was the best thing actually.
Anyway, once this was applied I sited bi-card soda to the whole area. As you can see I let it pile up. When it was dry, I just shook all the excess off. I did two layers of bi-carb, which may have been too much, but you have to learn, right?
After this, I then sprayed layers of the spray adhesive over the top to hold it in place. I did about 4 light coats, then a more saturated one.
|
|
Day 3 was busy, because I'm impatient!
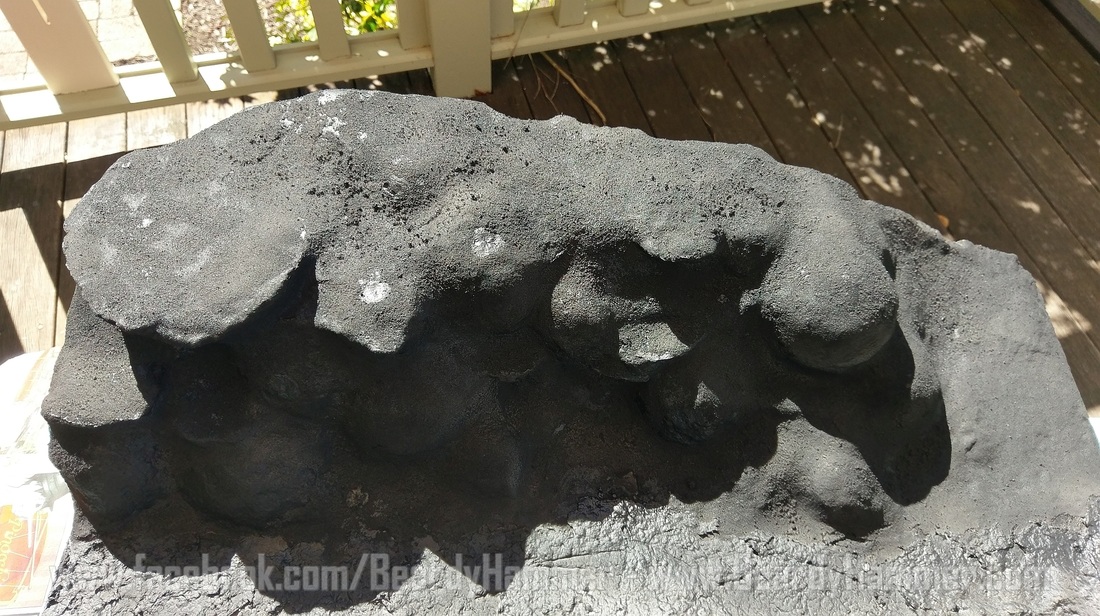
With the bi-carb completely dry (well on the surface - I told you I'm impatient - I applied thin coats of Chaos Black. This was a whole can!
I would have been better off using a cheap spray to do this job as it was a waste really!
As you can see though, there is now texture on the rocks. Bu the looks of it I would have just stayed without the bi-carb, but once the paint is on it will be easier to make that decision for future projects. Be aware that any styrofoam that isn't well covered by the Sculptamold rots away from the spray paint. This I discovered pretty quickly...
The majority of this hillside will be covered by grass, but this isn't a bad start.
I also used a 2 to 1 ratio of Scultamold (bag #2 of the project!) to water to do all the ground on the rest fop the board, giving it a roughish texture and spreading it on with the kidney tool.
Day 4 - lessons learnt from Day 3: spray adhesive is probably good for some things - terrain may not be one of them!
Despite the layers of spray adhesive applied to the bi-carb yesterday, it only really crisped the surface, to today I watered down some PVA glue and applied it to the hillside. It dried pretty quickly in the sun and seemed to do a better job of making the texture on the rocks more solid.
Then it was on to the ground - which was coated in watered down PVA glue and sprinkled with kitty litter and then bi-carb.
This was spray adhesived, and then when that didn't work again, it was left to dry and I went for the watered down PVA over the top. Again - listen to the train modellers!! Ye of little faith. I wiil learn the lesson one day.
Then straight PVA was placed in some crevasses and kitty litter was added to simulate small rocks. This worked with varying success.
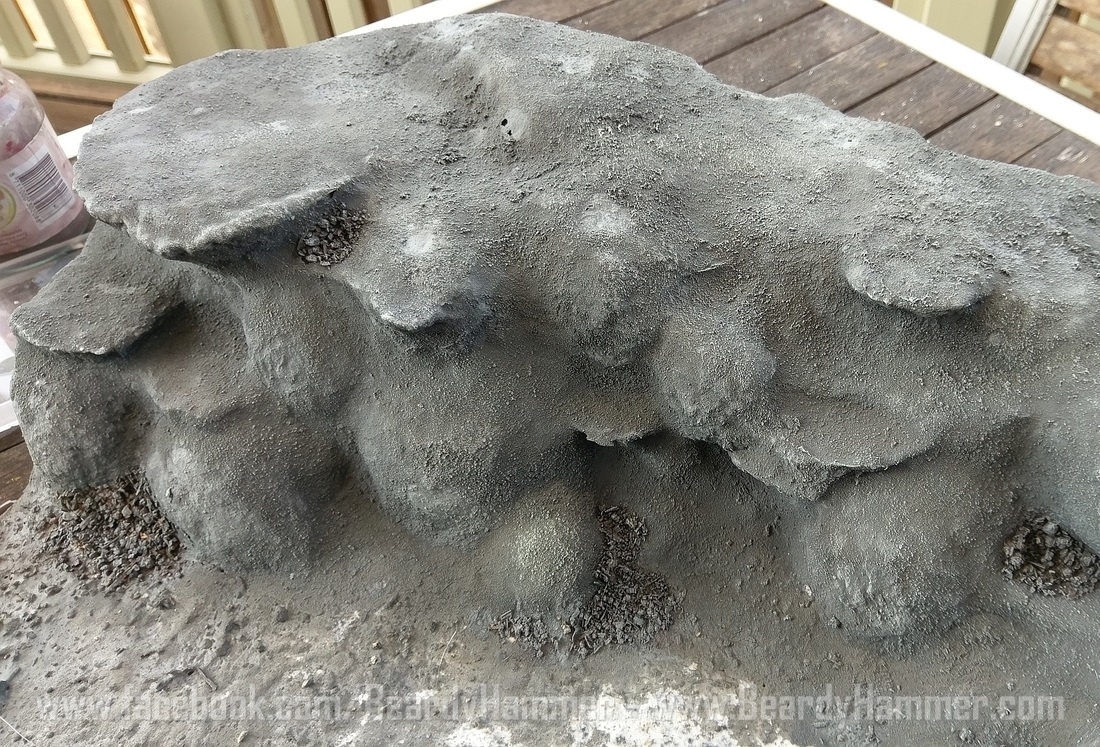
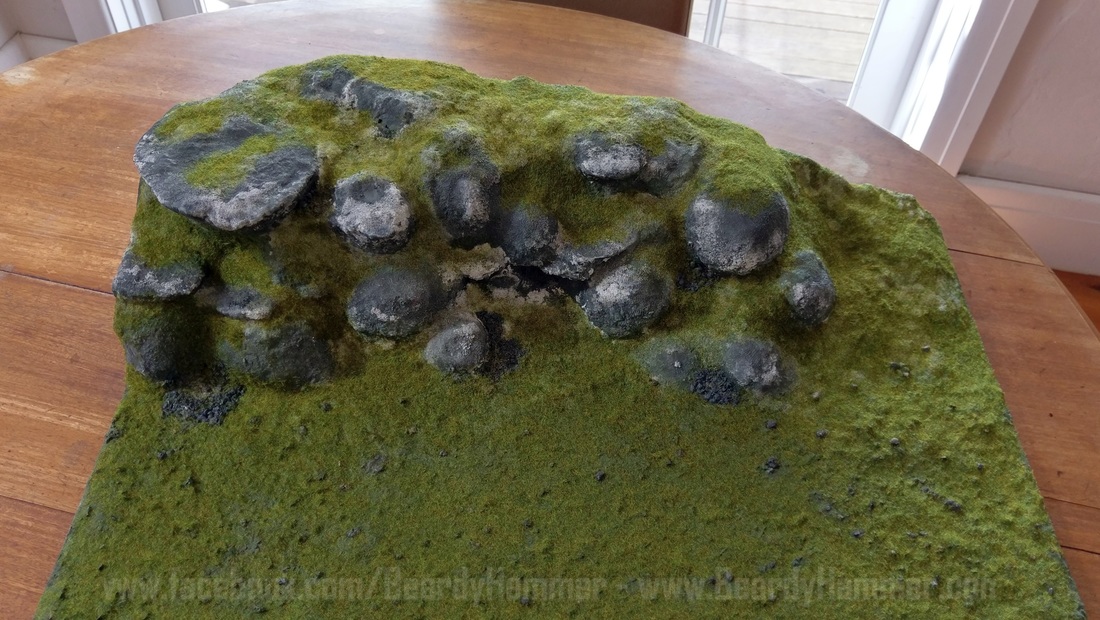
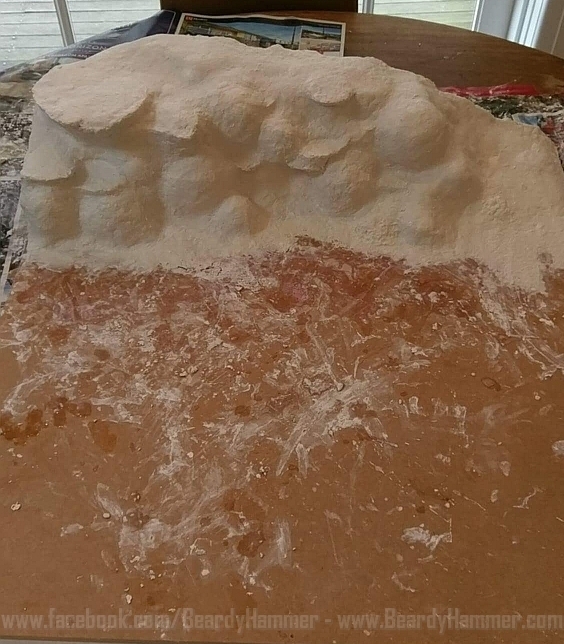
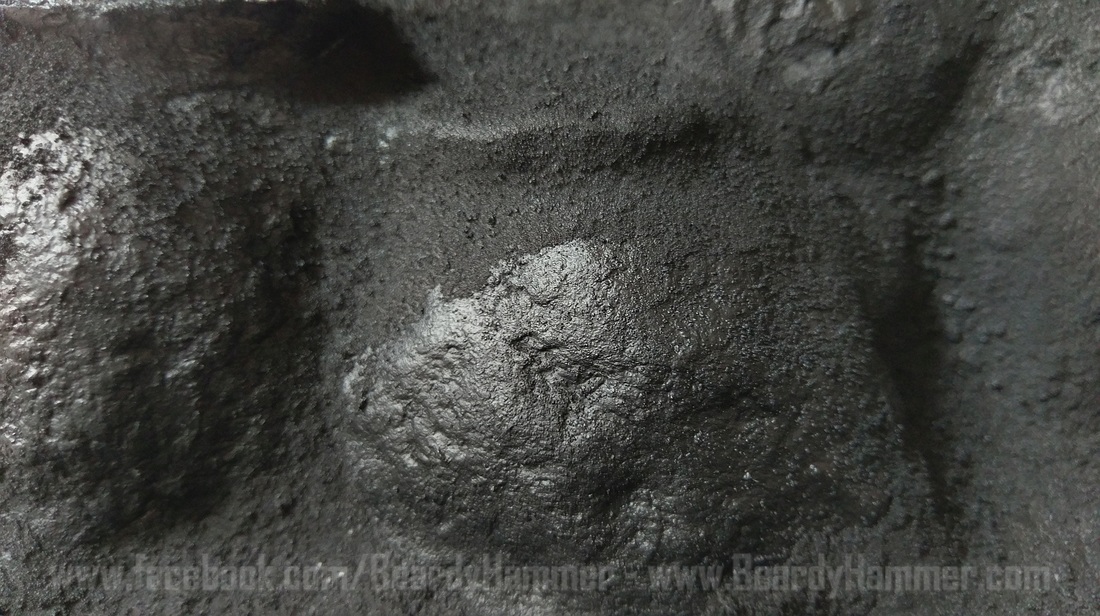
Once dry, the rocks were airbrushed with Skavenblight Dinge. This took two pots of paint in total and only just stretched.
When that was dry, various greys were drybrushed on with a large brush. Screaming skull was added to each grey to make it a warmer colour - like real stone. At forst it looked a bit much over the Skavenblight Dinge, but as successive layers were built up, it does actually look more like rock.
Finally a 50/50 layer or a light grey and Screaming Skull was applied as the final drybrush layer. All in all there were about 5 layers.
As most of this will be covered with grass eventually, I concentrated on the edges an the round forms of the boulders.

I then airbrushed Loren Forest on all the areas where grass will be. It's a layer paint, so was quite thin. This took a little while, but was effective for the ares where there will be thick grass. Each piece of kitty litter/ rock has to be picked out on the ground and the rocks before grass is laid.
Bit of a mission, but it should look very effective once done.
The plan is to also apply drybrushing to the ground to give some depth before the grass is laid down.
For a first effor with terrain, I'm pretty pleased - the airbrush was a God-send! (thanks Doug and Rob for the advice on thinner for GW paints)
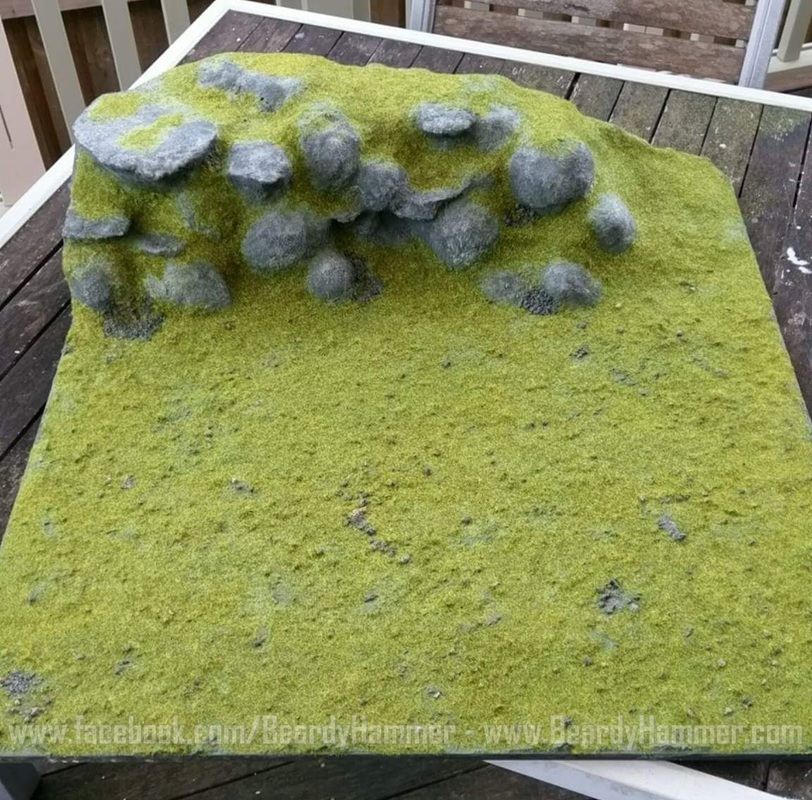
Day 5 and 6 - so without starting a Cheech and Chong joke, today was all about the grass!
In the earlier shot you would have seen that I had vaguely planned where the grass would go by airbrushing green on the hills and also all over the base. I then painstakingly went and picked out all the rocks individually and painted, washed and highlighted those.
Once that was dry, then it was time to apply the premium green!
Having never used this grass before,m it was a bit of a challenge, but thankfully some instructional videos by train enthusiasts helped out.
Watered down PVA was applied to the area on the hills first, then a mix of 80% Noch Scatter Grass Meadow (08152) and 20% some lighter shade of Noch grass was sifted over the glued areas. I bought the sifter or strainer from a local cheap shop, but worked a treat!
The ground was harder to do as I applied the glue around the painted rocks and then used the same mix of Noch Grass. The process took a long time as I painted horizontal sections of the board with the glue carefully avoiding the rocks where I could.
Once this was dry (over night) I shook all the loose grass off onto paper and poured it back into the container. As it was I had about 90% of it left!
When that was done, I carefully went and brushed the grass off the rocks on the ground and in the hills, then I used a spray bottle to apply a very watered down PVA and water mix all over the display. It looks a bit white when it went on, but dried perfectly clear and matte.
I may add some details to the field once the minis are placed, but will see how crowded it is...
Looks pretty effective and hopefully will contrast with the Tau's brown and black armour.
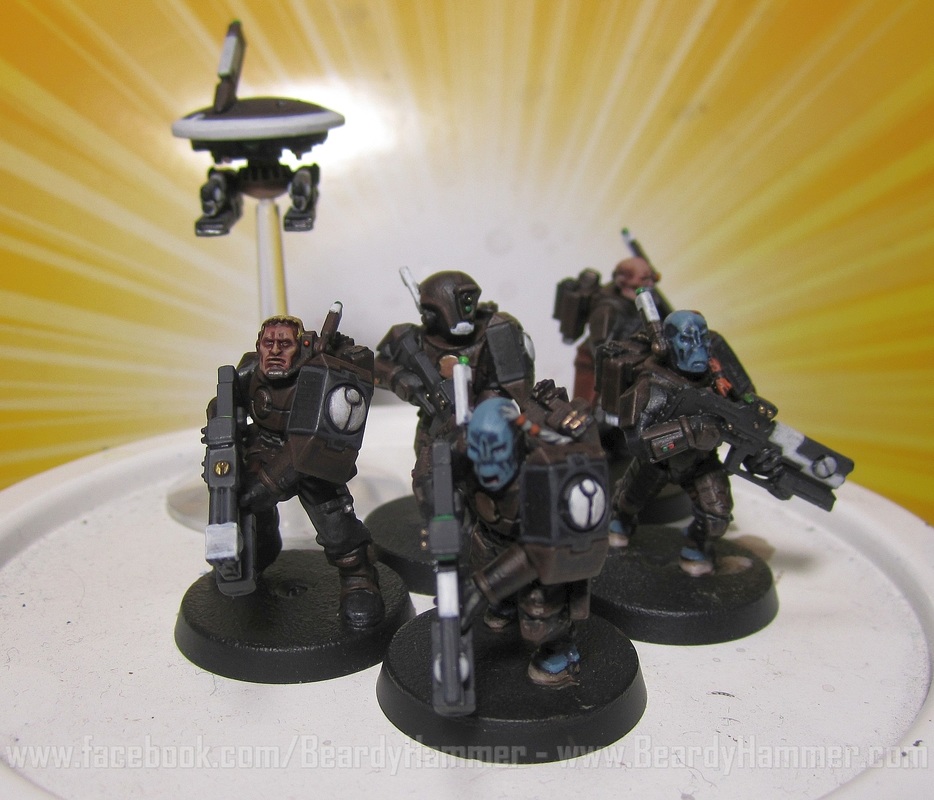
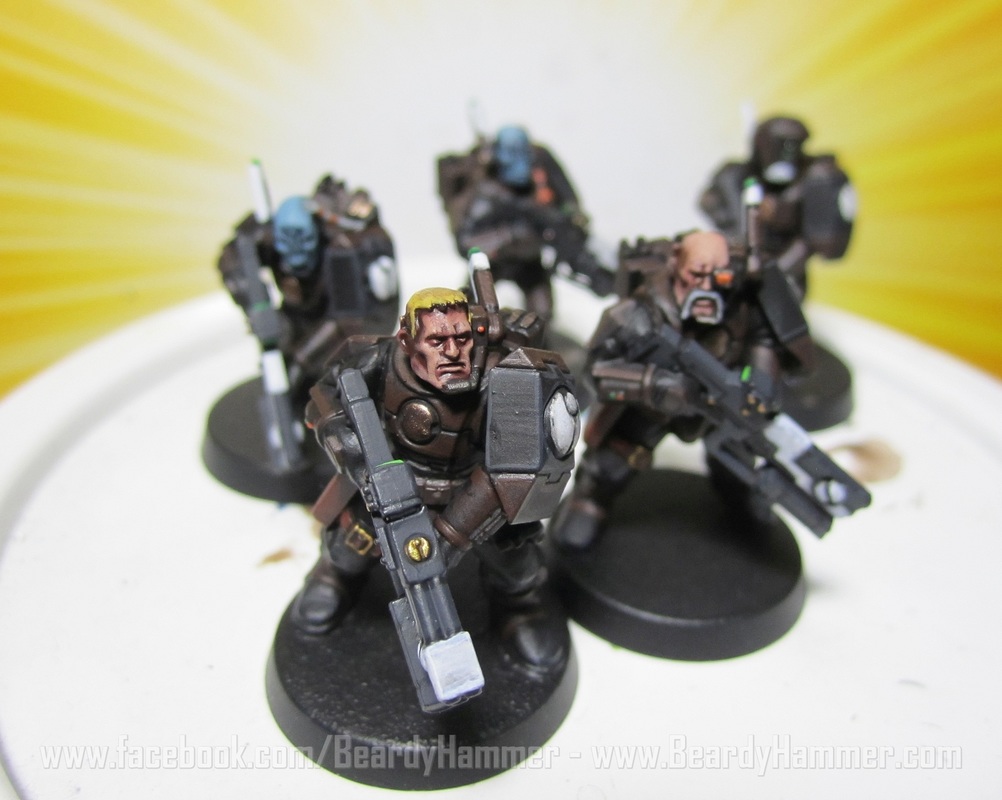
Tau Empire Infantry... with a twist!
|
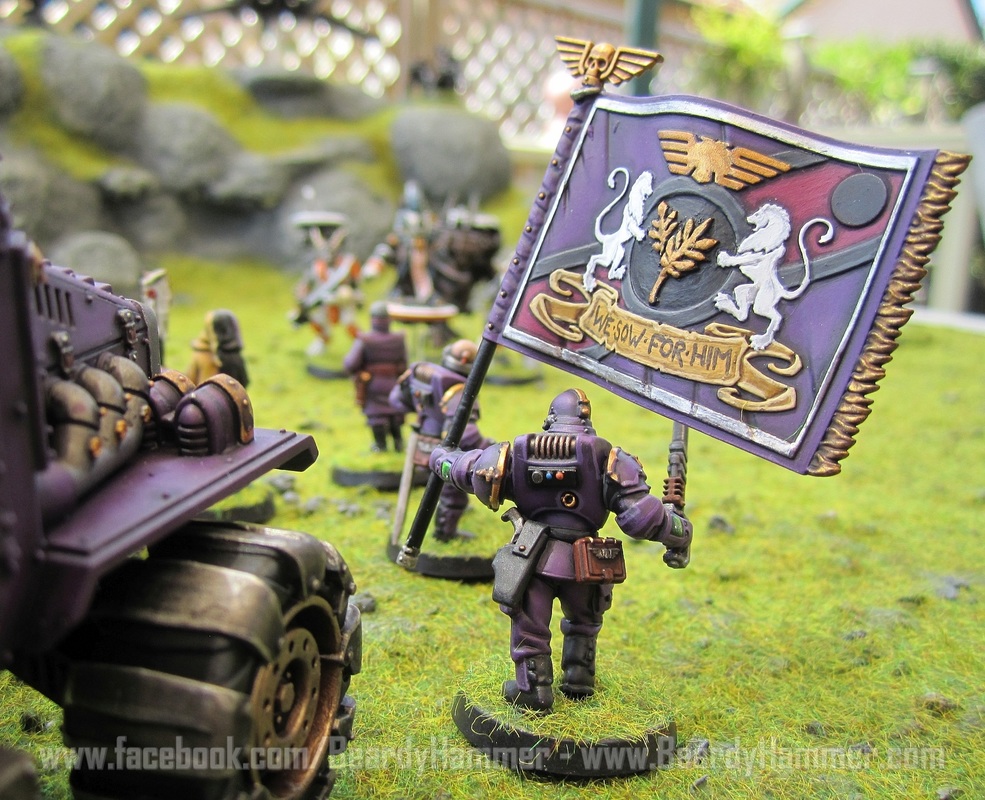
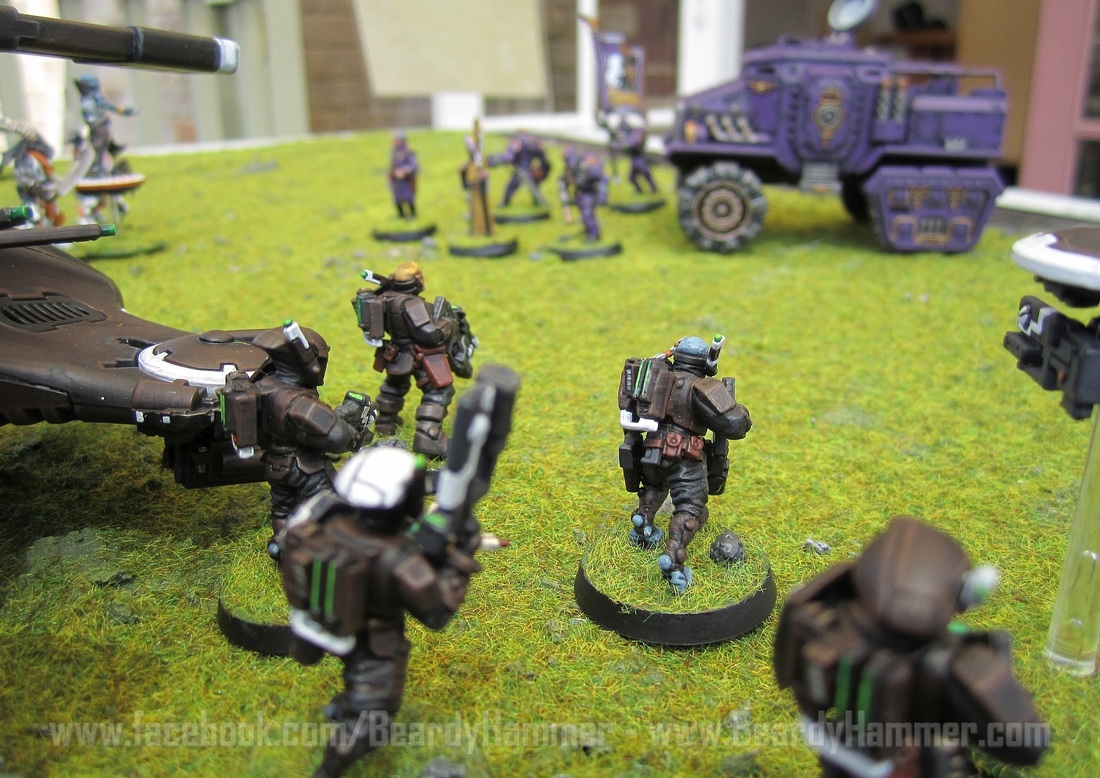
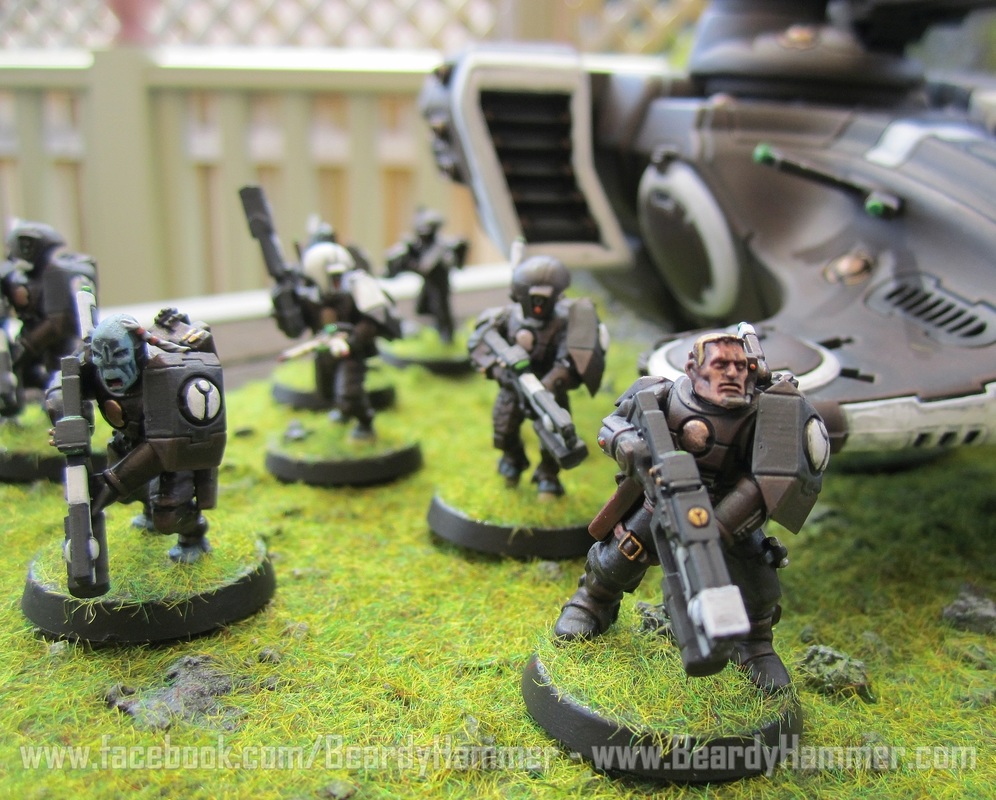
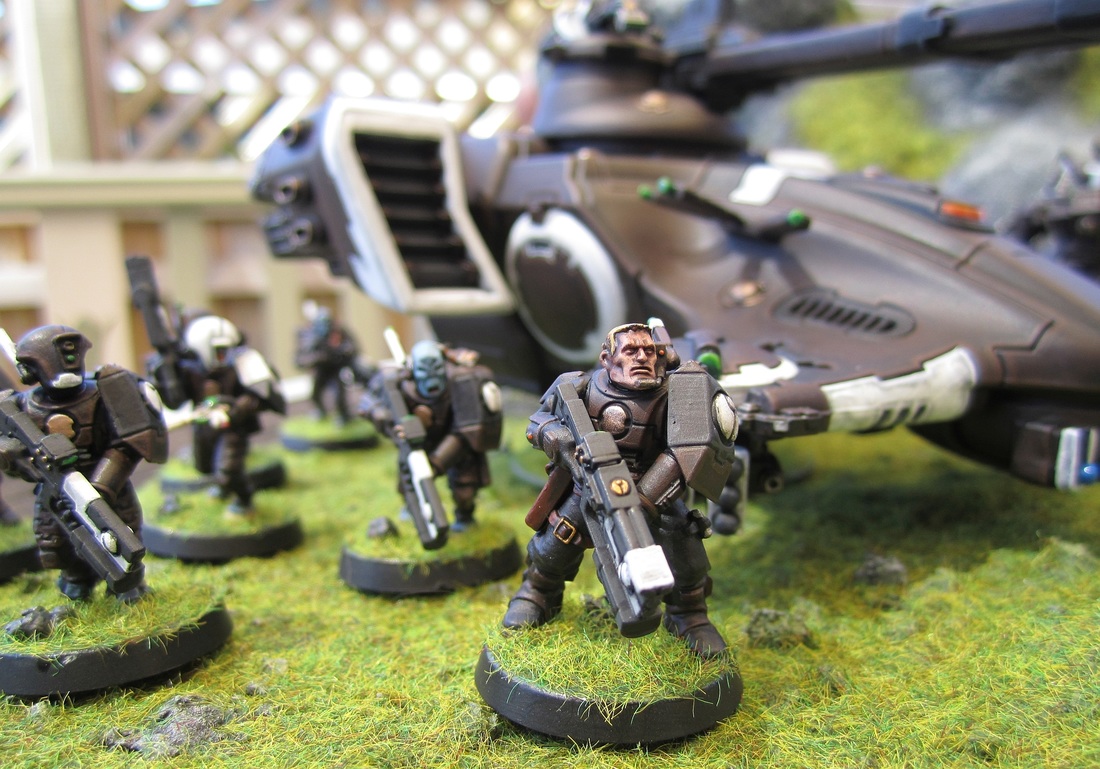
The Tau Empire is the most inclusive in the known Universe.
When they conquer a world, it is more like absorbing it and the people on it into the Tau as a whole. This is something I wanted to reflect in the forces of the Tau. I didn't just want it to be fishy blue guys or a whole lot of helmeted warriors - I wanted it to look like a coalition all fighting for The Greater Good! In general humans are absorbed into the Tau fighting forces as they are already fielded - as Imperial Guard or as Planetary Defence Forces, but when an individual or even a unit show their dedication to the Empire that goes above and beyond, then they can join Fire Warrior squads - the epitome of the Tau fighting machine - as equals. Because this unit would only have a few members with helmets on, it gave the opportunity to really show the diversity amongst the ranks and it was a pretty simple but effective conversion - Tau torso and arms, Space Marine Scout legs and generally the head was from that kit too. I had tried Imperial Guard legs but they just didn't suit.. These guys mix very nicely with the Tau units, and add that all-important bit of fluff that can bring a unit to life. This unit only has one more human, so a third of the squad in total. |


Battlesuits, Piranhas and... well... Battlesuits
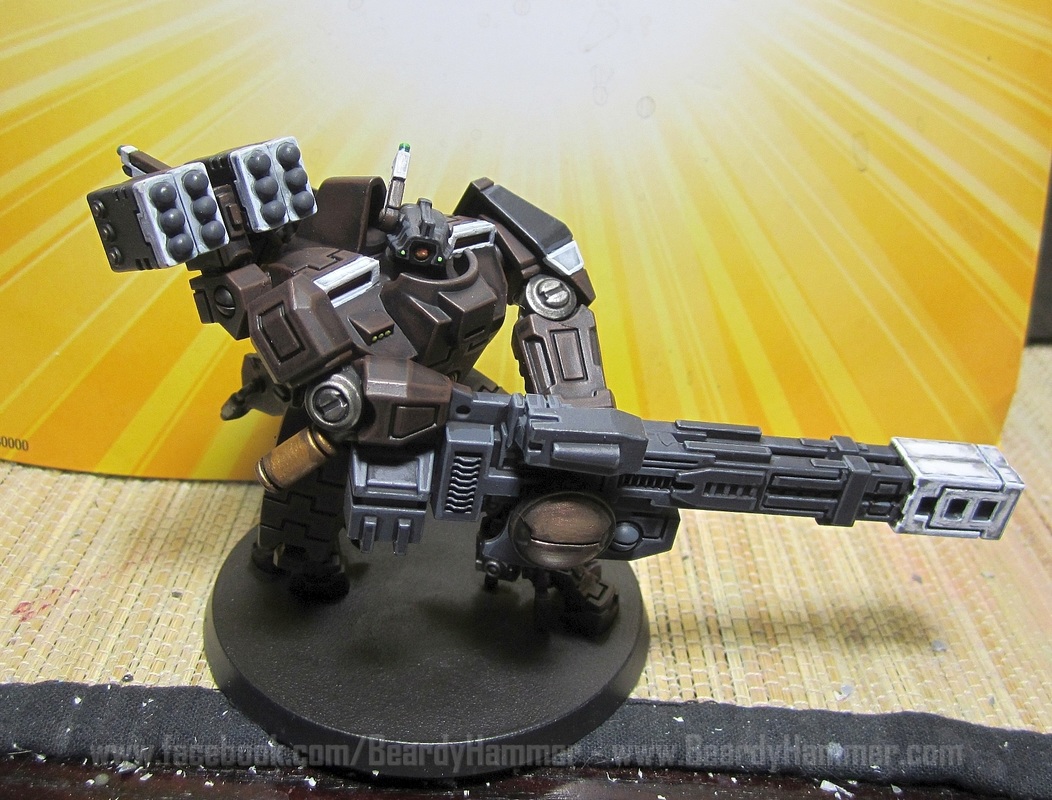
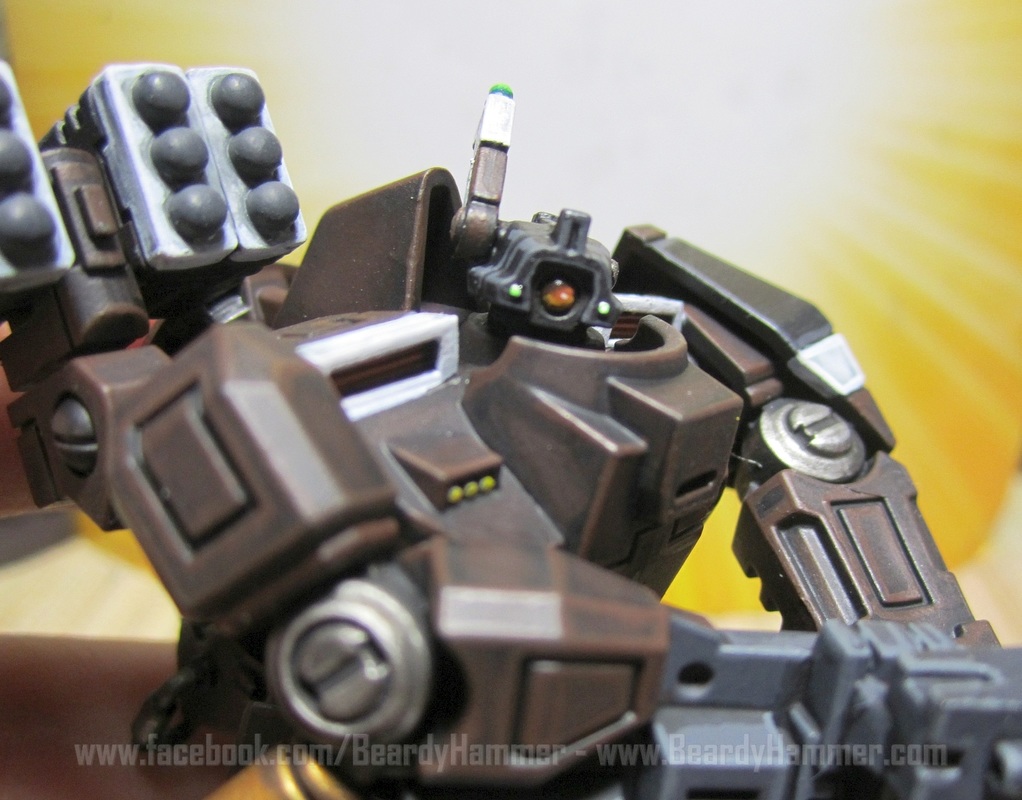
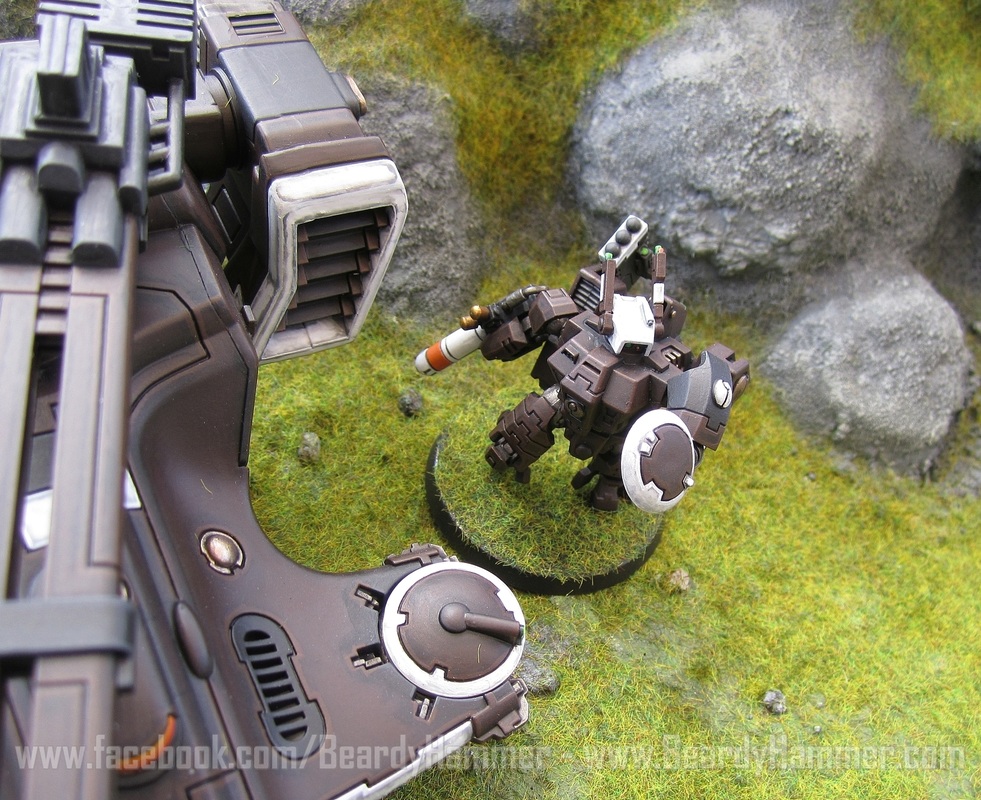
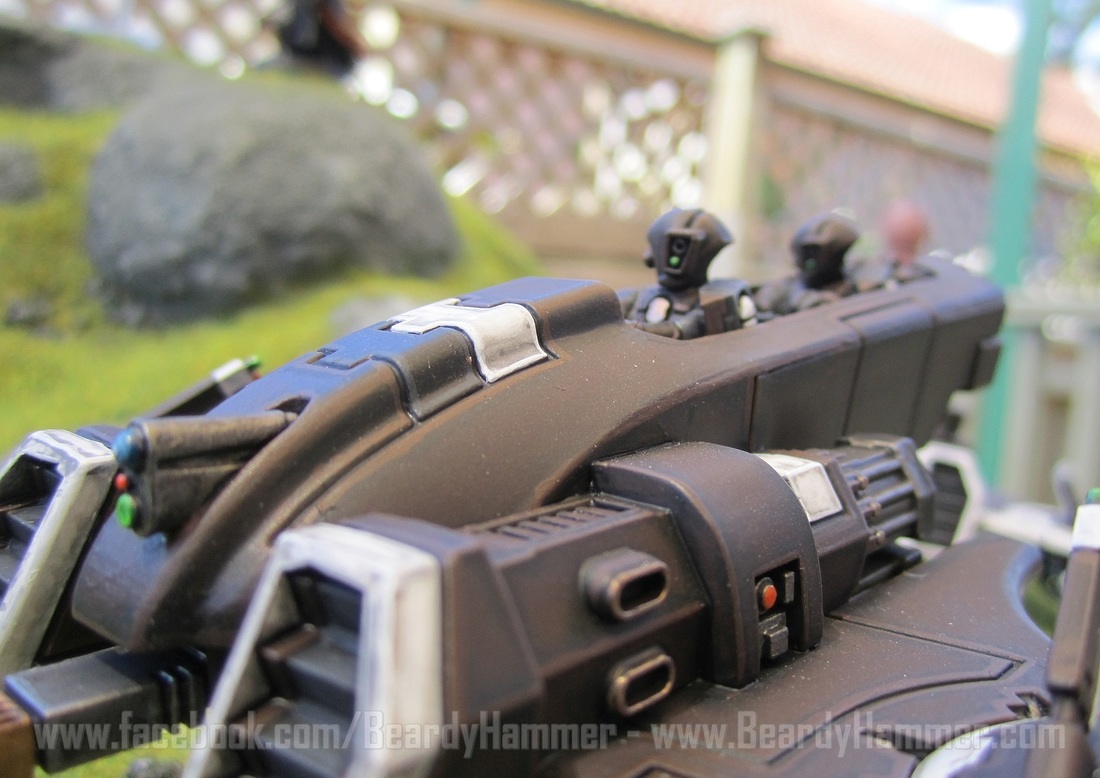
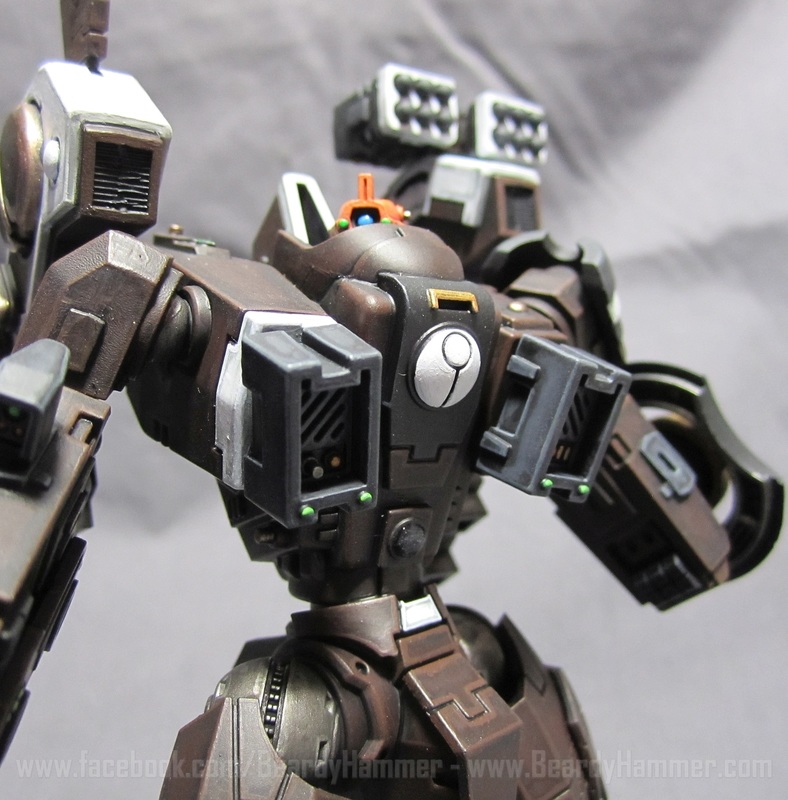
This big brawny guy is my Broadside, and I think he came up pretty well. I did learn the lesson that next time to do sub-assemblies because otherwise he's a bitch to get your brush around. I
'm particularly pleased with the eye. Bit hard to see the orange in the shoulder vents, but they're there!
'm particularly pleased with the eye. Bit hard to see the orange in the shoulder vents, but they're there!
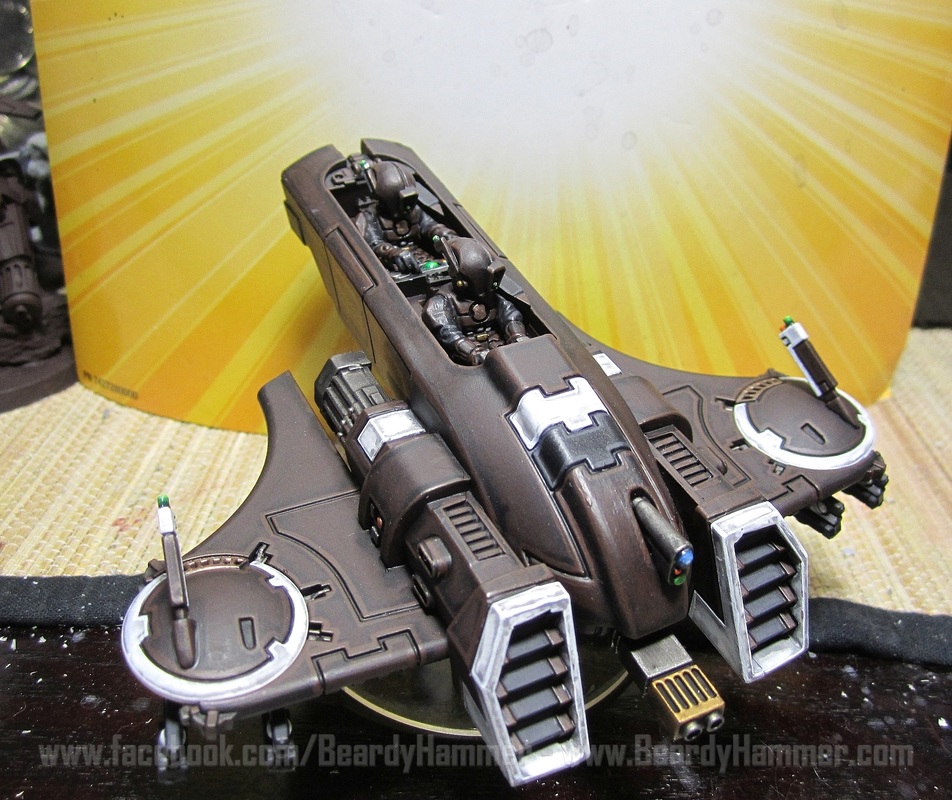
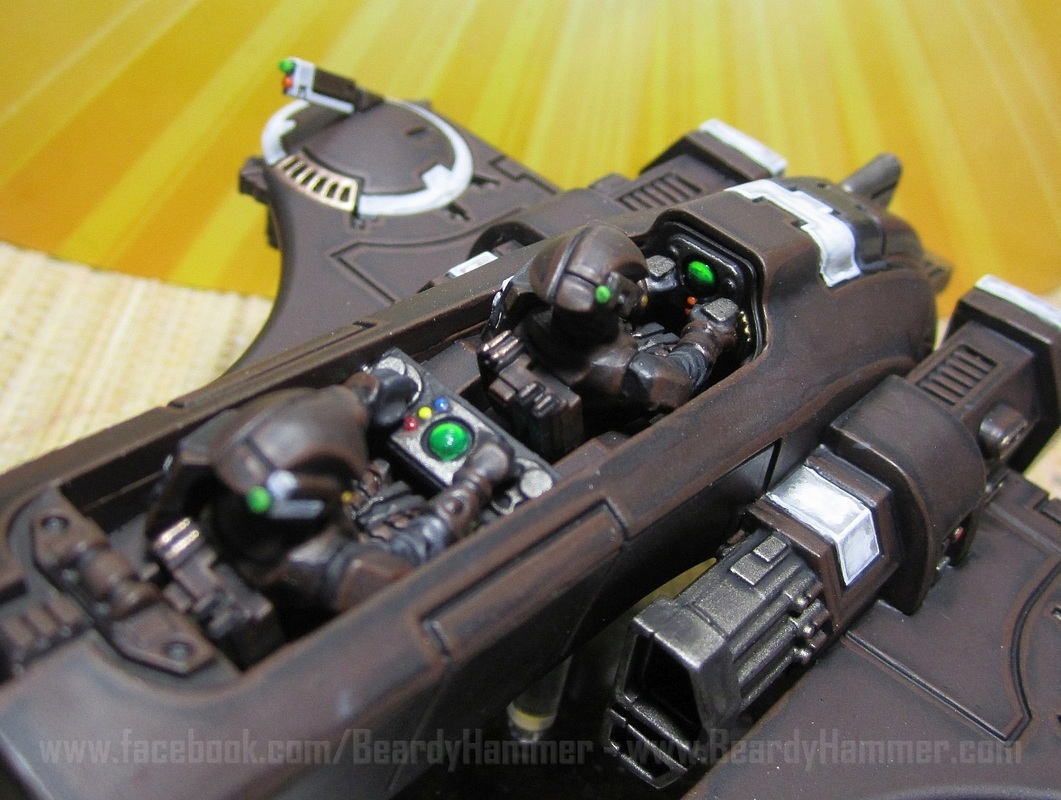
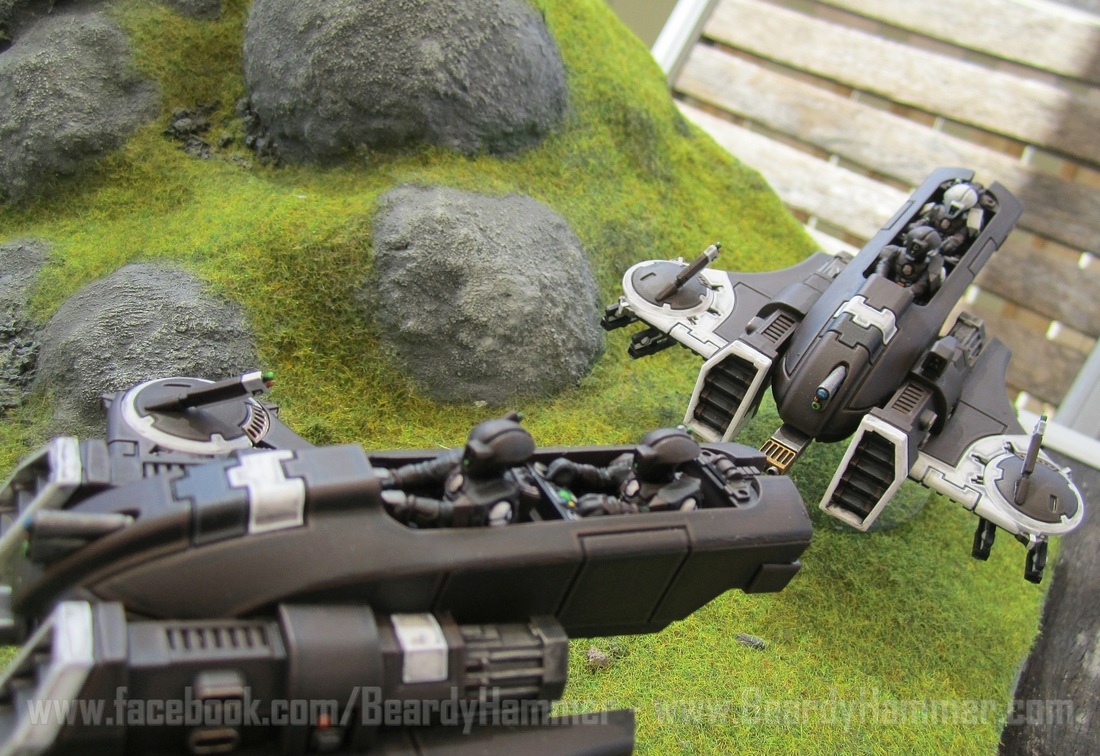
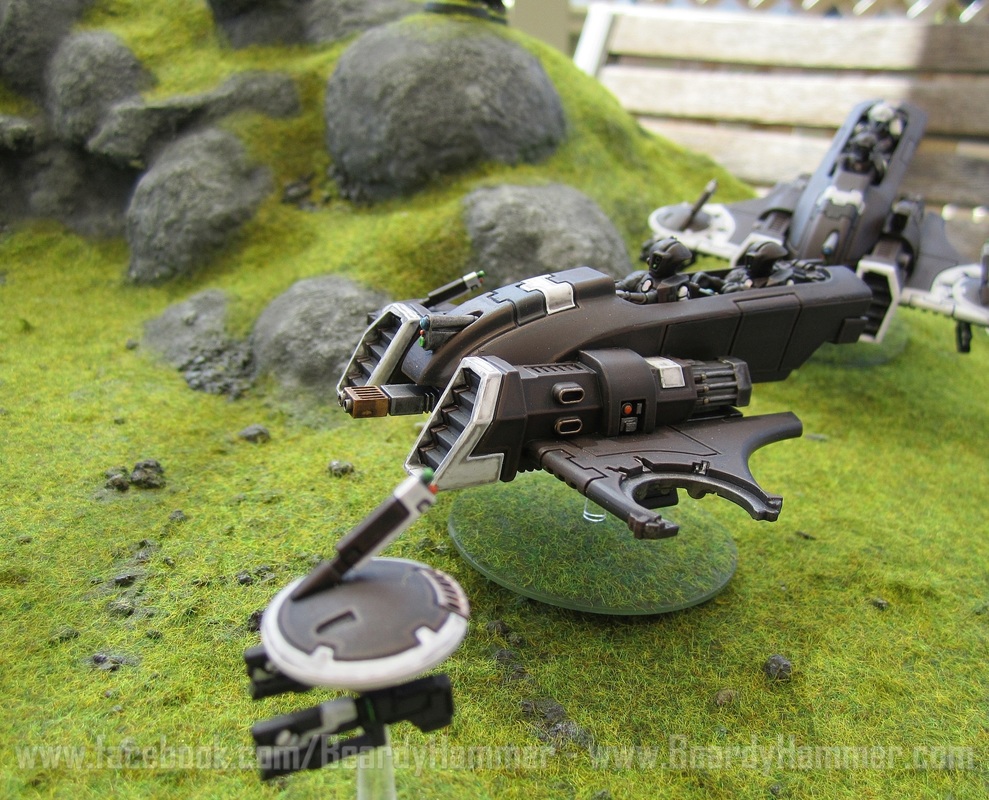
The Piranha was great to paint. I really fell in love with this vehicle, especially when I read the rules for large squadrons - 3 or 4 vehicles per unit. These are optimized for anti-armour and anti-Space Marine. Not entirely sure about the scheme, but sweet little vehicle.
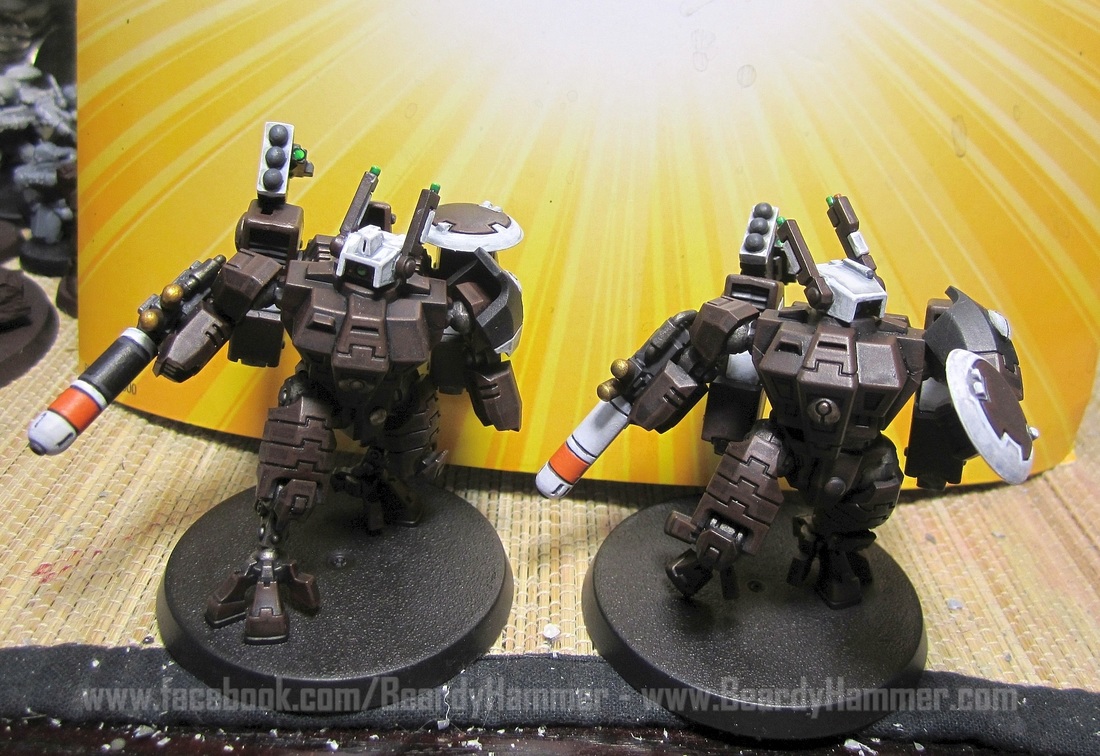
These two went together really well and are the newer versions which have more hip and leg articulation.
At present they are missing the markings, but as soon as the Codex arrives they will get added to all the miniatures..
They paint up pretty quickly too and look pretty striking. Be curious how these will look among the infantry - speaking of which...
At present they are missing the markings, but as soon as the Codex arrives they will get added to all the miniatures..
They paint up pretty quickly too and look pretty striking. Be curious how these will look among the infantry - speaking of which...
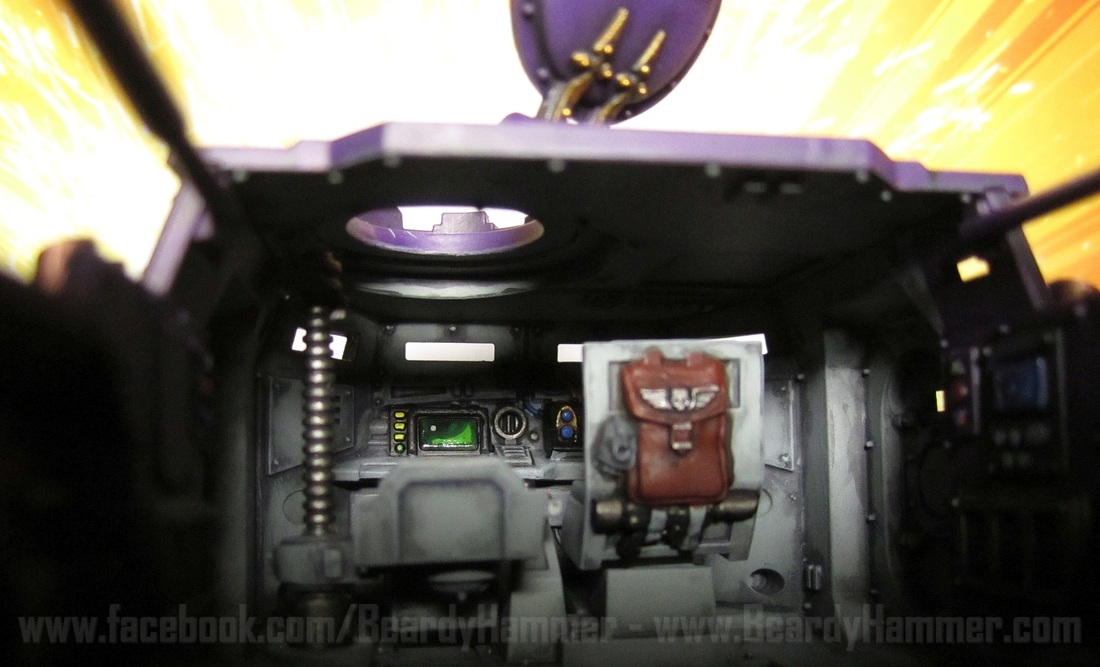
Hammerhead Is Complete!
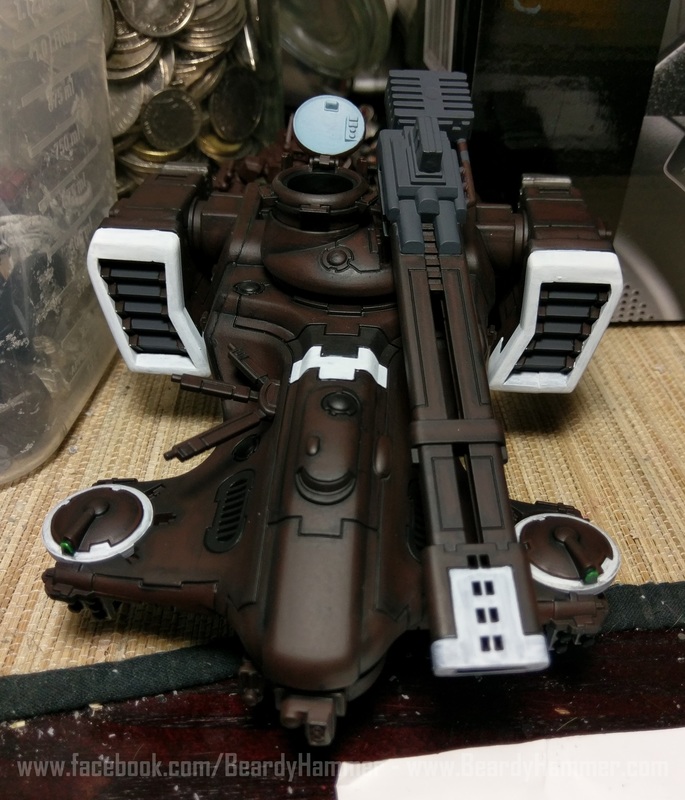
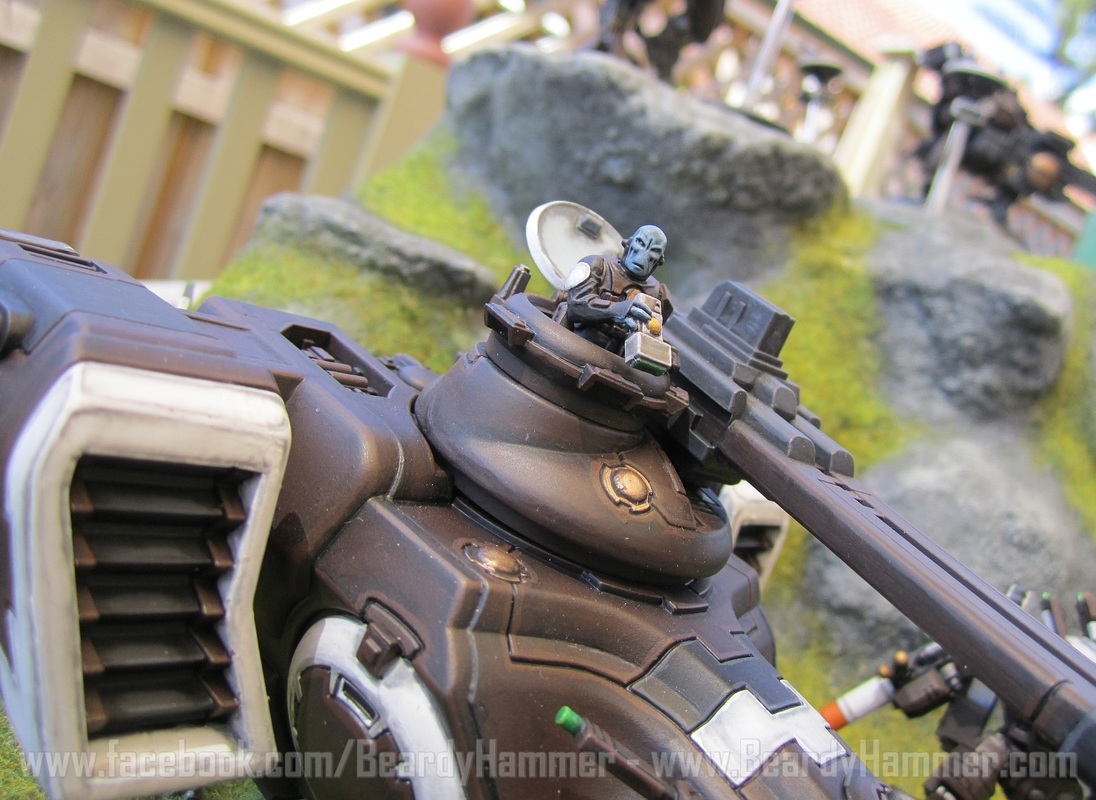
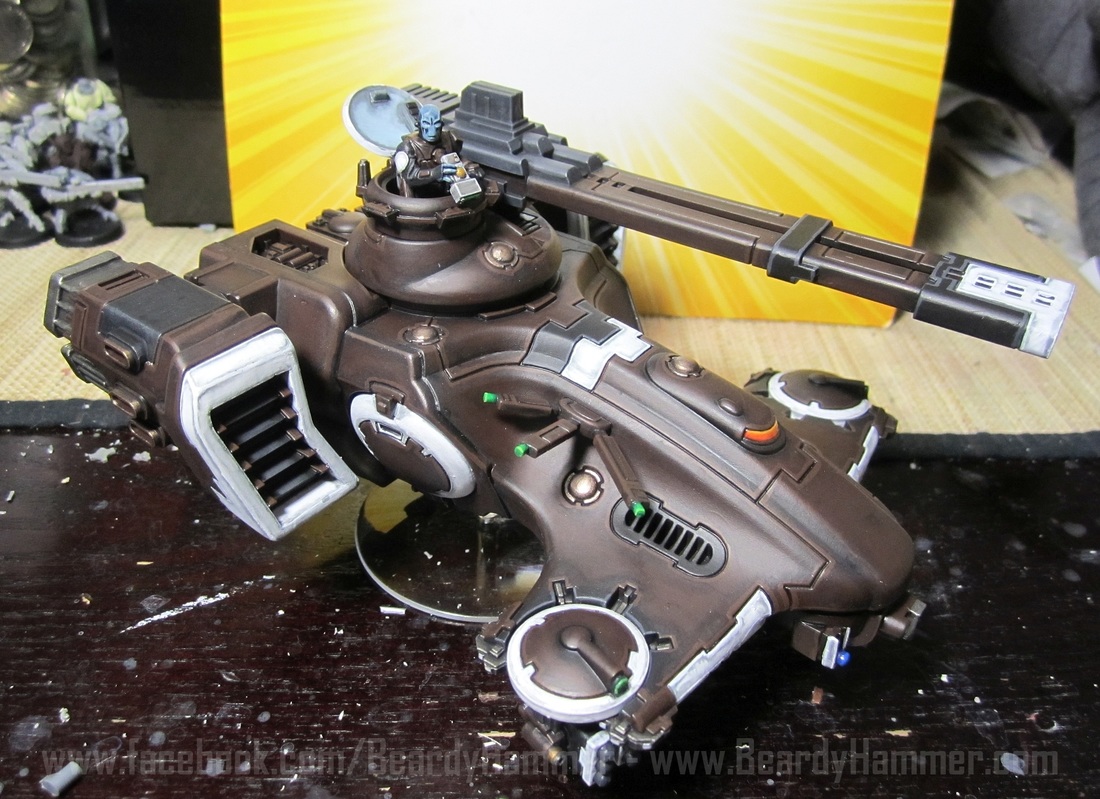
A week in the Tau Hammerhead is done!
The Hammerhead is a bit of a clunky kit, but it really does paint up nicely. If you wanted to be fiddly there are some places that could do with some filler and a sand, but for a start this will do nicely!
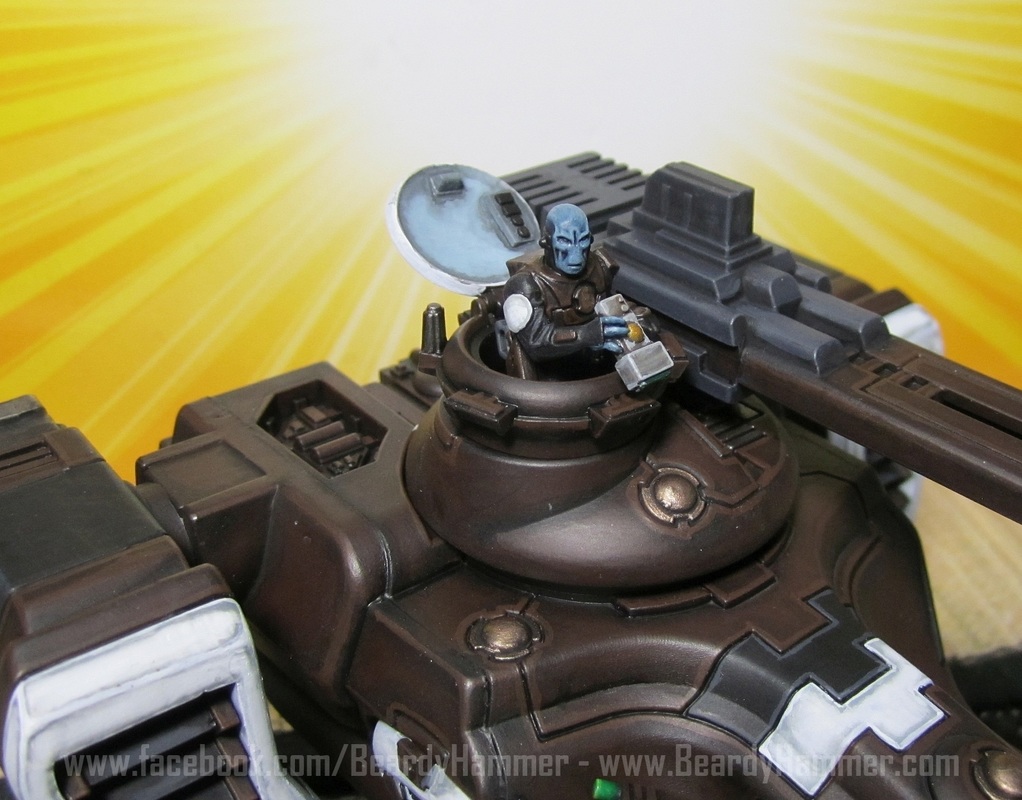
It's a bit hard to see the shading and highlighting in the first shot, but hopefully you can see it in the second where you can see the Tau tank ace looking for his next target.
The Hammerhead is a bit of a clunky kit, but it really does paint up nicely. If you wanted to be fiddly there are some places that could do with some filler and a sand, but for a start this will do nicely!
It's a bit hard to see the shading and highlighting in the first shot, but hopefully you can see it in the second where you can see the Tau tank ace looking for his next target.
... So Where To From Here?
A little while back I did a test colour scheme on this Crisis Suit - maybe it's time for him to have a companion...