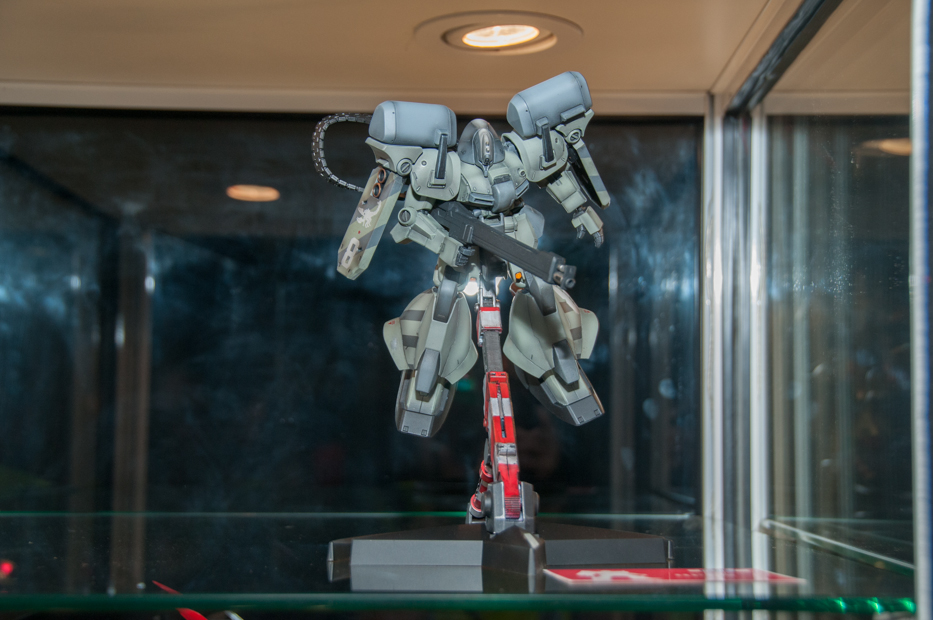
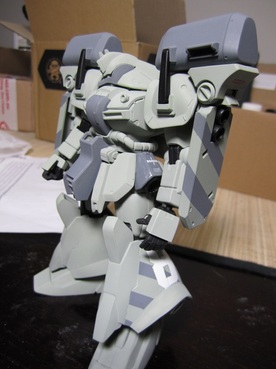
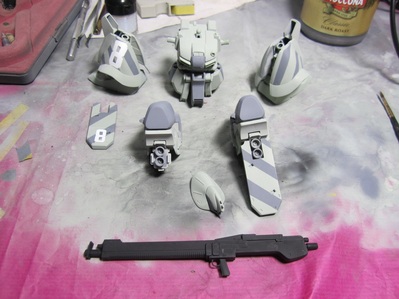
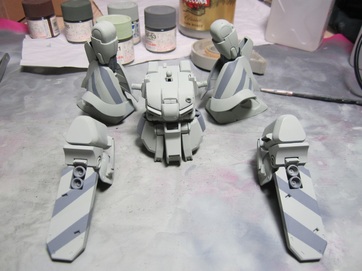
Gunpla - we won... kind of...
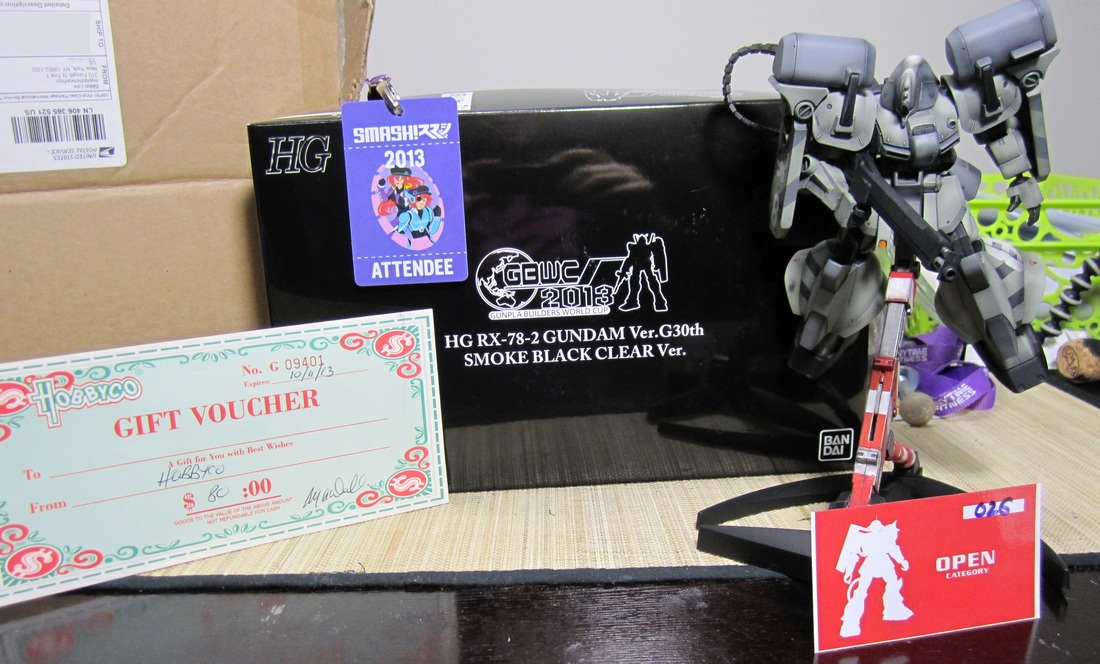
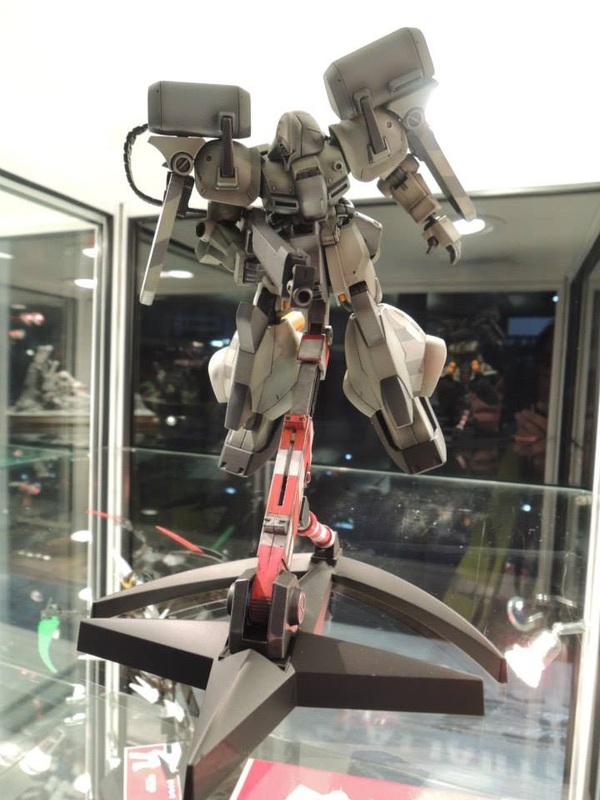
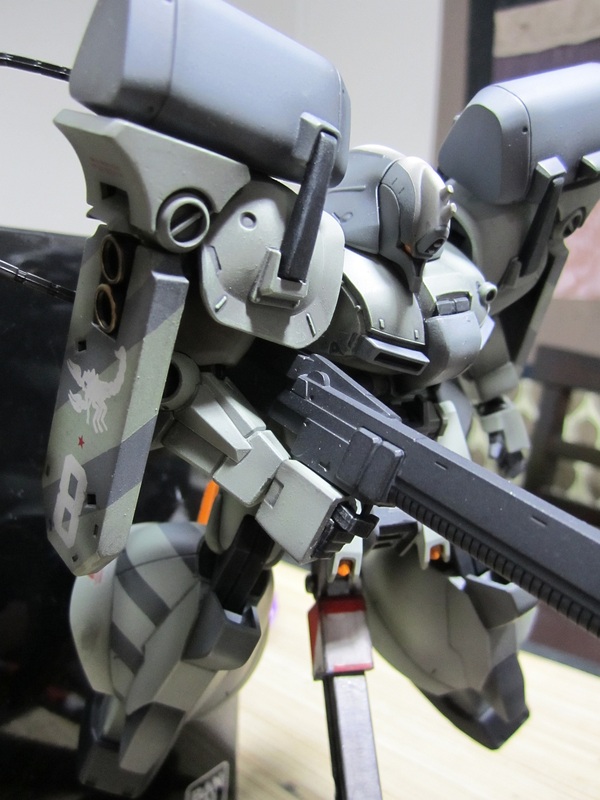
Ok - it's equal eighth, but it's my first entry and I only had 9 days to do it, so not too shabby.
And look, I got an exclusive Gundam Builder World Championship kit... cool!
Geek-factor = high!!
And look, I got an exclusive Gundam Builder World Championship kit... cool!
Geek-factor = high!!
Official display images below courtesy of Gundam-Forum.com.au and Gundam Guy
10th August 2013
Day Nine - all Done!
8th August 2013
Day Eight
|
So it's been a bit of a disaster to be honest - Day Seven was all about fixing!
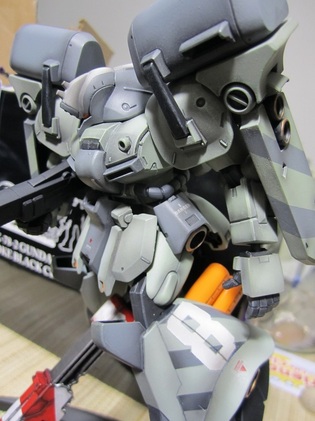
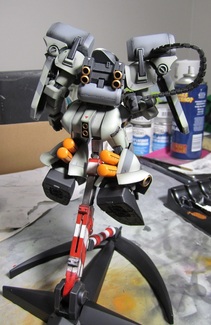
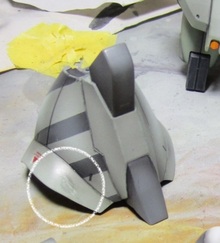
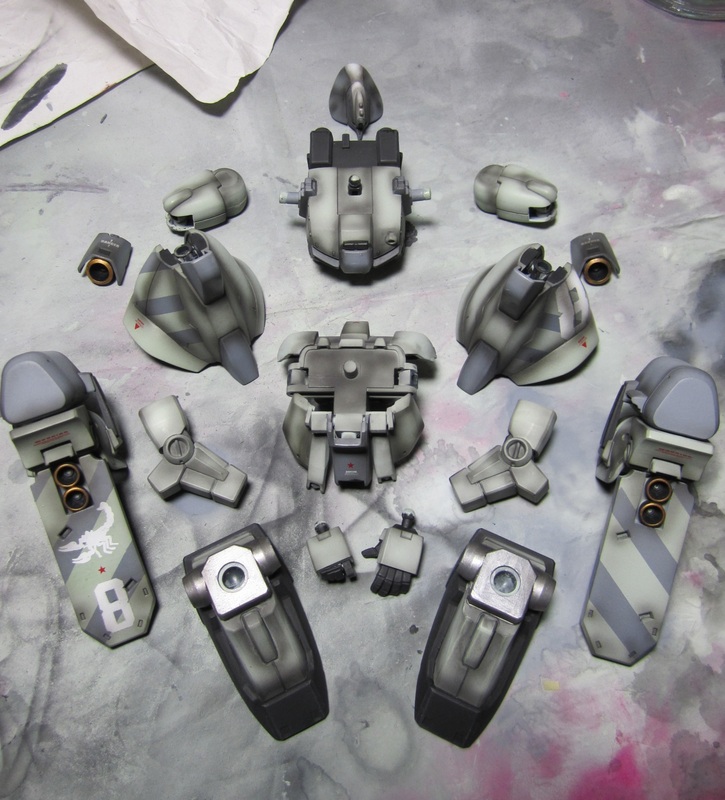
I stuffed the weathering on the legs and upper arms, the Dullcote blew the shading out of the crevasses and time is running out! The heavy weathering was part inexperience and part crappy airbrush. I will be buying a new airbrush after this! I couldn't get fine lines no matter how thin the mixture was, so I went about redoing both legs entirely. What a job! Lots of masking and fiddling, but in the end, I'm 90% happy as opposed to before where I was only 40% happy. Today I also applied the orange highlights. You might not have seen this colour coming, but here it is, in all it's glossy glory!! I've started adding orange lights around the place too to unite the colour choice. The head has worked out nicely and the new shading on the lower legs is still thick, but lighter and cleaner. I also used Tamiya Matte White spray, over the white "8". Interestingly it stripped the Citadel Colour White almost completely after it bubbled it horribly. Not a a fan of their Matte White spray I have to say. It's thin and covers weirdly. Now as I said, even the fix ups have had issues - and to the right is one of them. A splurg from the airbrush then badly touched up by me. It's a real pain actually, but it might be too hard to fix now - meteorite damage?? I know, the realm of the hopeless and lost!! Should be ok I hope...
This was the last full day of painting and it's still not done. "I have a bad feeling about this..." |
7th August 2013
Day Six - fixing day Five
You guessed it - I rushed the Dullcote, so I had to go back and pick out some of the shading - the Dullcote blew it out!
It's ok, it gave me the chance to make it a bit more precise anyway... I'm being positive here!
It's ok, it gave me the chance to make it a bit more precise anyway... I'm being positive here!
|
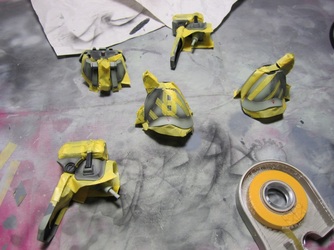
So to start off the fix-job on the wethering, it's time to re-mask and respray!
It took over an hour to re-mask the areas - which was basically go over the whole effected areas. First I masked off the surrounding areas to avoid splash, then the grey bits. Mostly the grey is ok though, so once it was done - time to mask off the "8". I'm not going to lie - this was a pain in the arse, but once it was finished my melancholy mood lifted and it was on with a clean fresh coat of Tamiya JN Grey. It looks so clean too! Kind of makes me wish I'd never weathered it, but that's the path, so following it through to the end now. Hoping to get this done in time, but I have tomorrow night, the whole of Wednesday and Thursday night... here's hoping it's enough time! |
5th August 2013
Day Five
|
Today was the final full day I would have to work on this, so I had to get as much done as possible; final touches, then weathering - 8 hours of uninterrupted Gundam action.
Before I go on I'm not entirely happy with the airburshing, but I'll get to that. Picking out the thrusters with Citadel's Shining Gold (now deleted), neatening up areas missed and (like Jeff in Voltron) "formed the head"! And by that I mean I repainted it entirely! I used the Tamiya Neutral Grey all over from yesterday, then masked a white live down the centre. This would unify the white sections and make the head stand out. Then it was onto the airbrushing. It was painful and messy and it's not what I had hoped - but weathering with an airbrush is always a bit dicey, well for me anyway. I found dropping the air pressure and tightening the nozzle really helped, but by then I had some very dark panel lines. It's ok - I can fix it to an extent with dry brushing and some detailing. Still not ideal and the crispness of yesterday is back to being messy. It's ok - I was going for weathered, maybe not this weathered though! |
4th August 2013
Day Four - Part 2
|
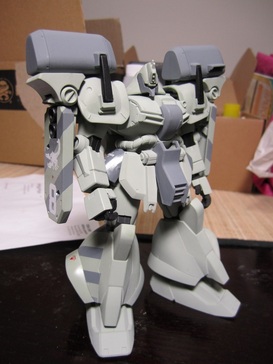
Alrighty - here we are, post-HobbyCo visit, some detailing and a new approach to the scheme and a flat camera battery!
Right, so as I was saying this morning, the scheme was just too stark (not Tony Stark BTW) and plain. The Tamiya JN Grey was way too dominant and the Tamiya Neutral Grey just looked too bitsy. It's not the way a military mech would look! I picked out the tops and bottoms of the flares on the shin armour, used the excellent Tamiya Flat Black on the soles of the feet and more of the Tamiya Neutral Grey around the top. This made the model darker and more imposing. I also began the rather thankless task of painting black inside all the armour plates and under the skirts. In the end, this isn't the way the actual machine would look, but it makes the armour stand out and the construction pieces Bandai use to hold it all together disappear. It's boring to do, but it has to be done. I also decided the head needed to be darker. Ideally there will be white details on it to reflect the white on the legs and arms, but not sure how and when to do this as yet. It may be the last thing done. Tomorrow, final decals and detailing the torso. |
The colour difference from the past pictures is because the picture above was taken with my phone camera due to a flat battery in the usual camera
3rd August 2013
Day Four
|
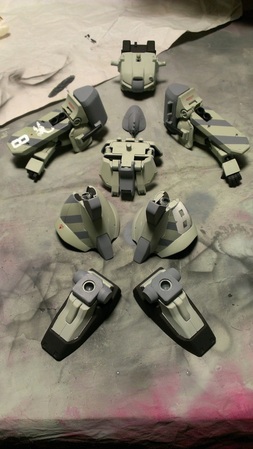
It's 1am (so it's just barely Day Four) but here is the dry fit.
I found the matte paint comes off very easily, so this will be the only dry fit until I weather and Testors Dullcote it. As you can see, the colours are a bit stark - not exactly dynamic unfortunately. There obviously needs to be more grey without it looking like a rock, so where to put it? That is the big question! One of the big problems is the head - it's just boring! Do I go fully grey? Do I apply colour? We will see... |
3rd August 2013
Day Three
Ok, so notes to self:
1) WAIT FOR THE GLOSS TO DRY BEFORE APPLYING DULLCOTE - it will crinkle or peel!!
2) WAIT FOR THE DECAL FIXANT TO DRY BEFORE APPLYING THE DULLCOTE - it will crinkle!
3) WHEN USING GLOSS, GLOSS THE WHOLE PIECE - or the surface will be uneven when the Dullcote is applied!
4) So basically, don't rush everything!!
Not a great way to learn these things - hope I haven't stuffed it too much...
Some bits might need to be done from scratch, better that than half-arsed.
Apart from that, picked out details today and applied the somewhat dodgy decals.
Tomorrow, a trip to Hobbyco and some supplies including the excellent Tamiya Masking Tape and more Testors Dullcote
2nd August 2013
Day Two
|
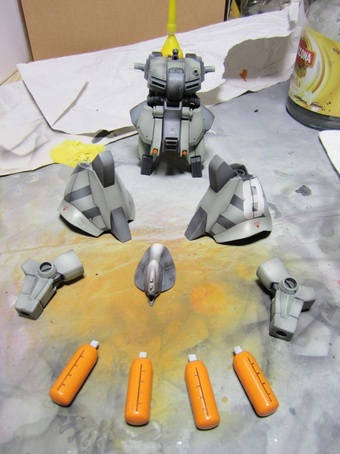
Day Two, and time to get less green/grey and more grey/ grey!
Using Tamiya Neutral Grey I picked out the pieces of armour that needed to stand out a bit more. I did several thin layers with a brush on the groin and cockpit cover, with varying results. The ammo tanks on top of the shoulders needed a lot of masking, and even then there was some sneaky over-spray. The big change are the numbers I stencilled then airbrushed onto the left leg and the right hangy-downy-armour-bit. This was a bit of a pain! I printed the numbers off the internet, then cut them out, then traced them onto the leg, then masking and spraying very lightly with Citadel Skull White spray - it's very flat which is what I wanted! The masking unfortunately pulled up the edges of the lettering, which was pretty disappointing, but by the time I do the weathering, that might look quite good. The rush continues! |
1st August 2013
Day One
|
Alrighty, so you read the Gunpla article below (now if you didn't, why not? Give it a read!) which has been on my mind for a while.
I had hoped to prepare better, but with 10 days to go, I decided it was time to start. Not having time to really hunt around for a kit, I knew I had an old 1/144 Xekueins HG from Bandai partly made - no paint, just messy glue. I finally found it in the cupboard, so it was time to invent a colour scheme (blue seemed so boring!) and try and get it done by Thursday 8th August. Good luck, son So the recipe: - 1 x Bandai HG 1/144 Xekueins - 1 x Tamiya JN Grey - 1 x Tamiya Neutral Grey Tamiya airbrush thinners and a crappy old Testors airbrush |
30th July 2013
